
“Life is all about balance.”
-Unknown
With all of the roles we fill, life can feel like one giant balancing act.
Balance. That’s a word that I have a really hard time with. I am an extreme person. I’m either all in or not at all. As I designed this flamingo appliqué, I realized that while balance is an essential part of life, it is something that I have to work at constantly!
Why is balance so essential?
Balance is essential so we don’t all go certifiably insane! (which I feel like I’m constantly on the brink of…) I am a mission-minded person. This mindset causes me to steamroll through a project and take down everyone and everything in my path. I’ll have a project that I’m trying to accomplish for my blog or my next business venture, and pretty soon, the dishes are piled high and the laundry even higher. Focusing on balance brings me back into the big picture and causes me to see my surroundings instead of having tunnel vision. It is possible to be productive at my business while still keeping a tidy home and feeding everyone…with balance!
How do I incorporate balance into my routine?
I have found the best way to incorporate balance in my daily life is to make up a schedule and then STICK. TO. THE. PLAN! The very moment I deter from the schedule, the rest of the day gets swallowed up in whatever mission I am focused on for the moment. I have even been known to set a timer (thanks, Alexa) to remind me when to stop crocheting and go fold a load of laundry. When I have a set time each day to accomplish certain tasks, it’s amazing how much gets done in a day rather than coming to the end of a day feeling overworked with not much to show for my efforts.
What does balance have to do with anything?
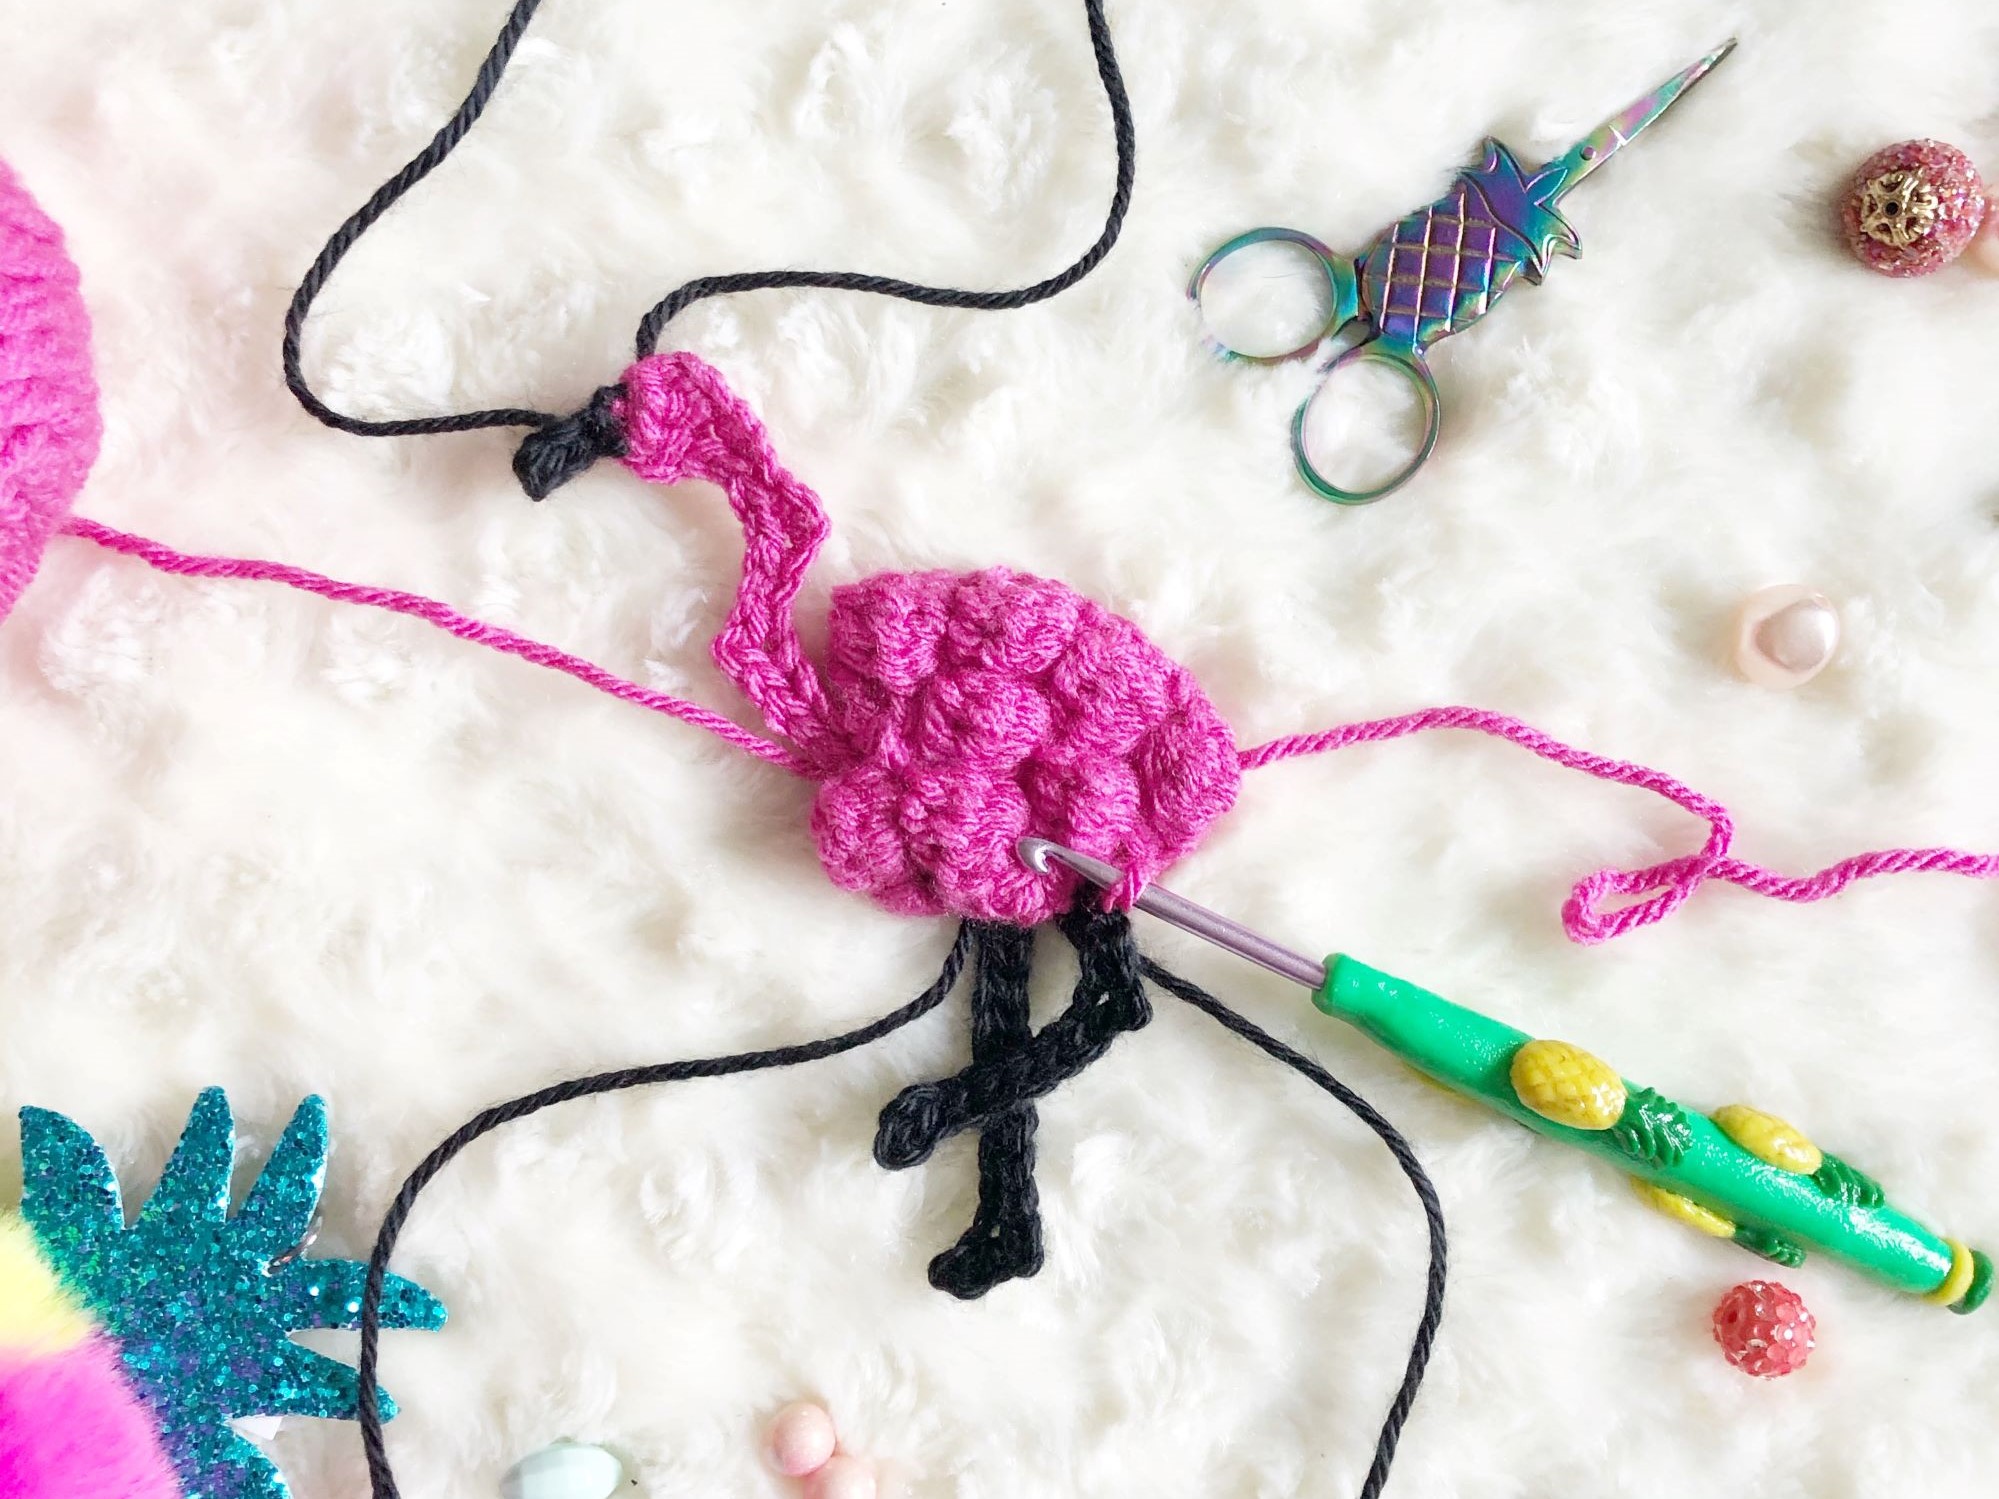
As I was designing this Bobble Heart Flamingo Appliqué, I thought a lot about balance. Those flamingos stand around all day balanced on one foot, and it felt like a really great topic to introduce this new project with! This appliqué is one of my ALL TIME FAVES! I just love how his little legs dangle off the edge of the cozy. The bobble stitches just make him look super squishy, and the curves built into the neck give him so much character. I hope that while you make this, you’ll remember to keep your life balanced…
…and oh so FLAMAZING!


Skill Level – Advanced Beginner
Disclaimer: This post contains affiliate links to the products used in this project. If you make a purchase through any of these links, we will get a small commission at no additional cost to you.
Materials
- Worsted (4) weight yarn in two colors (pink and black pictured)
- US 7/4.50mm crochet hook
- Tapestry needle
- Scissors Click this link for the pineapple scissors you see in my pictures!
- Decorative buttons (optional) Buttons pictured are from Kathy’s Kozies and can be found for purchase on her website.
Abbreviations
- YO – Yarn over
- CH – Chain
- HDC – Half double crochet
- Bobble – Bobble stitch
- SC INC – Single crochet increase – work two SC in one stitch
- SC – Single crochet
- SL ST – Slip stitch
- SC DEC – Single crochet decrease – work two SC together
- SK – Skip
- FO – Finish off
Notes
- This flamingo appliqué is worked by beginning with the body. The body is worked from the narrow end to the wide end back and forth in rows. The neck, head, and legs are added as the SC border is worked around the perimeter of the body.
- Gauge is not essential to this project.
- The finished appliqué measures approximately 5” tall (from head to feet) x 4” wide (from beak to tail).
- Beginning CHs do not count as a stitch.
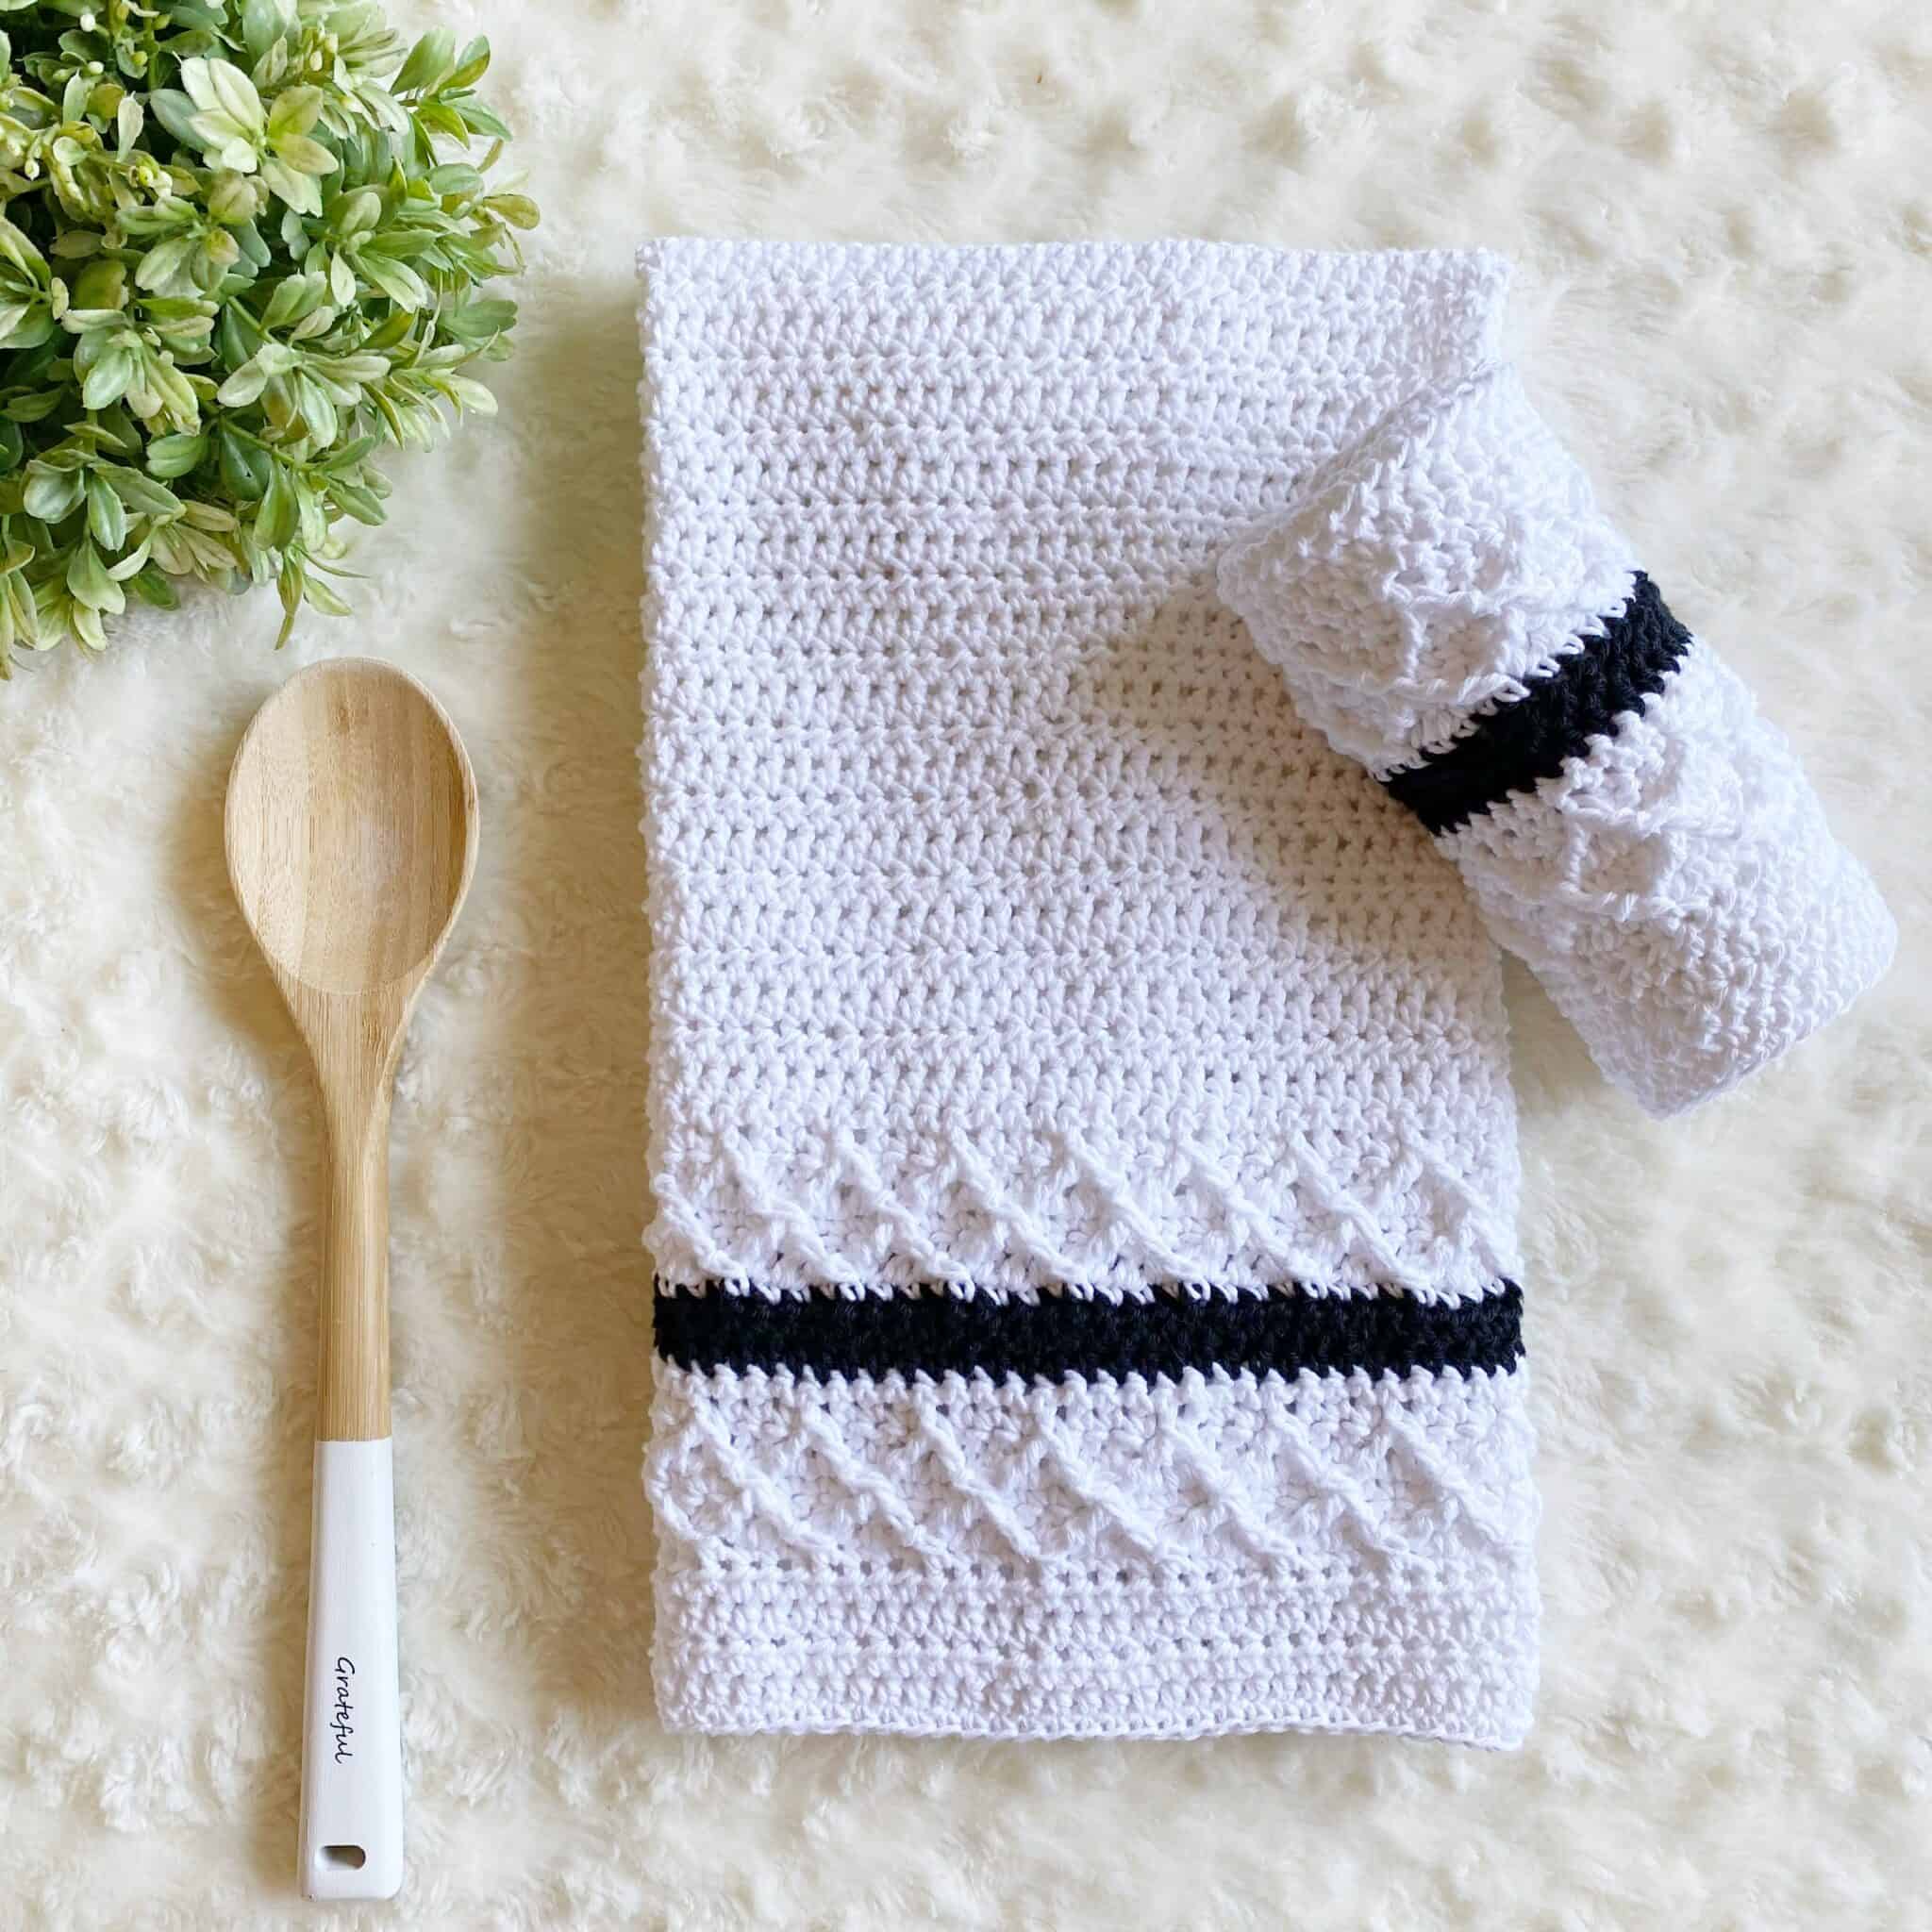
- This appliqué is a collaboration with The Everything Cozy by Kathy of Kathy’s Kozies! You can find the pattern for her cozy in her Etsy shop. Be sure to check her out on Instagram and give her a follow!
- Be sure to check out my other summer appliqués including The Pineapple Appliqué and The Palm Tree Appliqué.
- If you have any difficulty completing this project and would like support, please email me at theplushpineappleshop@gmail.com
Special Stitches
Bobble Stitch
- YO, insert hook into desired stitch and pull up a loop (3 loops on hook).
- *YO, pull through two loops (2 loops on hook).
- YO, insert hook back into the same stitch and pull up a loop (4 loops on hook).
- *YO, pull through two loops (3 loops on hook).
- YO, insert hook back into the same stitch and pull up a loop (5 loops on hook).
- *YO, pull through two loops (4 loops on hook).
- YO, insert hook back into the same stitch and pull up a loop (6 loops on hook).
- *YO, pull through two loops (5 loops on hook).
- YO, pull through all five loops.
Pattern
Body
Row 1: CH 4, HDC, Bobble, HDC. (3)

Row 2: CH 1, turn, SC INC, SC, SC INC. (5)

Row 3: CH 1, turn, [HDC, Bobble] 2x, HDC. (5)

Row 4: CH 1, turn, SC INC, SC 3, SC INC. (7)

Row 5: CH 1, turn, [HDC, Bobble] 3x, HDC. (7)

Row 6: CH 1, turn, SC in each stitch across. (7)

Row 7: CH 1, turn, HDC, Bobble, SL ST 3, Bobble, HDC. (7)

Row 8: CH 1, turn, SC 2, SL ST 3, SC 2. (7)

Border + Appendages
Left side + Neck + Head
Rotate piece so that the narrow end is on your right, and the top of the heart shape is on your left.

CH 1, SC 2, SL ST 2, CH 16
Head
HDC in 2nd & 3rd CH, CH 1, turn, SC DEC (pull through with black yarn).


Beak
CH 1, turn, SL ST, CH 4, SL ST in 3rd & 4th CH, SL ST to base stitch (pull through with pink yarn).

Neck
Working into the CH base (chin), SL ST 2, working into the CH (neck), SL ST 3, SK 2, SL ST 2, [SL ST, CH 1, SL ST] in next CH, SL ST 4, SL ST to base stitch.
SL ST, SC 2.

Underneath + Legs
SC 1, SL ST (pull through with black yarn).

First Leg
CH 12, SL ST in 2nd CH, [SL ST, CH 1, SL ST] in next CH, SL ST 9, SL ST to base stitch (pull through with pink yarn).

SC, SL ST (pull through with black yarn).
Second Leg
CH 13, SL ST in 2nd CH, SK 1, SL ST 6, [SL ST, CH 1, SL ST] in next CH, SL ST 3, SL ST to base stitch (pull through with pink yarn).

SC 2 to complete the underneath.
Right Side + Back
Tail
SL ST to bottom of 1st HDC (narrow end of body), CH 3, SL ST to 3rd CH, SL ST to base stitch.

Back
SC 7, Join to first SC with a SL ST.

Finishing
Cut yarn. FO. Weave in the black yarn tails.
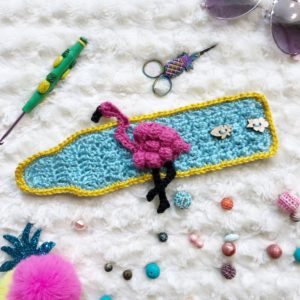
You can use your new appliqué to add some flamingo goodness to any of your makes! Here the appliqué is shown attached to Kathy’s Everything Cozy! You can find this pattern as well as matching buttons on her website!

Fold the cozy into thirds and position the flamingo in the center.

Stitch the body of the flamingo onto the cozy using the pink yarn tails. Be sure to only grab the top layer of stitches on the cozy to ensure that the stitches don’t show on the other side.

Be sure to position the neck with the curves in place and stitch it down until you reach the top edge of the cozy.

Weave in all tails and cut yarn.
This project was a collaboration with Kathy of Kathy’s Kozies and her Everything Cozy! It was designed to fit her Everything Cozy which you can find in her Etsy shop. You can also find these adorable laser-cut wooden hibiscus flower buttons on her website!

If you make this flamingo appliqué, please share it! I would love to see your work! You can tag me on Instagram and Facebook @theplushpineapple. Use the tag #theplushpineapple.
“Much love, sunshine, and pineapples”
Sarah
The photographs and pattern contained in this document are the property of A Plush Pineapple. Unauthorized reproduction, in whole or in part, or distribution of this pattern or content is prohibited. ALL FINISHED PRODUCTS created using this pattern may be sold locally or online. If selling finished products online, please give my blog credit for the pattern by posting a link to my website.


[…] Flamingo […]