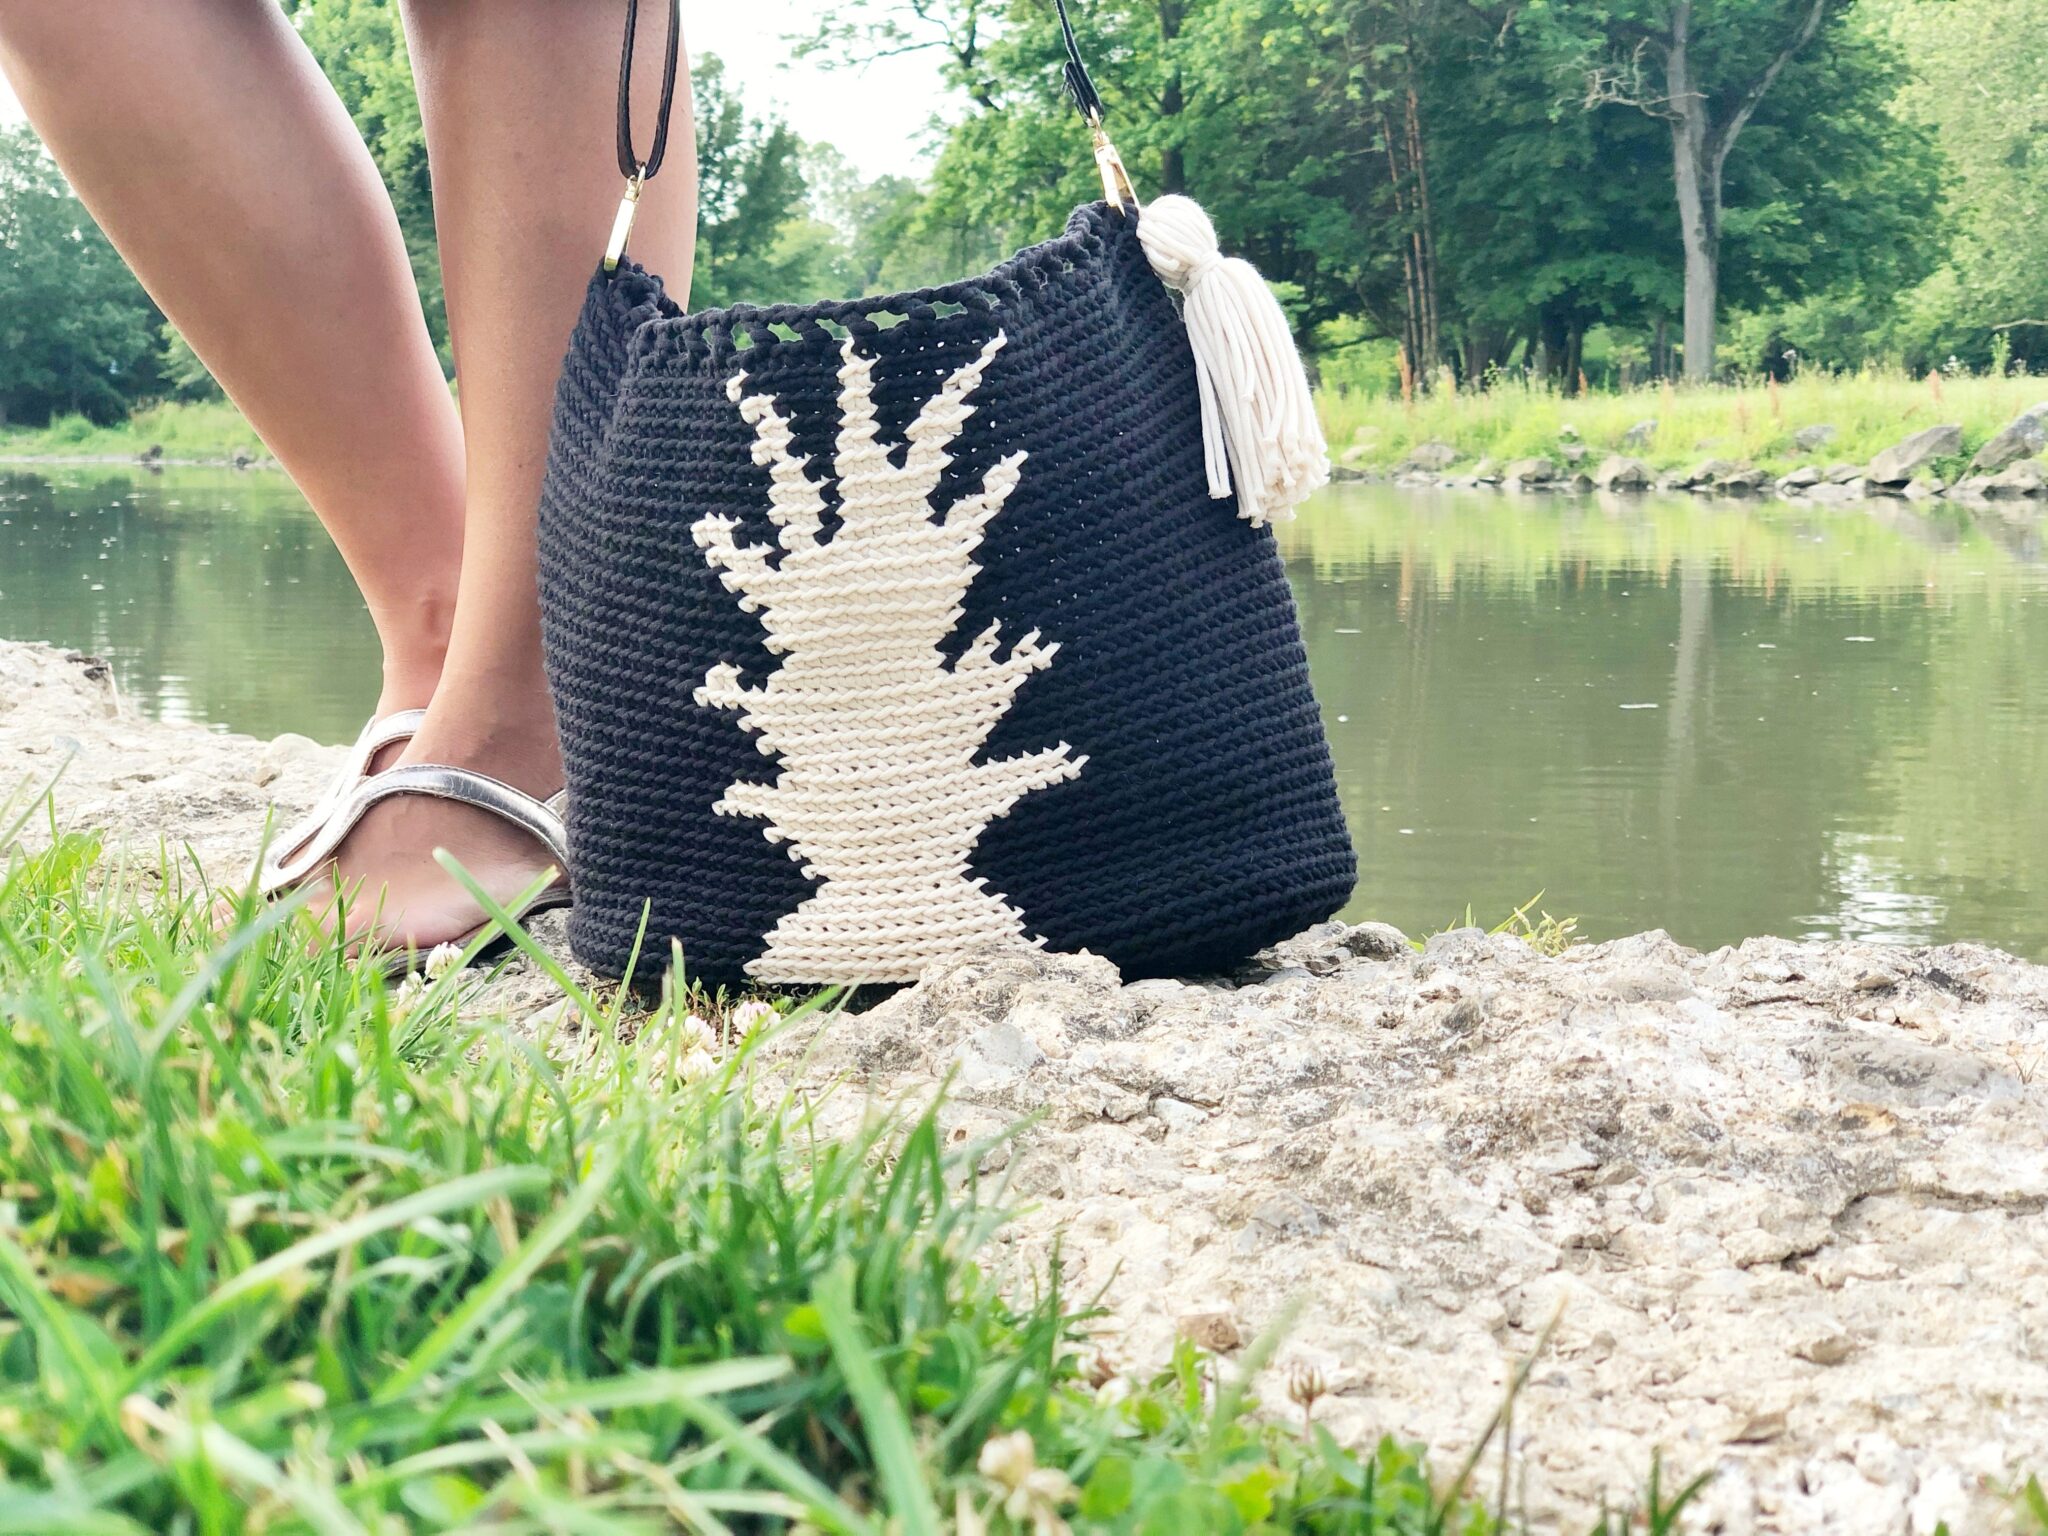
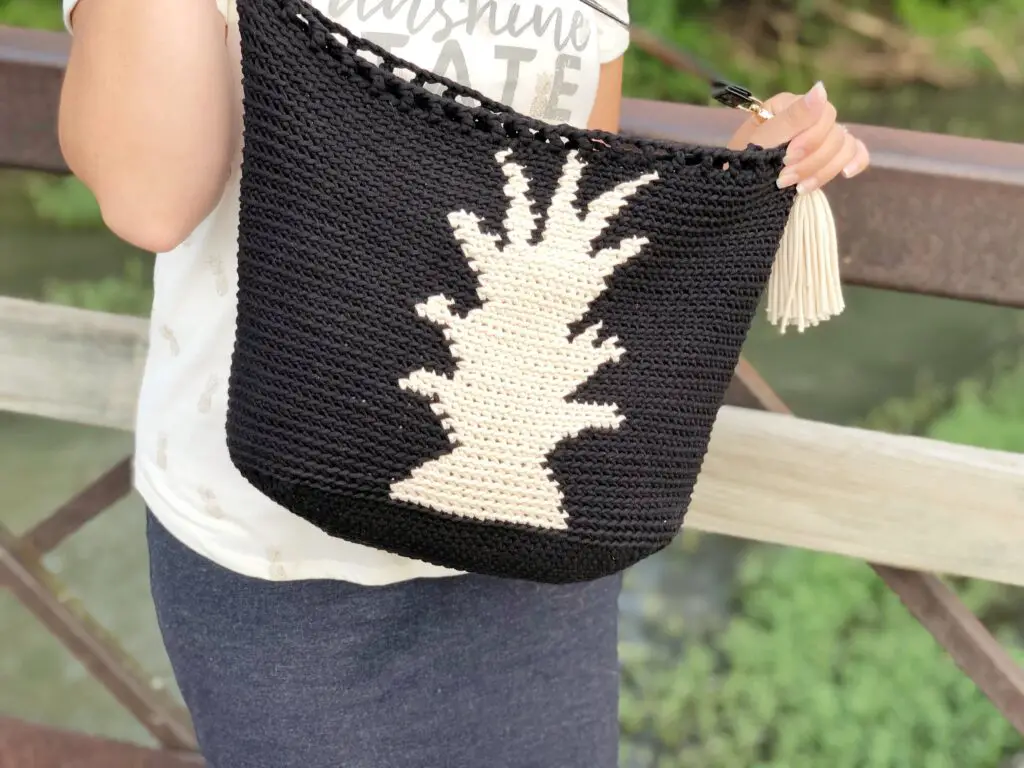
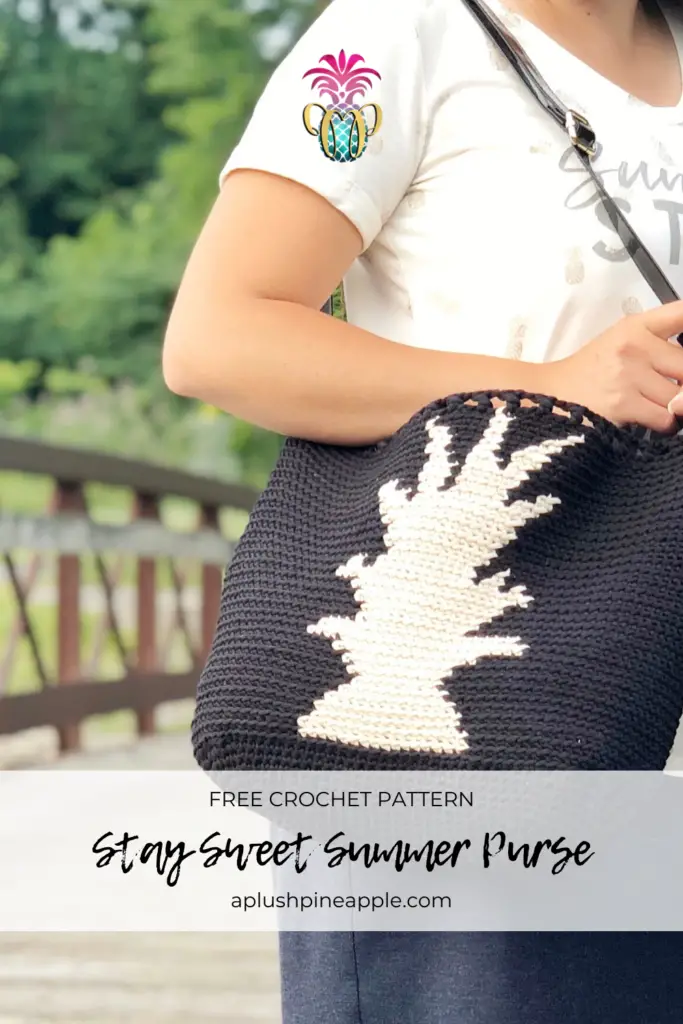
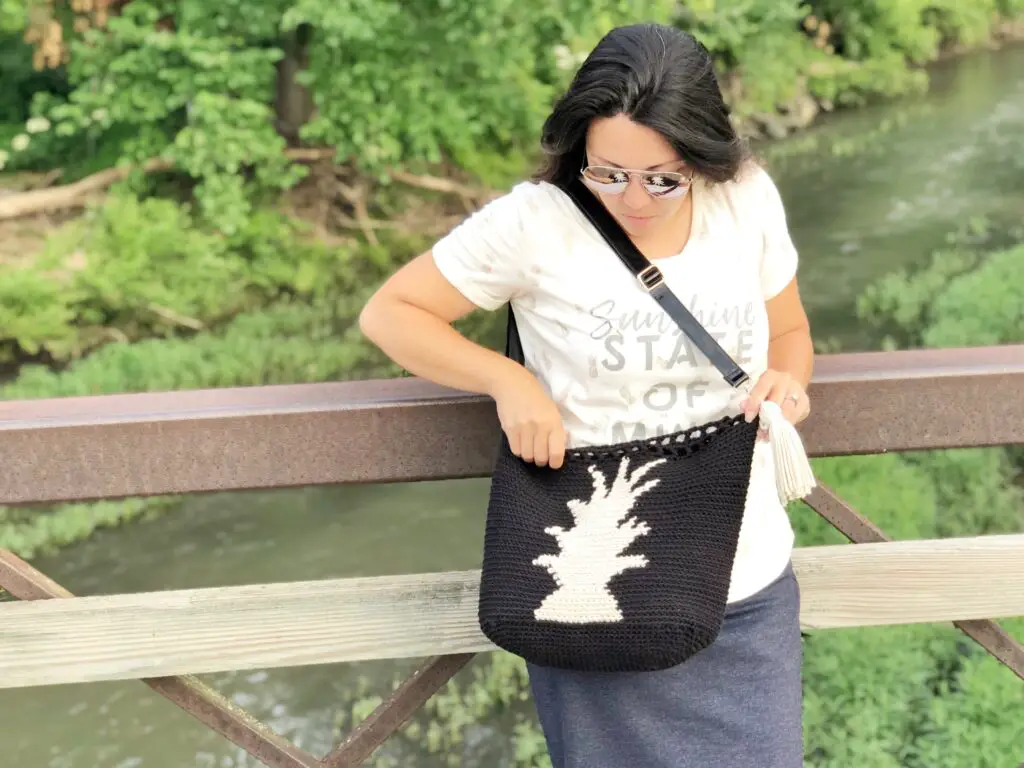
Crochet a beautiful summer purse with pineapple design to carry around all of your summer essentials!
“Be a pineapple. Stand tall, wear a crown, and always stay sweet on the inside.”
Unknown
Staying sweet on the inside is no easy task.
Let’s face it. Life is difficult. When you are the type of person that is passionate about life only to be misunderstood, it’s hard to stay sweet. When you invest time and energy, compassion and caring into people only to have ill will and bitterness, hatred and malice returned, it’s hard to stay sweet. When you truly want what’s best for others even as they turn their back on you, it’s hard to stay sweet. It’s easy to wonder why you should stay sweet. Why not let yourself become angry at the world, at circumstances of life, at people in general? The answer is simple. No one likes a rotten pineapple!
What would you do if you came home from the store with a pineapple, cut into it, and moldy disgusting juice and mildew poured out? You would be totally grossed out! This same principle applies in life.
If you allow yourself to become angry, hateful, and spiteful because of how you have been treated, you are grossing others out with your attitude. Hold on, because I know exactly what you’re thinking right now. “If I gross other people out, then I don’t have to deal with them,” is exactly what’s going through your mind, amiright??? The problem is that you are always dealing with people. You are not in total isolation. Your family, friends, and co-workers are affected by your attitude.
Don’t be guilty of allowing others to control what happens inside of you. You are the only one who can turn your attitude around. Choose to see the good in the world regardless of what the world throws at you. In a world where it’s easy to become bitter and rotten, be a pineapple and…
…stay sweet on the inside.
Yarn Lovers Treasure Vault
If you are here for the crochet vault event, then you have come to right place!
I’ve teamed up with over 25 amazing designers to bring you a special event! We have combined some freebies for you (worth $180+) into a Yarn Lovers Treasure Vault, and we’re giving YOU access to it for 5 days only for FREE. After that, the Vault disappears, so make sure you don’t miss it.
Once you sign up for the Vault:
- You can login and signup for any or all of the patterns, guides and other amazing free printables we’ve prepared for you. Each designer will then email you their printable.
- You don’t need to come back every day to hunt for the pattern of the day and click through 5 different websites
- You don’t need to follow a gazillion designers and tag 10 friends to have a chance to win these prizes
- You just grab what you want and enjoy your treasures.
What are those Treasures exactly?
The Vault contains 30 amazing yarn related free printables: patterns, guides, tips and tricks etc.
All of these have never been offered for free before! With a total value over $180!
How do I access the Vault?
Signup by tapping the link below, and we’ll send you your login info immediately.

Skill Level – Intermediate
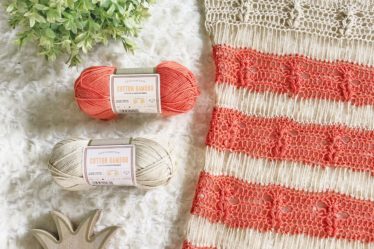
Materials
Disclaimer: This post contains affiliate links to the products used in this project. If you make a purchase through any of these links, we will get a small commission at no additional cost to you.
- Size J10/6.00 mm crochet hook
- Bulky (5) weight yarn in two colors – Bernat Maker Home Dec is recommended
- Color A – approx 320 yards
- Color B – approx 100 yards
- Tapestry needle
- Scissors
- Leather purse strap and hardware (optional)
- Tassel maker OR piece of cardboard measuring 6” x 3” (optional)
- Coordinating fabric for a lining (optional)
Abbreviations
- CH – Chain
- SC – Single crochet
- DC – Double crochet
- Sl St – Slip stitch
- BLO – Back loop only
- SK – Skip
Notes
- Gauge: 3” x 3” = 11 Rows x 10 SC worked in BLO
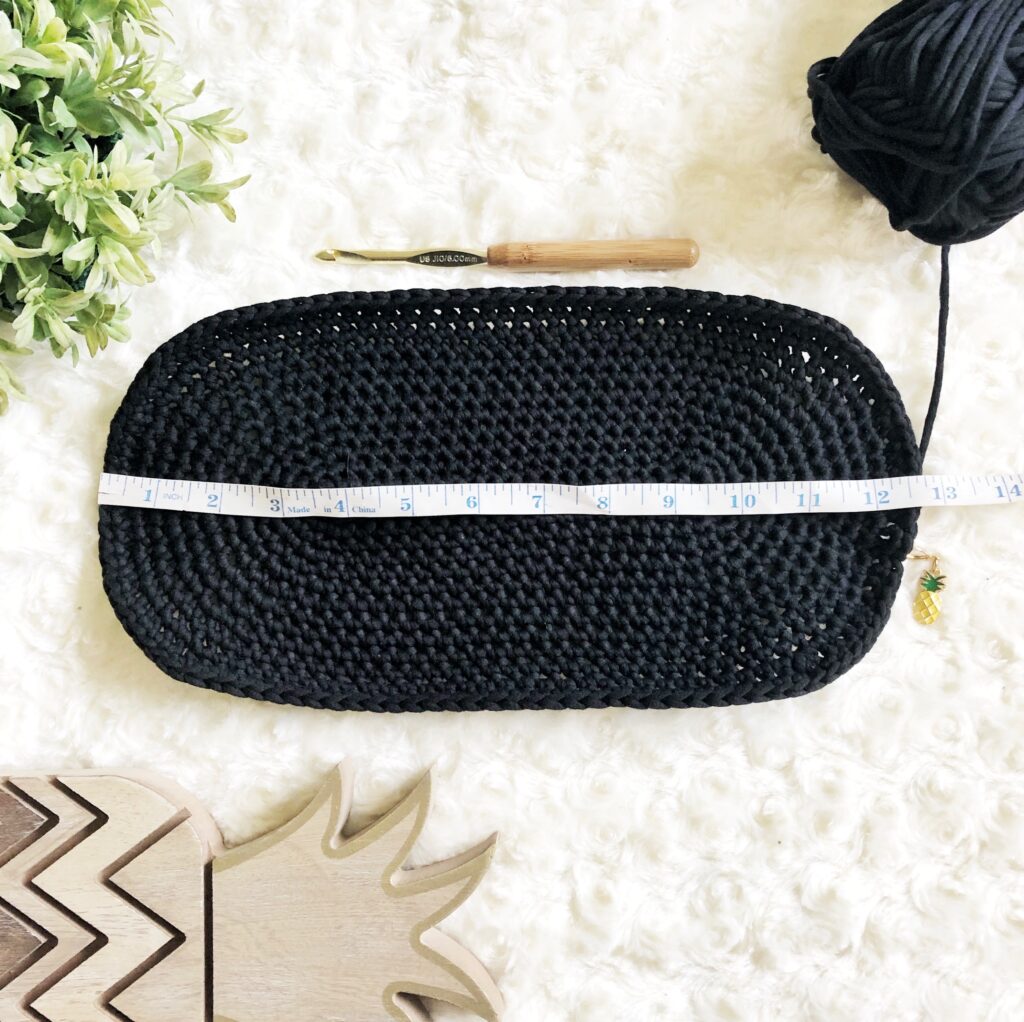
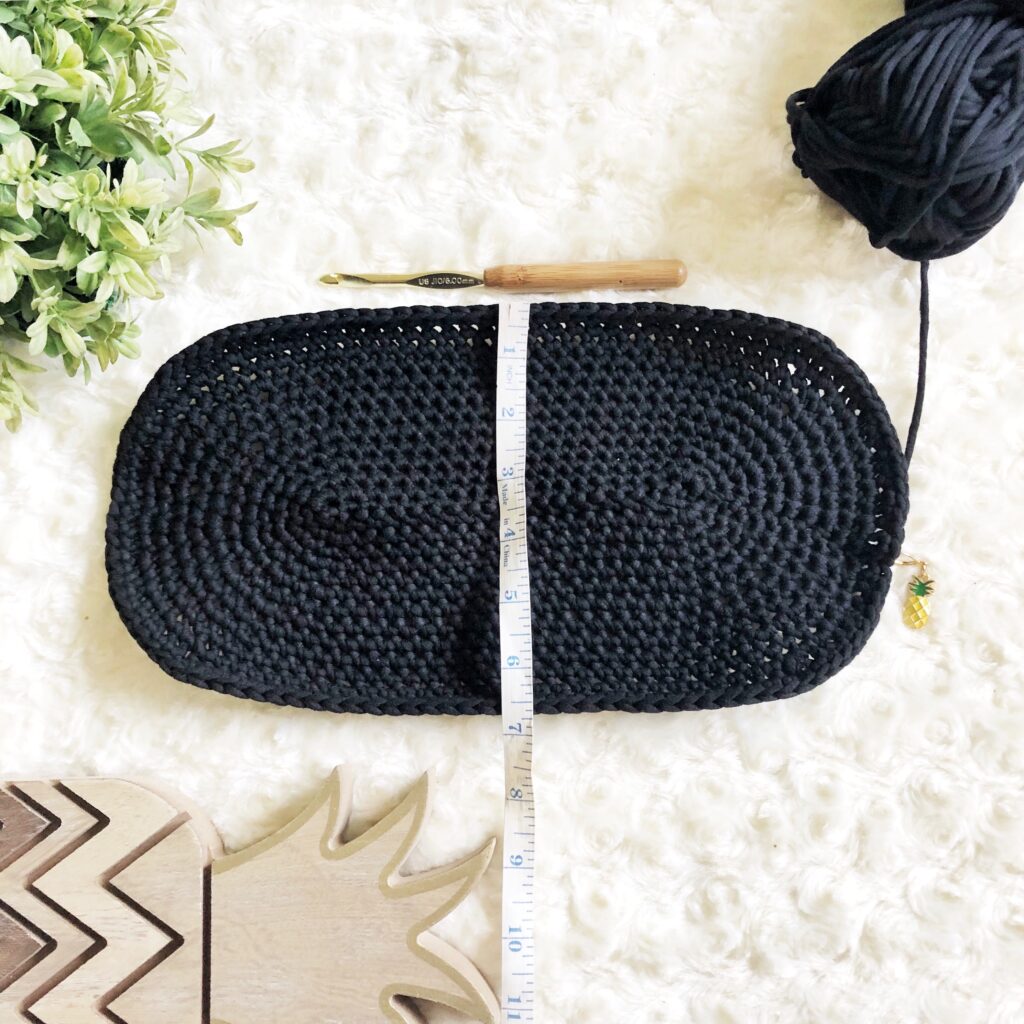
- Finished measurements are as follows:
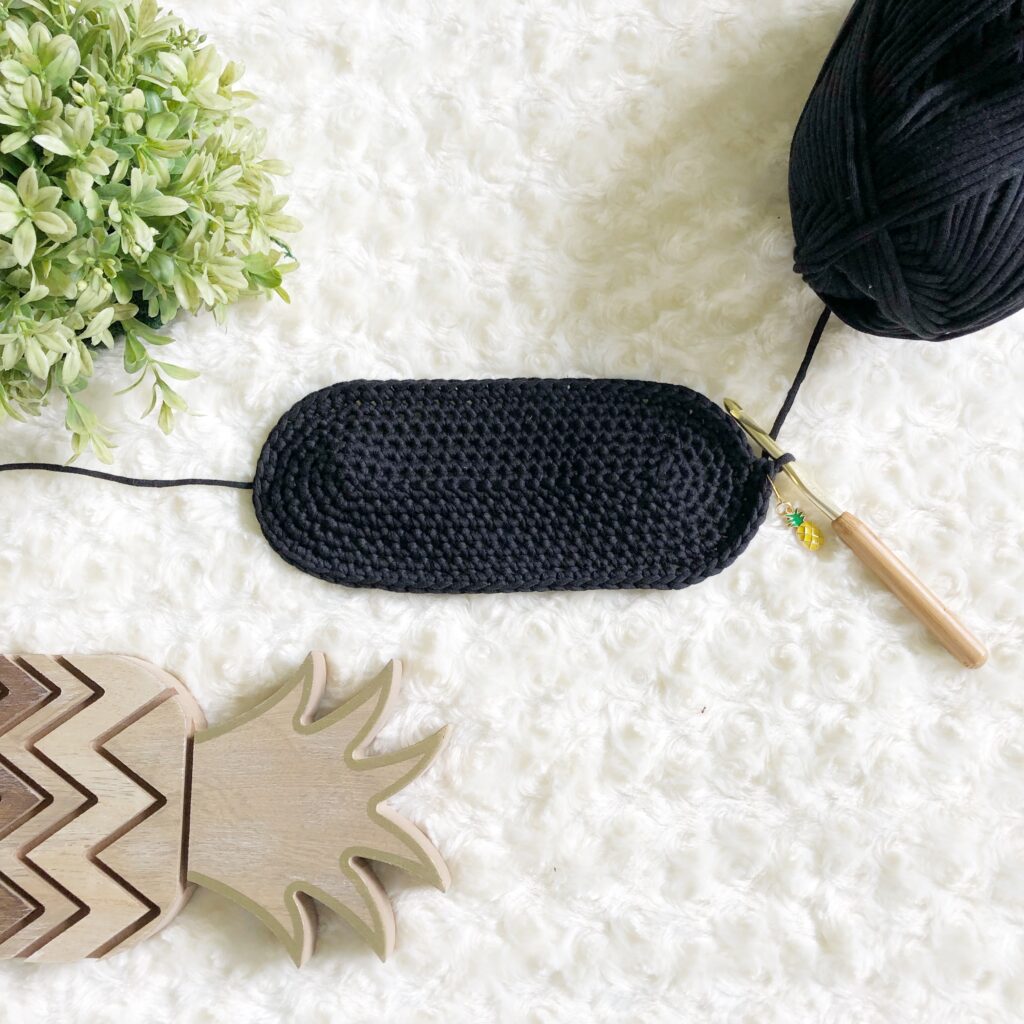
- Oval Base: 12 ¾” L x 6 ¾” W
- Purse Body: 32” Circumference, 10 ¼” Height
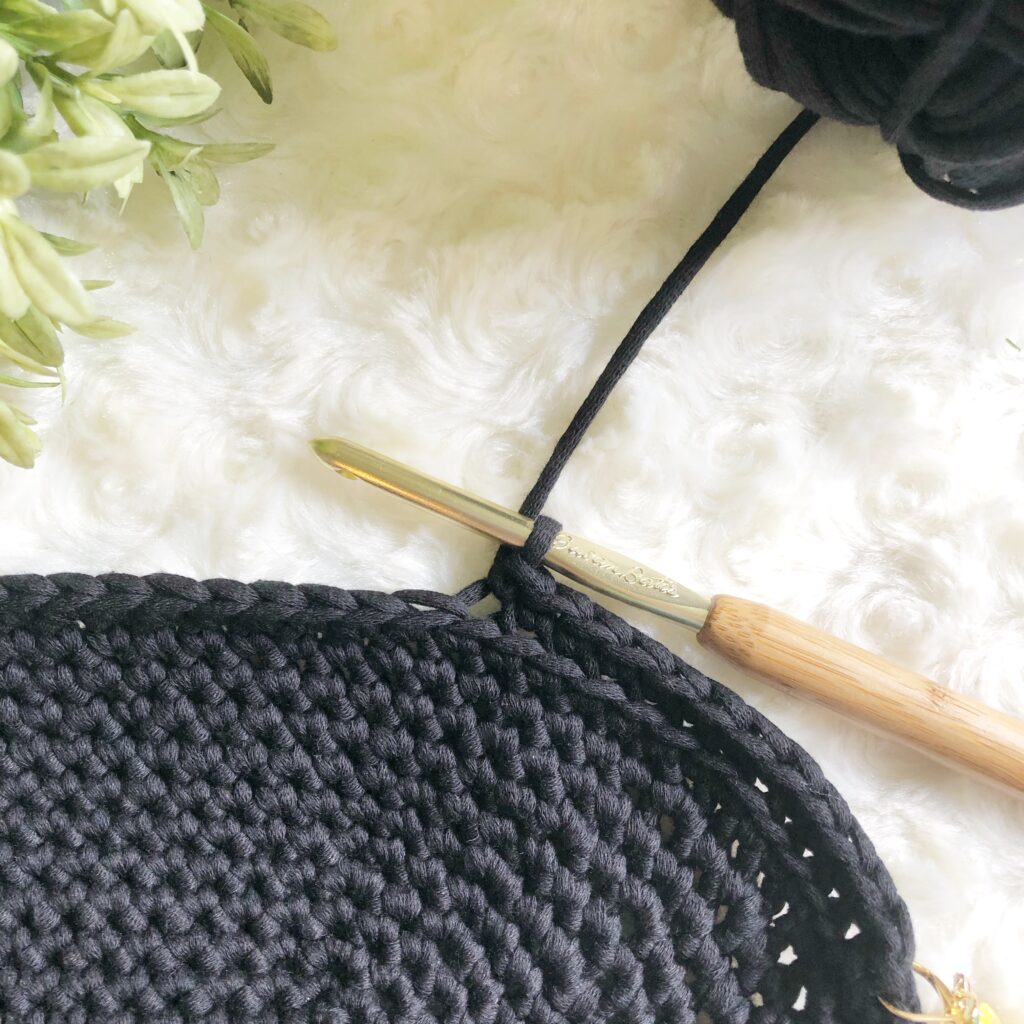
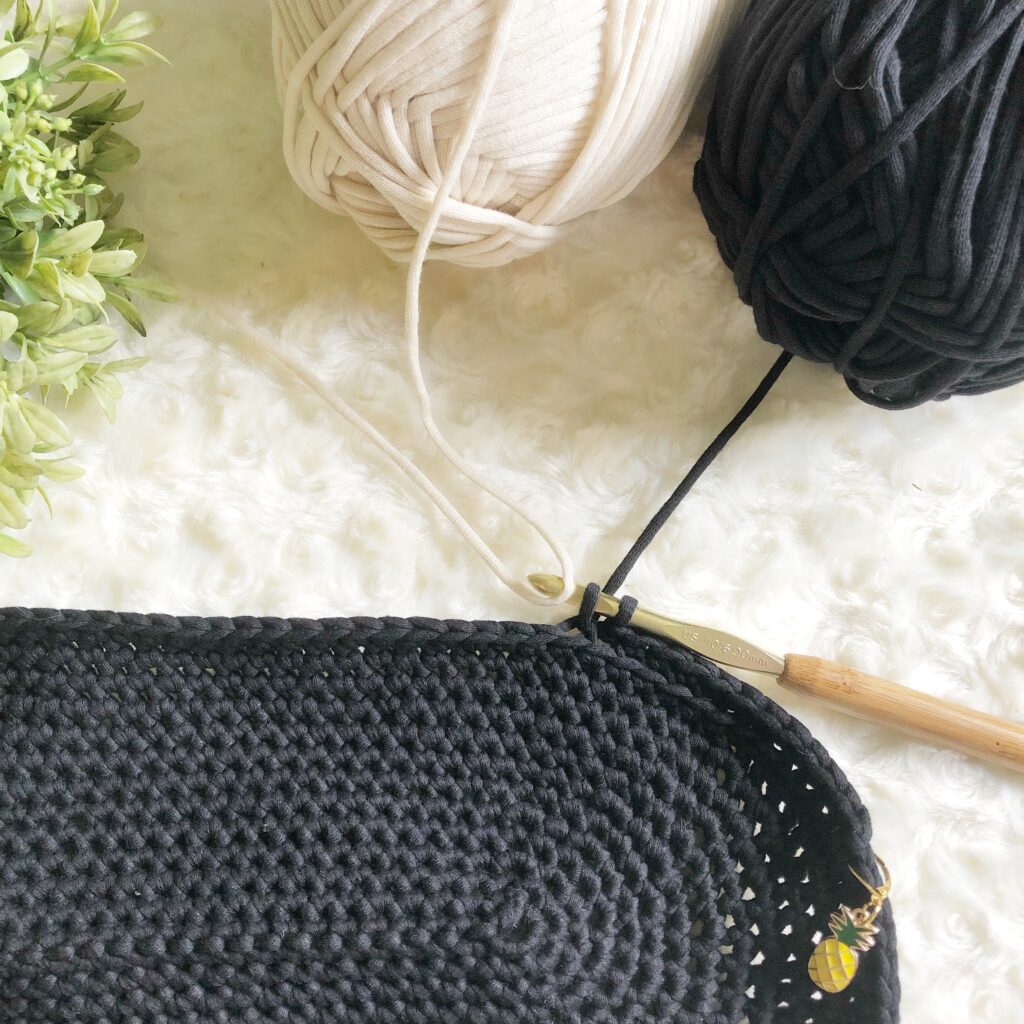
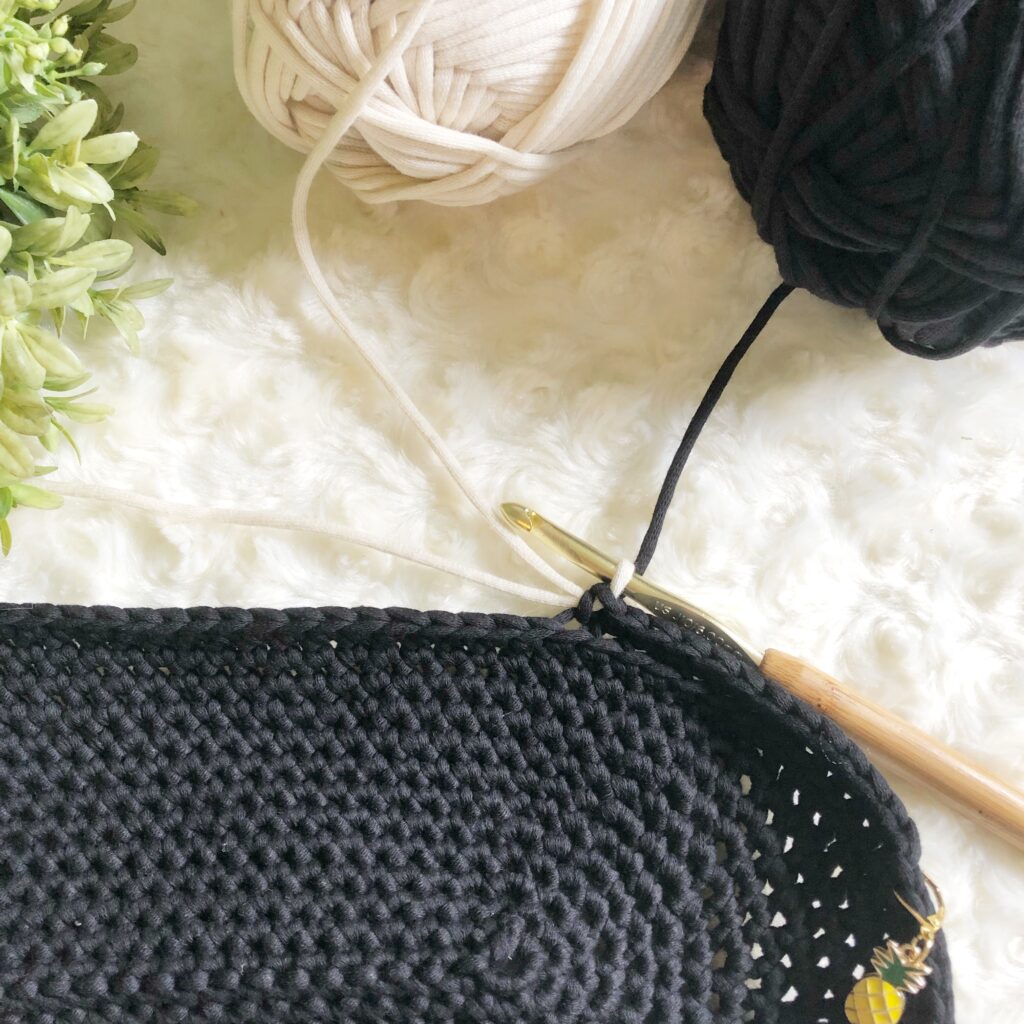
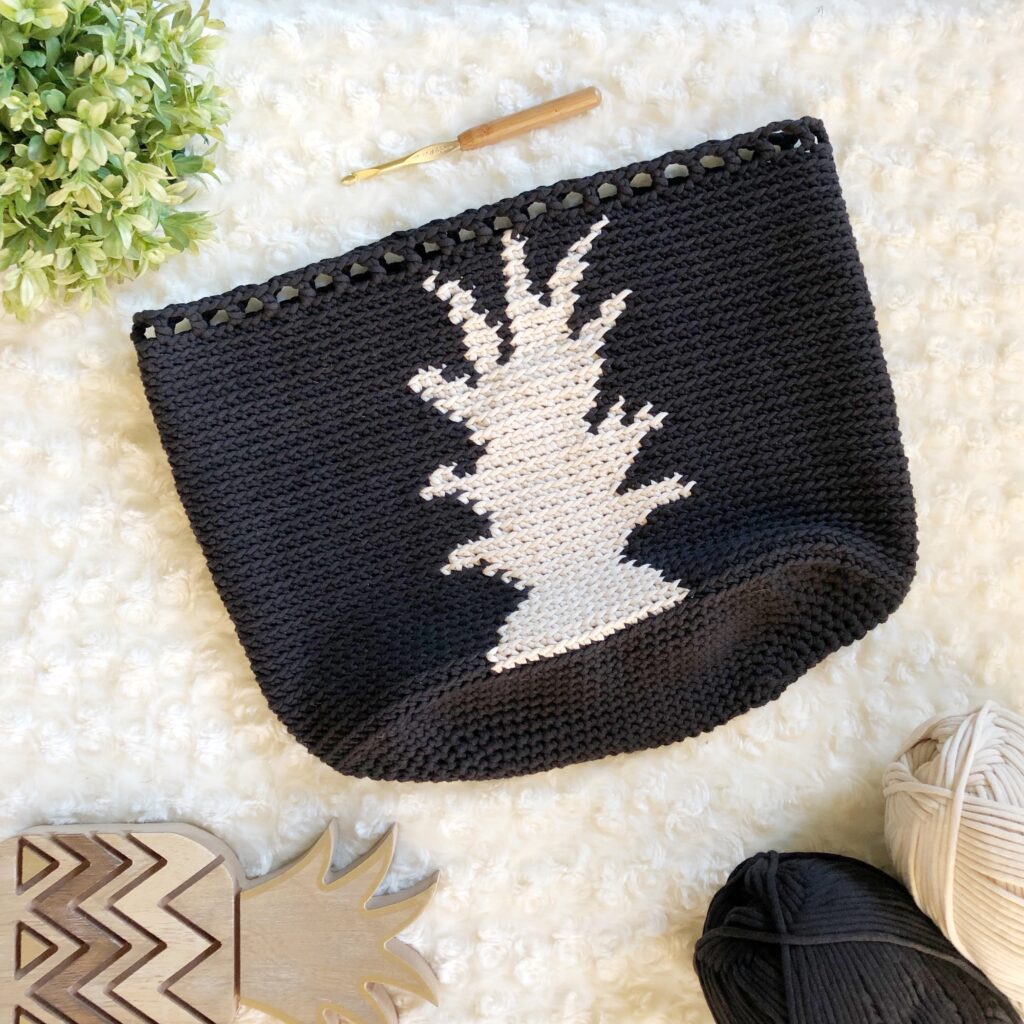
- This purse is made from the base up. It is begun with an oval base made by crocheting on both sides of a foundation CH and continuing in the round. Once the base is completed, the bag is made by SC in BLO in the round for the remainder of the purse body.
- Each round of the base is finished by joining to the first SC of the round. I recommend using the invisible slip stitch join and standing/chainless starting stitch. When the base is completed, a stitch marker is used to mark the beginning and end of each round, and the remainder of the purse is made by working continuously in the round.
- If you choose to join traditionally, beginning CH stitches do not count as a stitch.
- There are multiple color changes in this project. You may choose to carry the yarn, but I found that carrying the yarn warped the shape of the pineapple design somewhat. I chose to cut my yarn at each color change. This method will create several ends to weave in at the end, but gives a cleaner overall appearance. The method chosen is a personal preference and entirely up to the discretion of the maker!
- If you have any difficulty completing this project and would like support, please email me at aplushpineapple@gmail.com.
Special Stitches and Techniques
Invisible Join + Chainless Starting Stitch
If you are unfamiliar with this technique, you can use this tutorial to guide you. Keep in mind that in the tutorial, the chainless starting stitch is a HDC. In this pattern, you will be using SC. For a chainless starting SC, simply pull the loop up higher than you normally would and make a SC as normal without yarning over.
Color Changing

Pattern
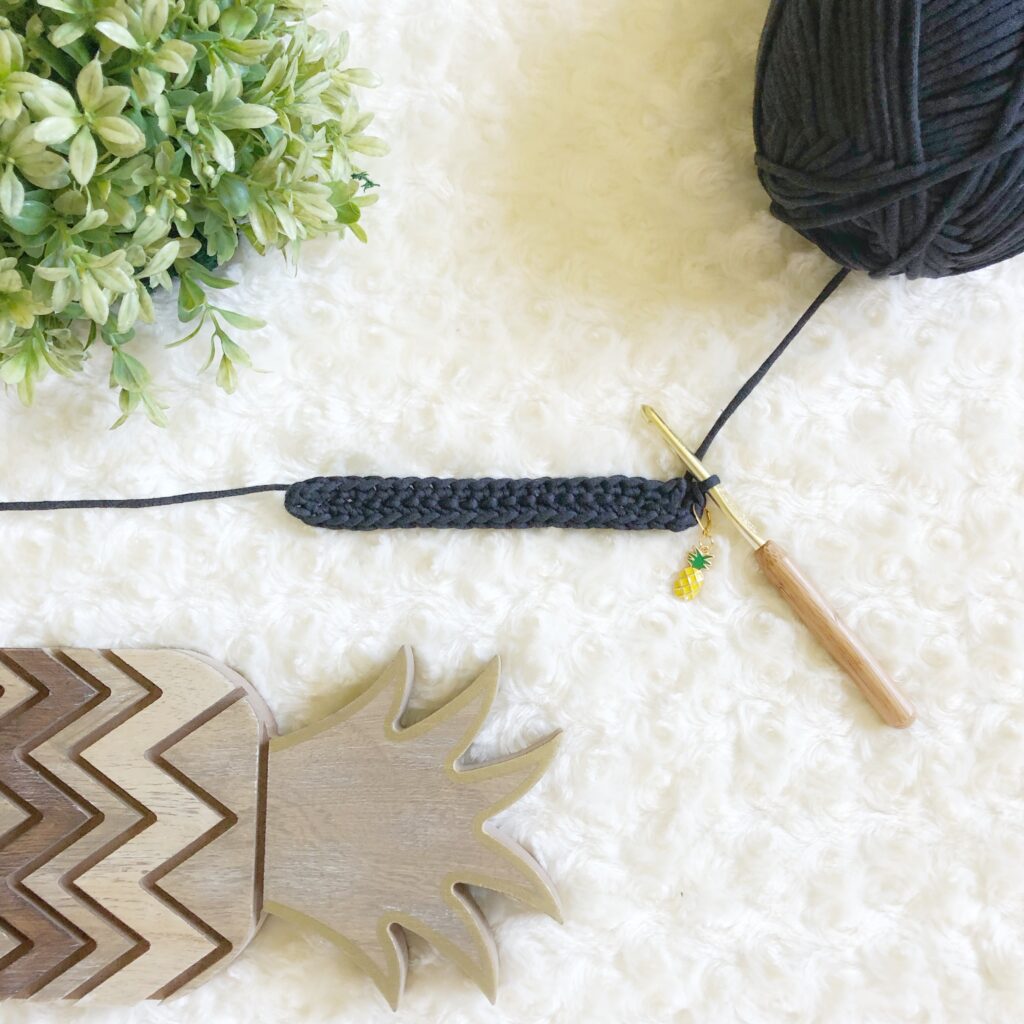
Oval Base
Round 1: Using Color A, CH 21. SC in the 2nd CH from hook and in the next 18 CH, 3 SC in the next CH. Now working along the bottom of the foundation CH, SC in the next 18 CH, 2 SC in the next CH (the same CH as the first SC). (Leave the last CH unworked). (42)
Finish the round by joining to the first SC of the round. I recommend the invisible slip stitch join and standing/chainless starting stitch for the remainder of the base (rounds 2-13). Remember that this does not count as a stitch.
Round 2: 2 SC in the 1st SC, 1 SC in the next SC, 2 SC in the next SC, 1 SC in the next 14 SC, *2 SC in the next SC, 1 SC in the next SC, repeat from * 3x, 1 SC in the next 13 SC, *2 SC in the next SC, 1 SC in the next SC, repeat from * 1x. (50)
Round 3: 1 SC in each SC around. (50)
Round 4: 2 SC in the 1st SC, 1 SC in the next SC, 2 SC in the next SC, 1 SC in the next 18 SC, *2 SC in the next SC, 1 SC in the next SC, repeat from * 3x, 1 SC in the next 17 SC, *2 SC in the next SC, 1 SC in the next SC, repeat from * 1x. (58)
Round 5: 1 SC in each SC around. (58)
Round 6: *1 SC in the first SC, 2 SC in the next SC, repeat from * 2x, 1 SC in the next 18 SC, *2 SC in the next SC, 1 SC in the next SC, repeat from * 5x, 1 SC in the next 16 SC, *1 SC in the next SC, 2 SC in the next SC, repeat from * 2x. (70)
Round 7: 1 SC in each SC around. (70)
Round 8: *1 SC in the 1st SC, 2 SC in the next SC, repeat from * 2x, 1 SC in the next 24 SC, *2 SC in the next SC, 1 SC in the next SC, repeat from * 5X, 1 SC in the next 22 SC, *1 SC in the next SC, 2 SC in the next SC, repeat from * 2x. (82)
Round 9: 1 SC in each SC around. (82)
Round 10: *2 SC in the 1st SC, 1 SC in the next SC, repeat from * 4x, 1 SC in the next 25 SC, *2 SC in the next SC, 1 SC in the next SC, repeat from * 7x, 1 SC in the next 25 SC, *2 SC in the next SC, 1 SC in the next SC, repeat from * 2x. (98)
Round 11: 1 SC in each SC around. (98)
Round 12: *1 SC in the 1st SC, 2 SC in the next SC, repeat from * 5x, 1 SC in the next 30 SC, *2 SC in the next SC, 1 SC in the next SC, repeat from * 9x, 1 SC in the next 28 SC, *1 SC in the next SC, 2 SC in the next SC, repeat from * 3x. (118)
Round 13: 1 SC in each SC around. (118)
Do not use the invisible slip stitch here. Place stitch marker to indicate the beginning and end of each round from this point forward.
Purse Body
Rounds 14-48 are SC worked in BLO only. The letter A will refer to Color A. The letter B will refer to Color B. Stitch count for Rounds 14-47 is 118 SC.
Round 14: 26A, 16B, 76A
Round 15: 26A, 16B, 76A
Round 16: 27A, 14B, 77A
Round 17: 27A, 14B, 77A
Round 18: 28A, 12B, 78A
Round 19: 29A, 10B, 79A
Round 20: 30A, 8B, 80A
Round 21: 30A, 9B, 79A
Round 22: 29A, 11B, 78A
Round 23: 27A, 14B, 77A
Round 24: 23A, 22B, 73A
Round 25: 24A, 20B, 74A
Round 26: 29A, 11A, 78A
Round 27: 28A, 12A, 78A
Round 28: 27A, 14A, 77A
Round 29: 26A, 16A, 76A
Round 30: 24A, 21A, 73A
Round 31: 25A, 1B, 1A, 2B, 1A, 10B, 2A, 2B, 74A
Round 32: 27A, 1B, 2A, 9B, 79A
Round 33: 29A, 11B, 78A
Round 34: 29A, 11B, 78A
Round 35: 28A, 13B, 77A
Round 36: 28A, 14B, 76A
Round 37: 27A, 11B, 1A, 4B, 75A
Round 38: 26A, 3B, 1A, 5B, 1A, 2B, 3A, 3B, 74A
Round 39: 25A, 2B, 3A, 5B, 1A, 3B, 79A
Round 40: 29A, 6B, 1A, 3B, 79A
Round 41: 29A, 2B, 1A, 3B, 2A, 2B, 79A
Round 42: 28A, 3B, 2A, 2B, 3A, 2B, 78A
Round 43: 28A, 2B, 3A, 2B, 3A, 2B, 78A
Round 44: 27A, 2B, 4A, 2B, 4A, 2B, 77A
Round 45: 26A, 1B, 6A, 2B, 6A, 1B, 76A
Round 46: 34A, 1B, 83A
Round 47: SL ST to the next SC, CH 4 (counts as 1st DC and CH 2), SK 2, DC in next stitch, *CH 2, SK 2, DC in next stitch,* repeat from * to * until 2 stitches remain, CH 2, join to the top of first CH 2 with an invisible join.
Finishing
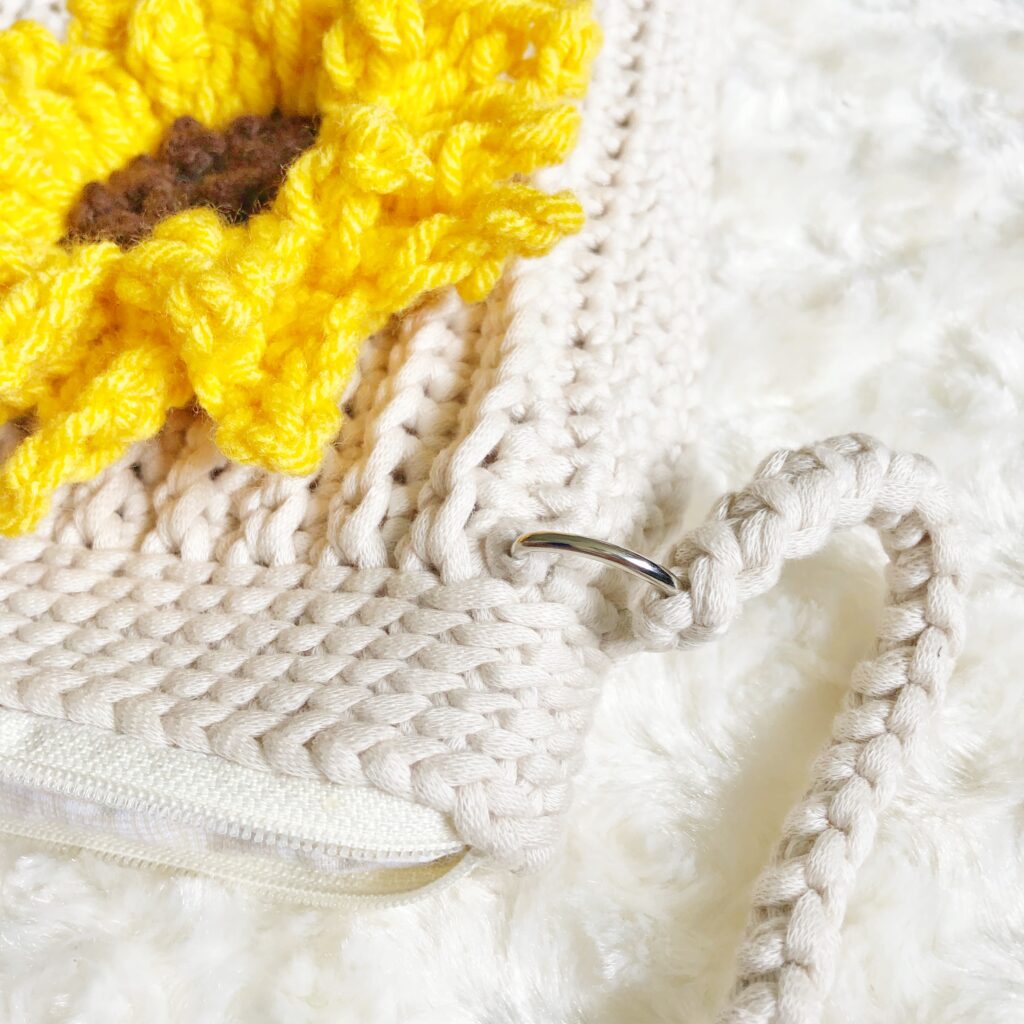
Strap
If you prefer to crochet a cord for the strap of your bag, you can use the tutorial found in my Linen and Lace Backpack post. Scroll until you see finishing instructions for the backpack and follow the instructions for the cord. Use bulky (5) weight yarn and a J10 hook. Crochet the cord until you reach the desired length. Be sure to FO with a long tail for sewing.
Whether you prefer to use a crochet cord or leather strap, you will need to attach D rings to the sides of the purse near the top with a whip stitch. If using a crochet cord, sew the cord onto the D rings. If using a leather strap, simply attach the clasps to the D rings.
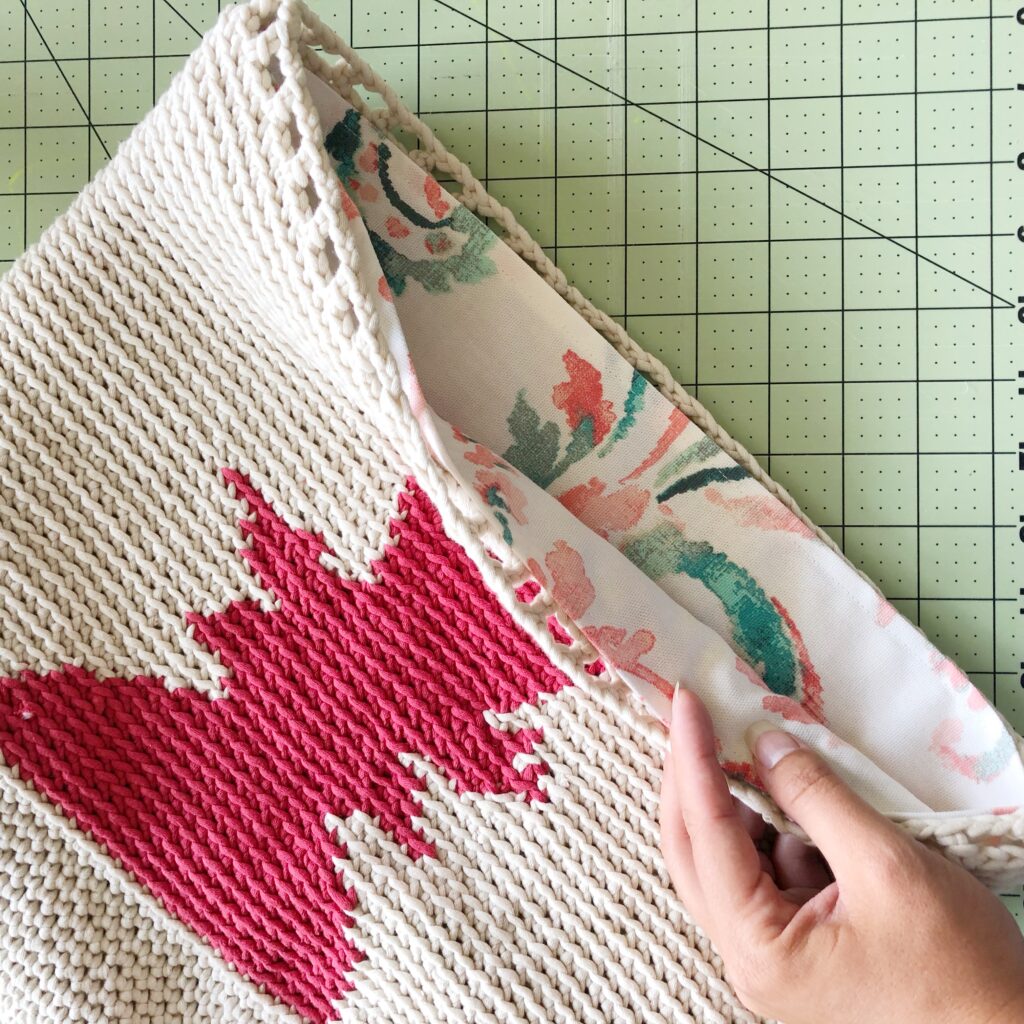
Lining
If you wish to line your new bag with a fabric lining, follow the instructions in this tutorial on how to add a fabric lining to a crochet bag.
Tassel
If you wish to attach a tassel to the side of your bag, use this tutorial on how to make a yarn tassel.
If you make this purse, please share it! I would love to see your work! You can tag me on Instagram and Facebook @aplushpineapple. Use the tag #aplushpineapple.
“Much love, sunshine, and pineapples”
Sarah
The photographs and pattern contained in this document are the property of A Plush Pineapple. Unauthorized reproduction, in whole or in part, or distribution of this pattern or content is prohibited. ALL FINISHED PRODUCTS created using this pattern may be sold locally or online. If selling finished products online, please give my blog credit for the pattern by posting a link to my website.