
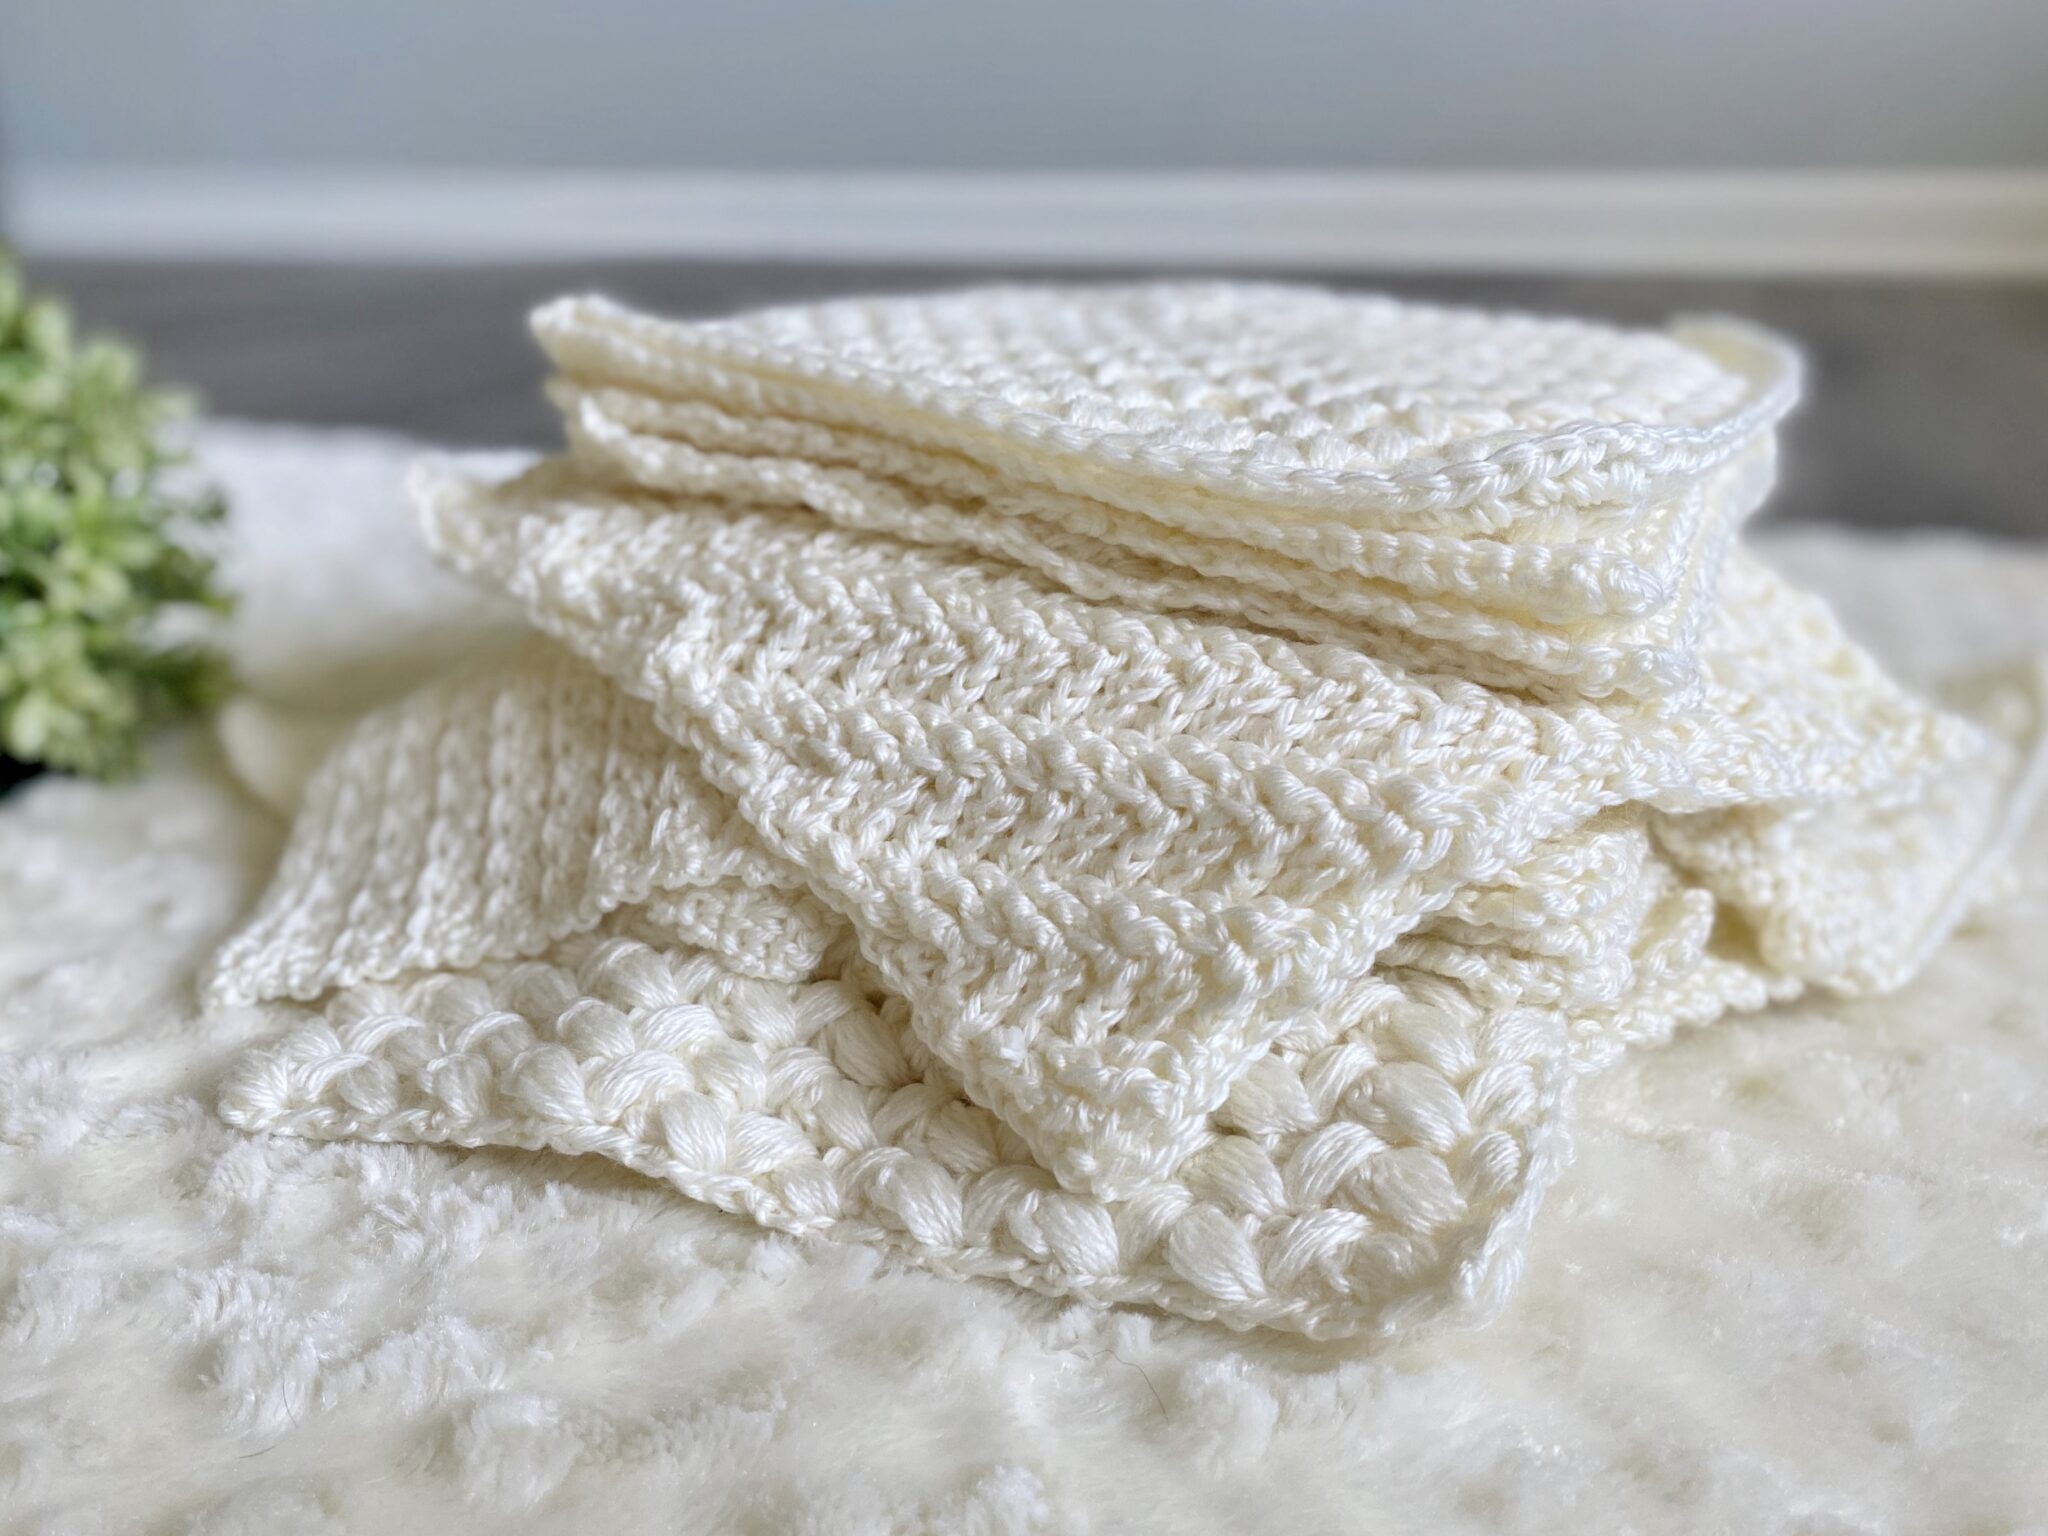
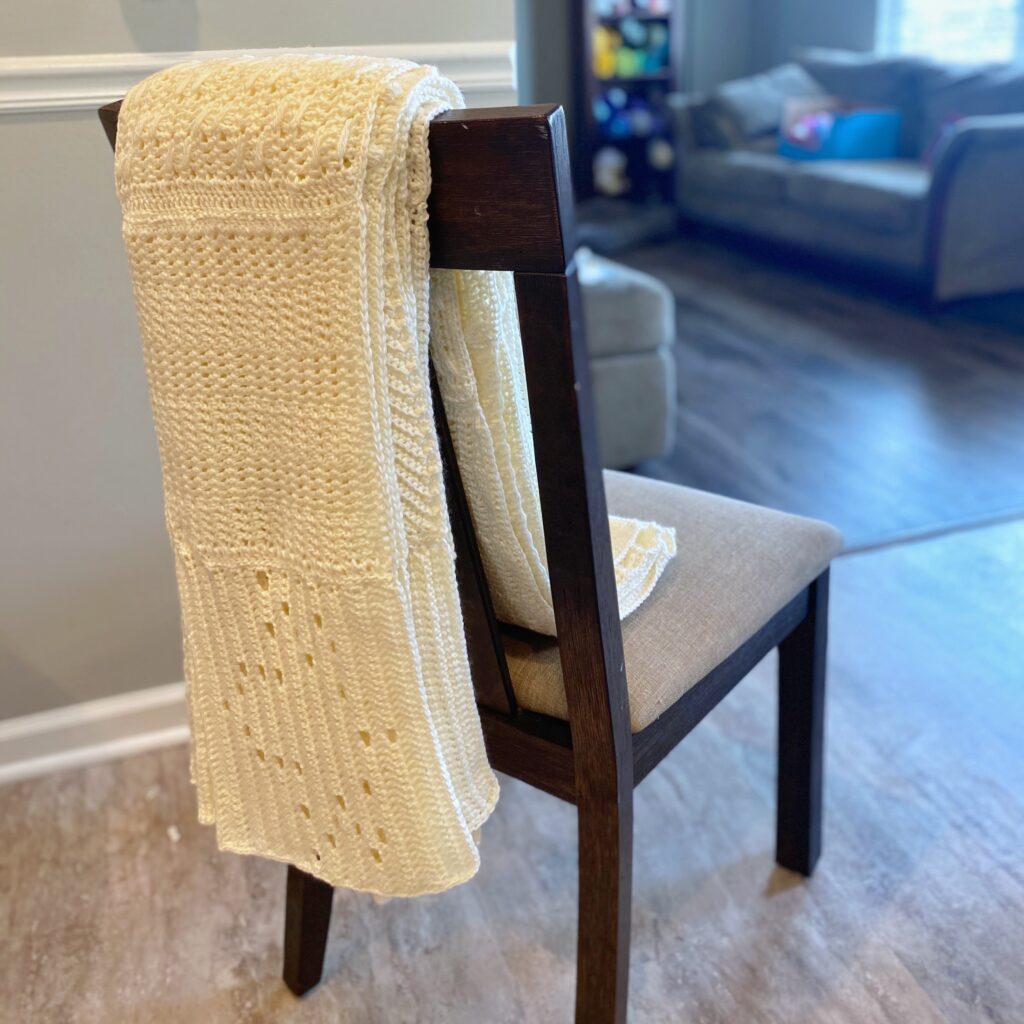
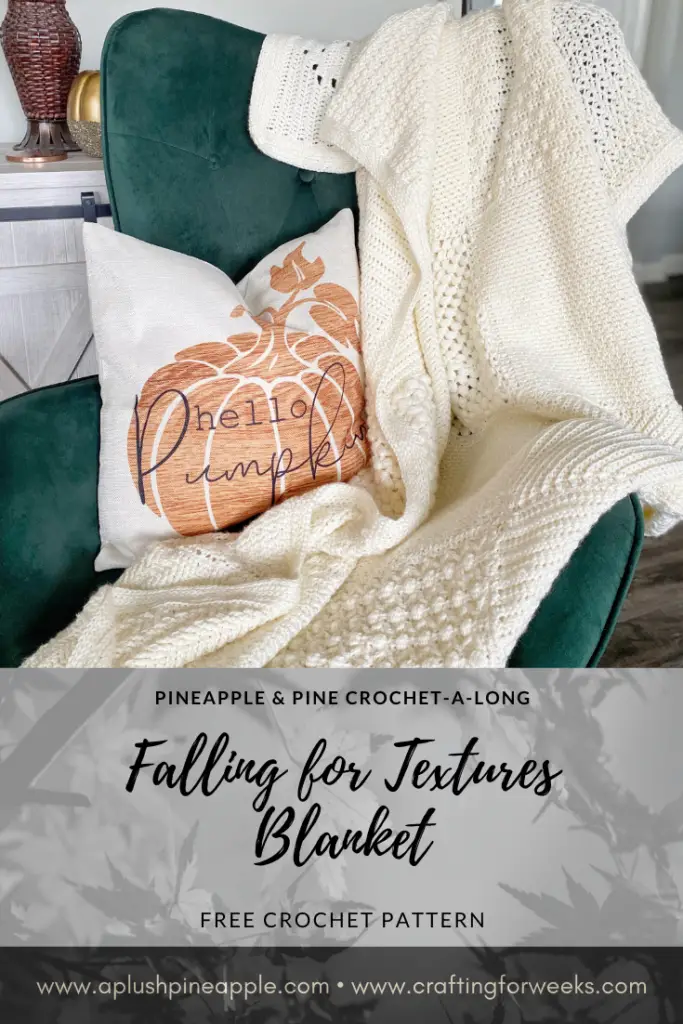
Join in for a warm and cozy free blanket crochet along with beautiful textures and a nod to the fall season with these gorgeous blanket square crochet patterns!
“Autumn shows us how beautiful it is to let things go.”
Unknown
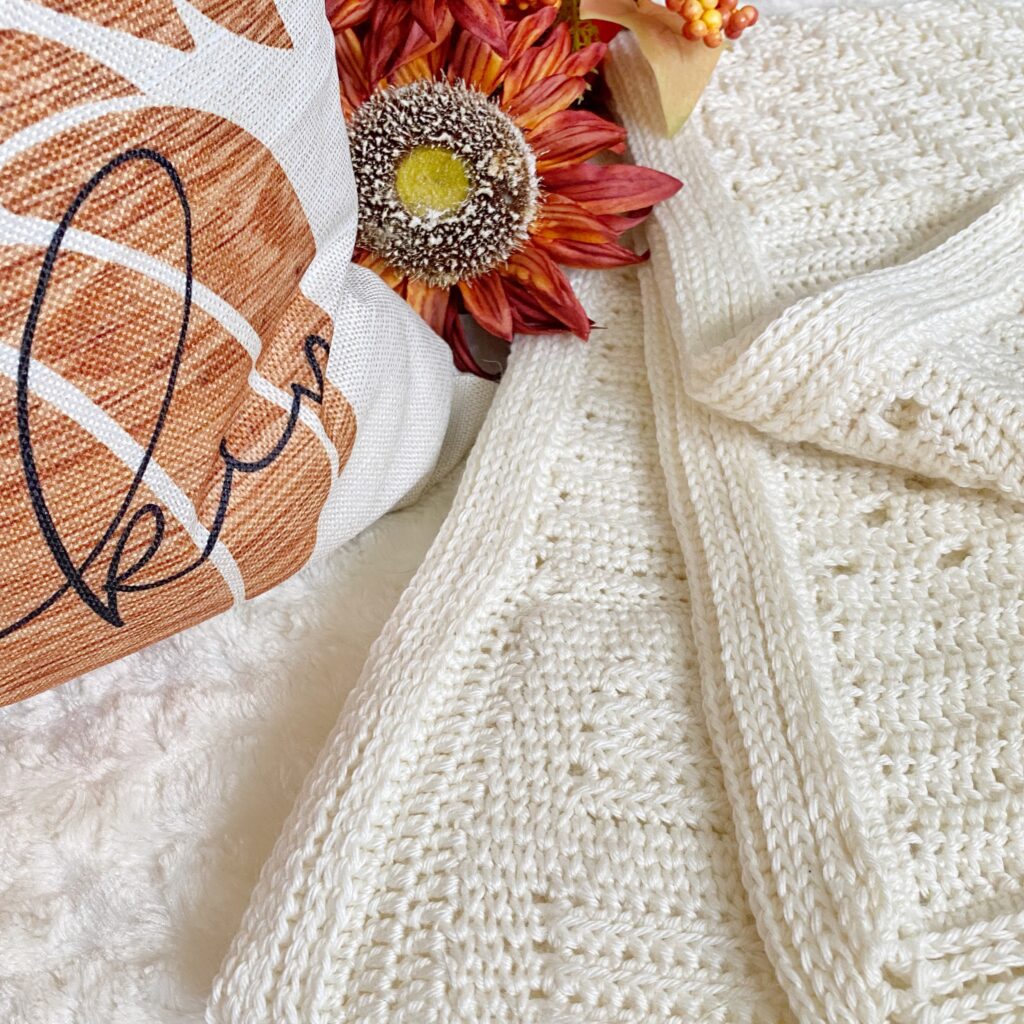
If you love crochet texture, this is the blanket CAL for you!
Letting go is hard to do. I am not one to let go of things easily. I am a hoarder by nature and have a difficult time purging my spaces of clutter due to an emotional attachment to everything I’ve come into contact with.
But when I do purge…when I do throw things away…how freeing it feels! It feels as though a burden has been lifted, and I have a fresh start. However taking that first step towards decluttering is sometimes all that is needed.
As I collaborated with the Pineapple and Pine design team and planned my squares for this free blanket crochet along, I couldn’t help but feel like I was letting go of summer to work on a fall project.
I love summer and everything that goes with it from the sunshine and warmth to pool days and beach days to ice cream and fireworks. I love it all!
Working on this fall project seemed to mean that all of that summer goodness was coming to an end. But as the beautiful texture of these blanket squares started to emerge, and as I put the finishing touches on, I could see that letting go of summer just meant that another beautiful chapter was…
…on the horizon!

CAL Schedule
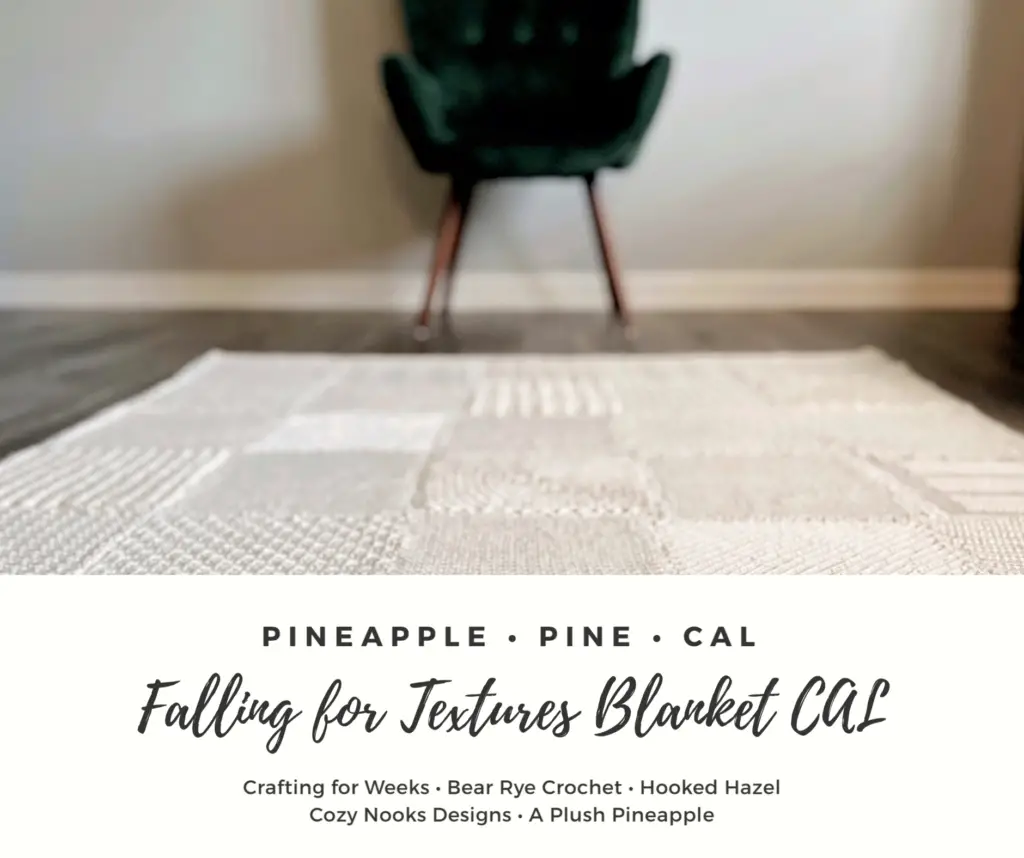
- 1. Week One – Aug 31-Sept 6 – hosted by Crafting for Weeks
- 2. Week Two – Sept 7-Sept 13 – hosted by Bear Rye Crochet
- 3. Week Three – Sept 14-Sept 20 – hosted by Hooked Hazel
- 4. Week Four – Sept 21-Sept 27 – hosted by Cozy Nooks Designs
- 5. Week Five – Sept 28-Oct 2 – hosted by A Plush Pineapple
Skill Level – Intermediate
Materials
Disclaimer: This post contains affiliate links to the products used in this project. If you make a purchase through any of these links, we will get a small commission at no additional cost to you.
- Sizes US 7/4.50mm, I9/5.50mm, J10/6.00mm crochet hooks
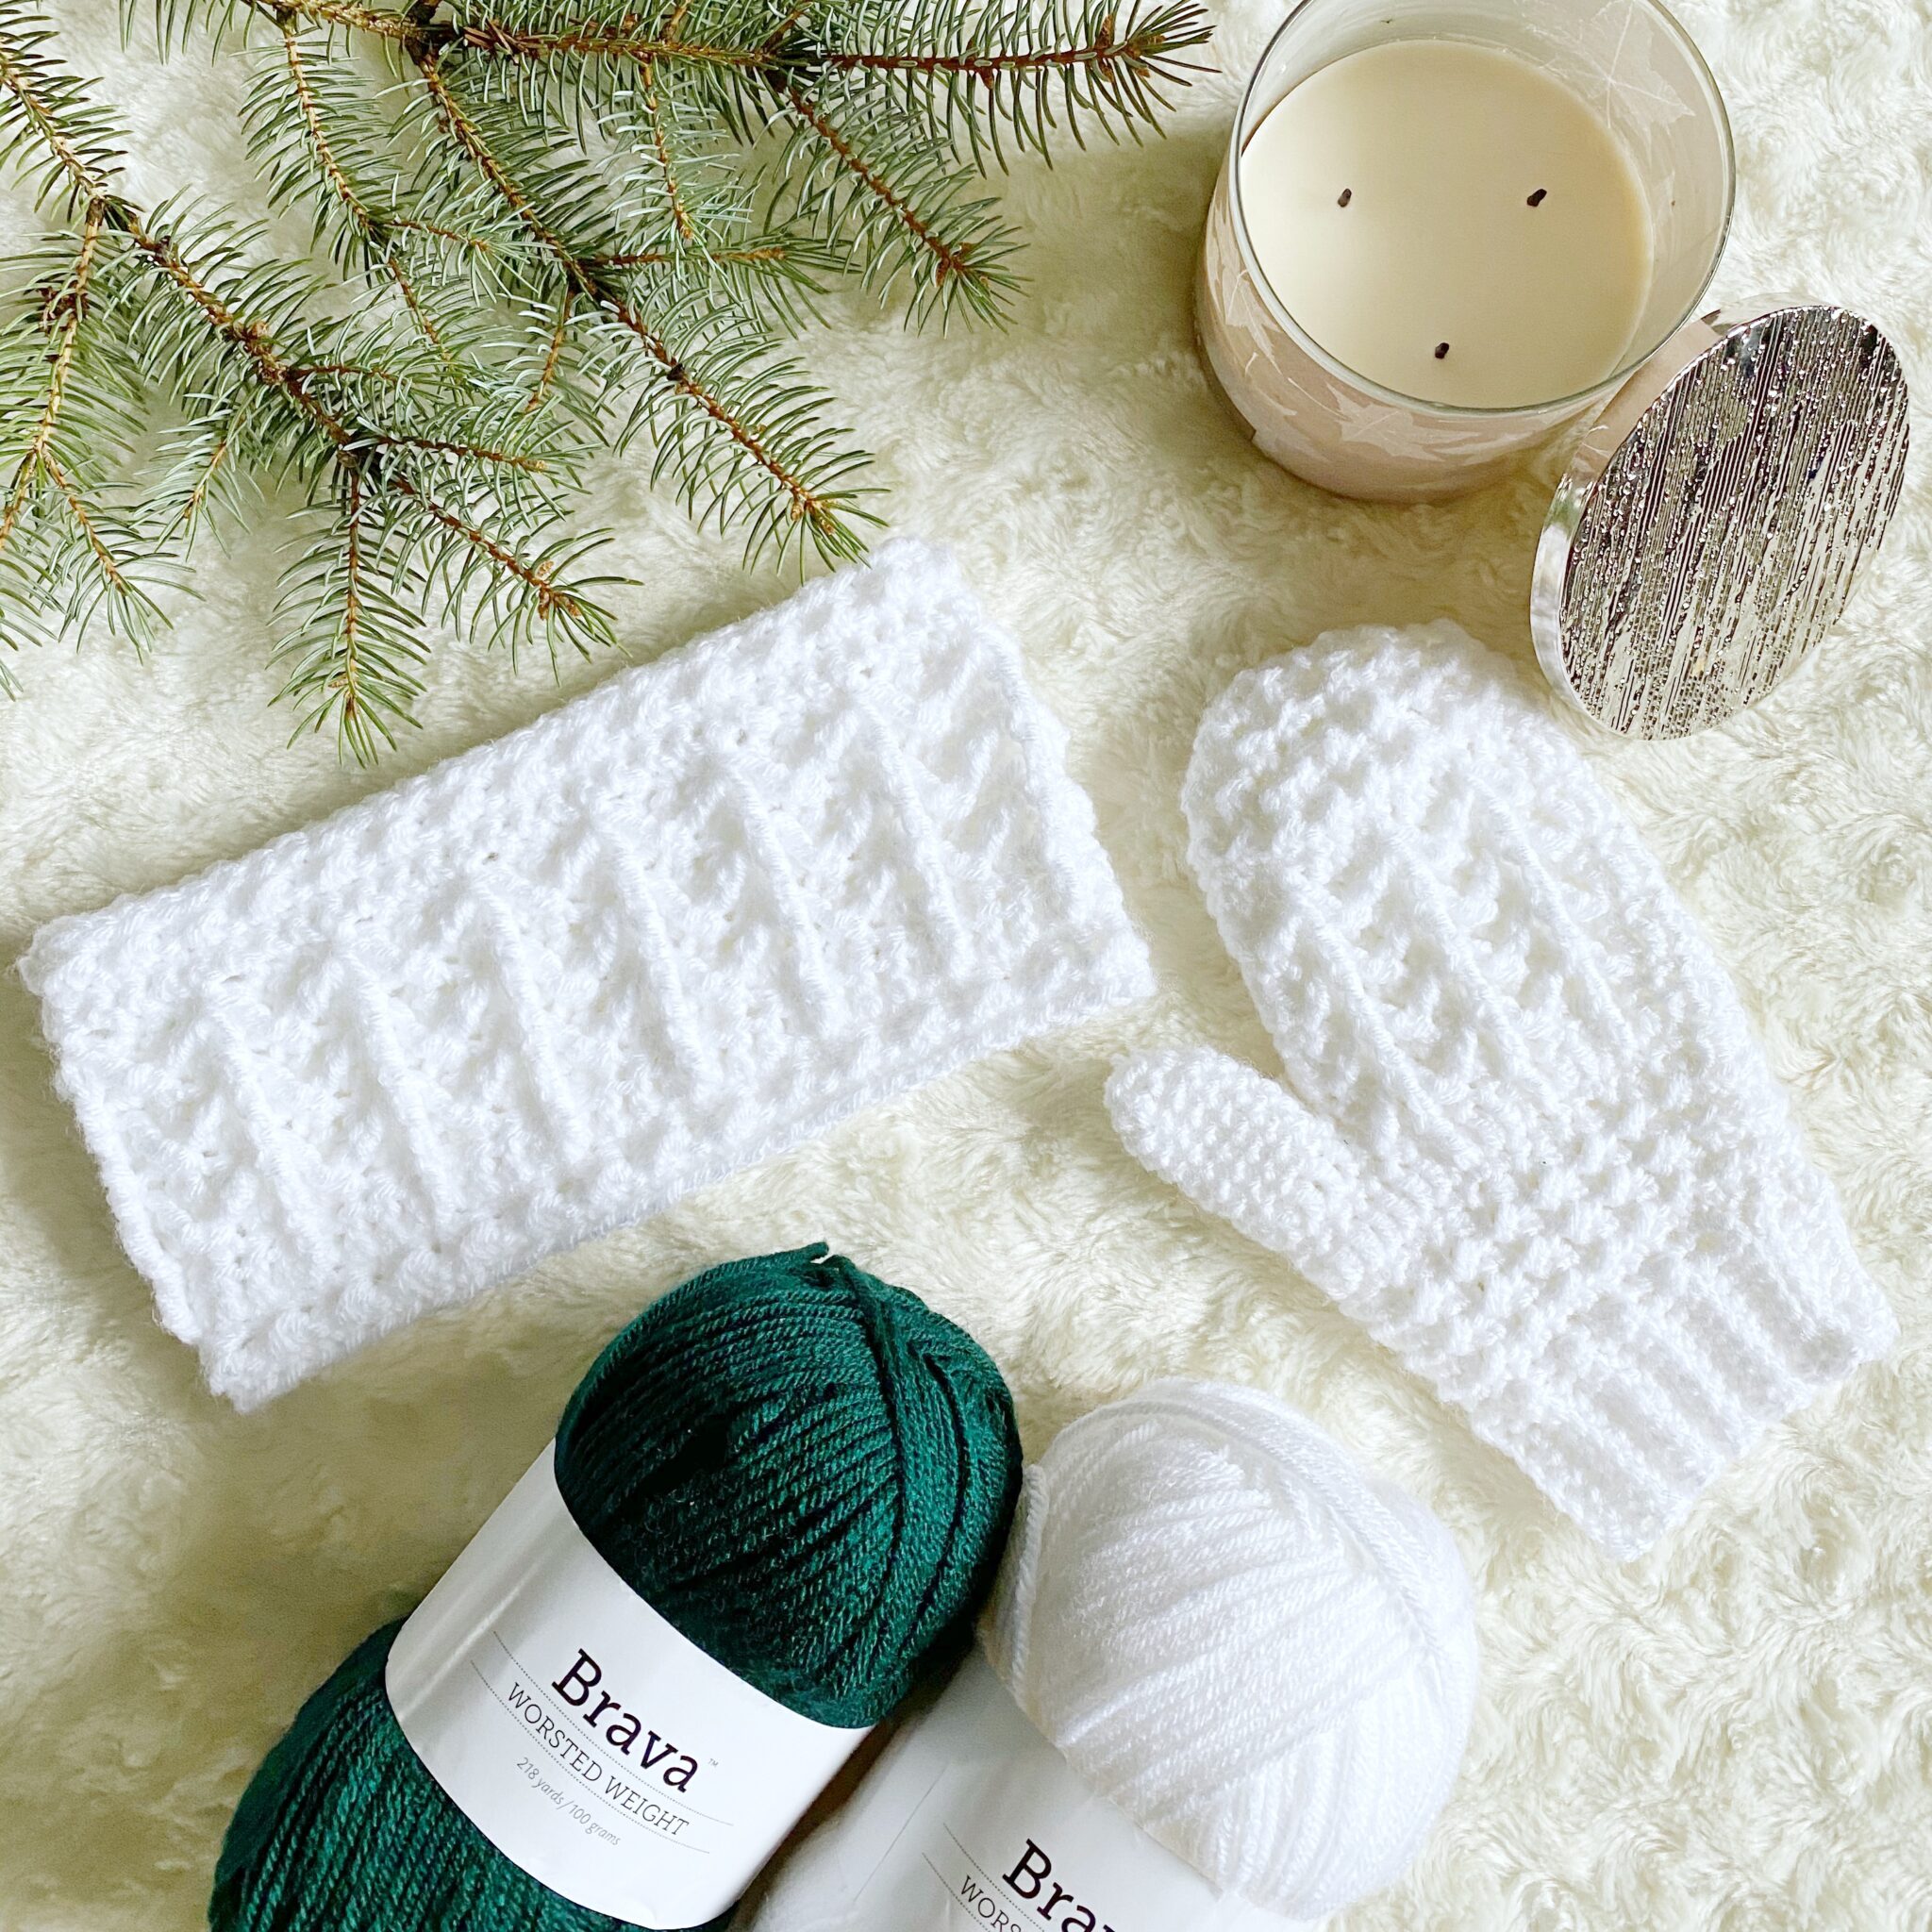
- Worsted (4) weight yarn (approximately 4,500 yards)
- Yarn shown is 22 skeins of Mighty Stitch in cream by We Crochet Official a silky light worsted with a beautiful sheen
- Tapestry needle
- Blocking mat & pins
- Scissors
- Measuring tape

Measurements
- Each square measures 10″ x 10″.
- The blanket calls for a total of 35 squares.
- Finished measurements are 70″ x 50″ before adding a border.
- Final measurements will vary slightly depending on border choice.
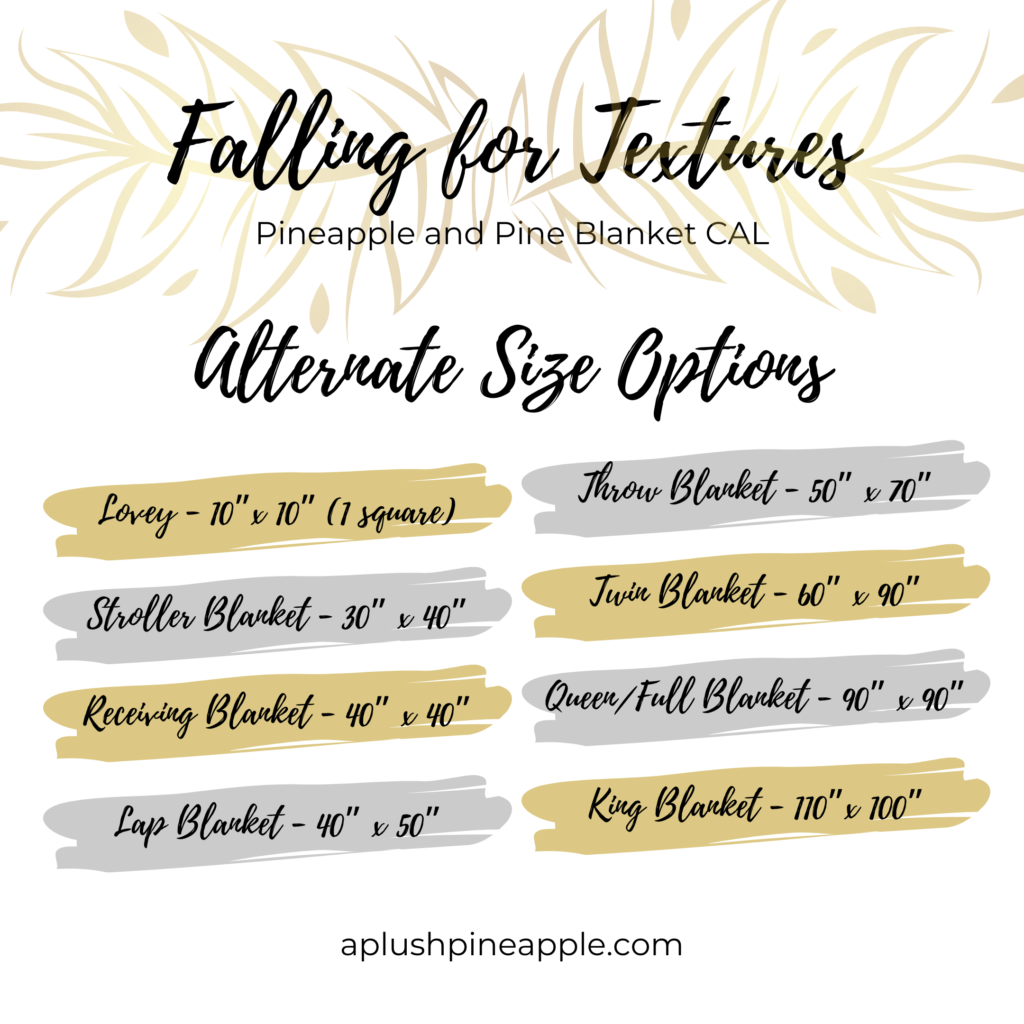
- If you would like to make a different size during this free blanket crochet along, feel free to use the chart below as a guide!
About the CAL
This month, we have teamed up with three other designers for a total of five amazing designers on the team! Each designer has three different square patterns for you including a low texture, medium texture, and high texture square design. On each designer’s respective host week, you will be able to get the pattern for her low texture square on Monday, her medium texture pattern on Wednesday, and her high texture square on Friday.
In order to replicate the blanket that we made, you will need to make four of each of the low texture squares, two of each of the medium texture squares, and one of each of the high texture squares. This count will give you a blanket that is five squares wide by seven squares long and measures approximately 70″ x 50″ (before adding a border). It’s a perfect size for a snuggly throw blanket!
You many also choose to mix and match squares to make your own custom size blanket using the chart above!
If find that you are too impatient and want to work ahead on your blanket, you can purchase the entire PDF bundle at a discount of 50% off by tapping the link below! The bundle includes FIFTEEN square patterns, and you get the download immediately after checkout!
Be sure to post your progress in our Facebook group so we can track everyone’s beautiful blankets!
Week One
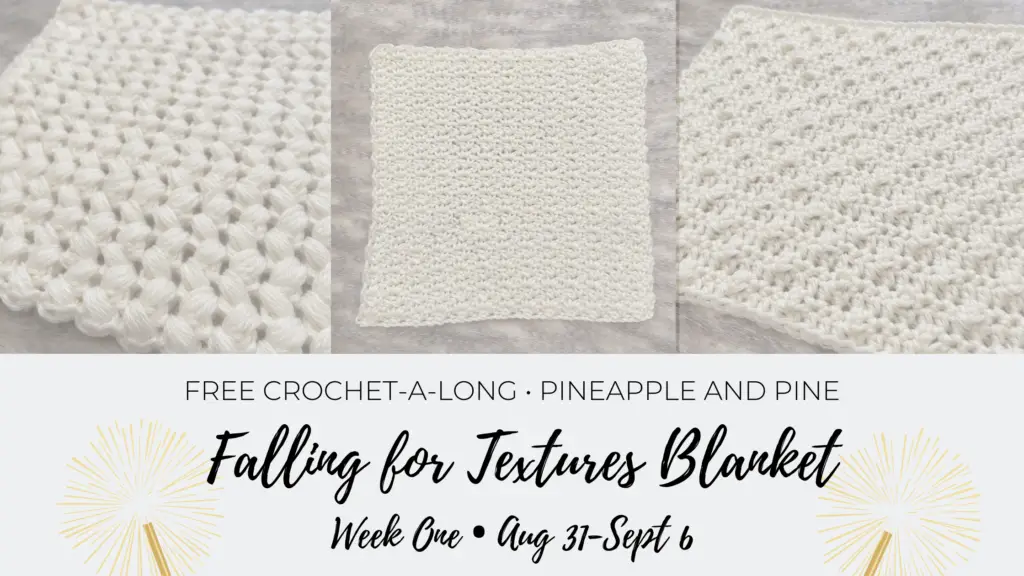
Week One is finally here! It’s launch week! We are so excited to get the ball rolling on the free blanket crochet CAL. This week you will find the square designs that Kelsie of Crafting for Weeks contributed to this CAL. Her squares are really beautiful with stunning, eye-catching texture and fun techniques to play with.
The low texture square releases on Monday, August 31. The medium texture square releases on Wednesday, September 2, and the high texture square releases on Friday, September 4. Just tap/click the link below to find the free version of these squares.
Week Two

Wow, Week Two already? It’s been a blast so far! This week’s squares are brought to you by Claire of Bear Rye Crochet. She has designed some pretty stunning squares for you with great contrast between the stitch definition in all three squares.
The low texture square pattern releases on Monday, September 7. The medium texture square releases on Wednesday, September 9, and the high texture square releases on Friday, September 11.
We have truly enjoyed seeing everyone’s progress photos on the blanket squares thus far. Remember, in order to recreate the blanket that we made, you need to crochet four of each low texture square, two of each medium texture square, and one of each high texture square. But, of course, you can change it up however you’d like!
Week Three
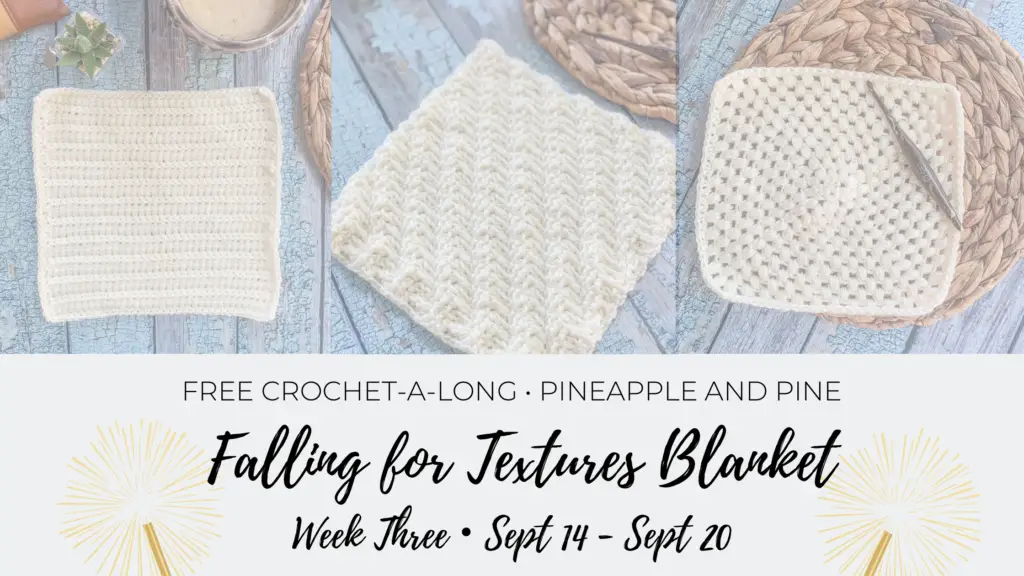
We are almost to the halfway point, and it has been so exciting to see all of the different squares being made in the Facebook group!
This week, our free blanket crochet square patterns have been designed by Emily of Hooked Hazel. Her squares definitely exude drool-worthy texture, and you are not going to want to miss out on making these beauties!
The low texture square releases on Monday, September 14. The medium texture square releases on Wednesday, September 16, and the high texture square will go live on Friday, September 18.
Be sure to bookmark this page, so you don’t miss out on any of the releases!
Week Four
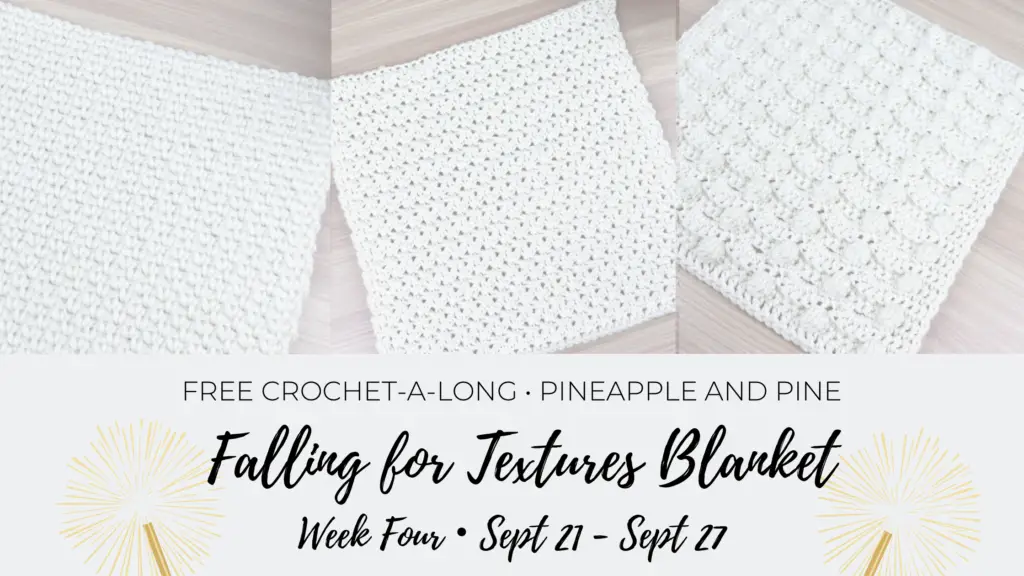
We can’t believe how fast this CAL is flying by! Week Four?!? Whaaat?!
This week’s lovely squares were designed by Rachel of Cozy Nooks Designs, and it’s another amazing lineup of squares! If you love texture, then you are sure to love the high texture square, and the low and medium texture squares don’t disappoint either!
Here is the schedule for releases this week:
- Low Texture – Monday, September 21
- Medium Texture – Wednesday, September 23
- High Texture – Friday, September 25
Remember, you need to make four of the low texture squares, two of the medium texture squares, and one high texture square to recreate the blanket that we made…OR…you may choose to mix, match, and choose your own using the sizing chart at the top of this post!
Week Five
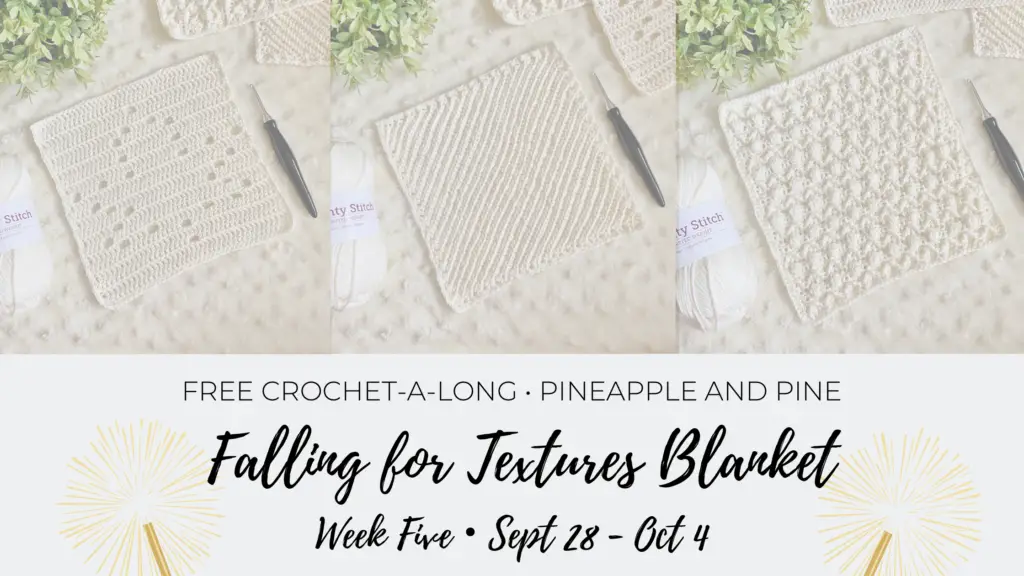
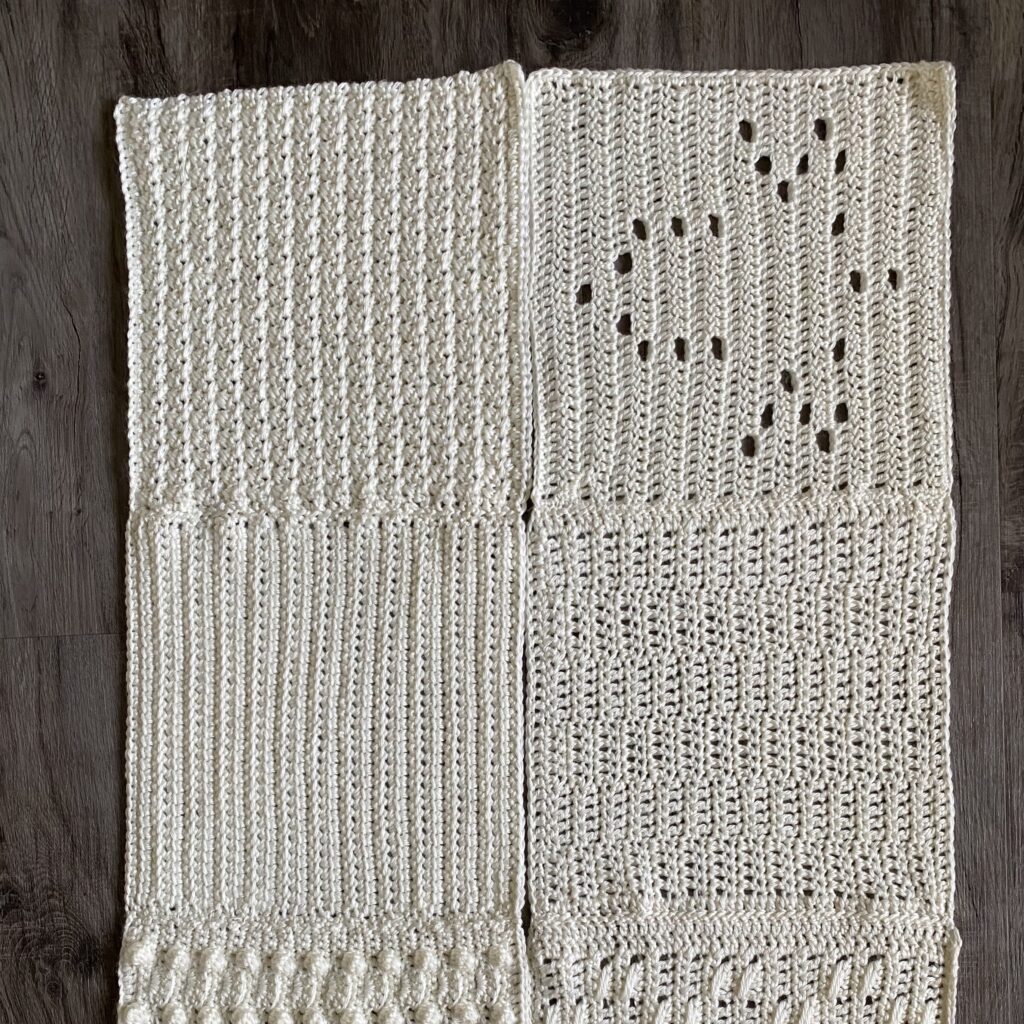
Hooray! It’s finally time for…*drum roll*…Week Five of the free blanket crochet-a-long! And it’s my turn to host the square patterns! I have been so excited waiting for my host week, and I am thrilled to now share with all of you the squares that I designed for the Falling for Textures Blanket CAL plus a few extra finishing goodies!
Here is the release schedule for this week:
- Low Texture Square – Monday, September 28
- Medium Texture Square – Tuesday, September 29
- High Texture Square – Wednesday, September 30
- Seaming – Thursday, September 31
- Border – Friday, October 1
We will be making our last squares for the free blanket crochet-a-long this week and adding the finishing touches to our blankets. Remember, you can still purchase the ad-free, printer-friendly PDF bundle of all FIFTEEN square patterns at a discount of 50% off!
If you’d rather follow along on the blog, that’s ok too. So without further ado, let’s dive into our final week of the blanket CAL!
Abbreviations
- BLO – Back loop only
- Bobble – Bobble stitch
- CH – Chain
- DC – Double crochet
- FO – Finish off
- FPTR – Front post treble
- FPTR2tog – Front post treble two together
- HDC – Half double crochet
- SC – Single crochet
- SC INC – Single crochet increase (2 SC in one stitch)
- SC2tog – Single crochet decrease (SC two stitches together)
- SK – Skip
- SL ST – Slip stitch
- YO – Yarn over
Gauge
- Leaf Filet Square: 4″ x 4″ = 16 DC x 9 rows
- Kelsi Square: 4″ x 4″ = 18 SC BLO x 18 rows
- Diamonds & Bobbles Square: 4″ x 4″ = First 17 stitches x rows 1-11 of the pattern
Notes
- The Leaf Filet Square is worked flat back and forth in rows using a filet crochet graph. If you are not familiar with filet crochet, a brief description can be found below under the special stitches section.
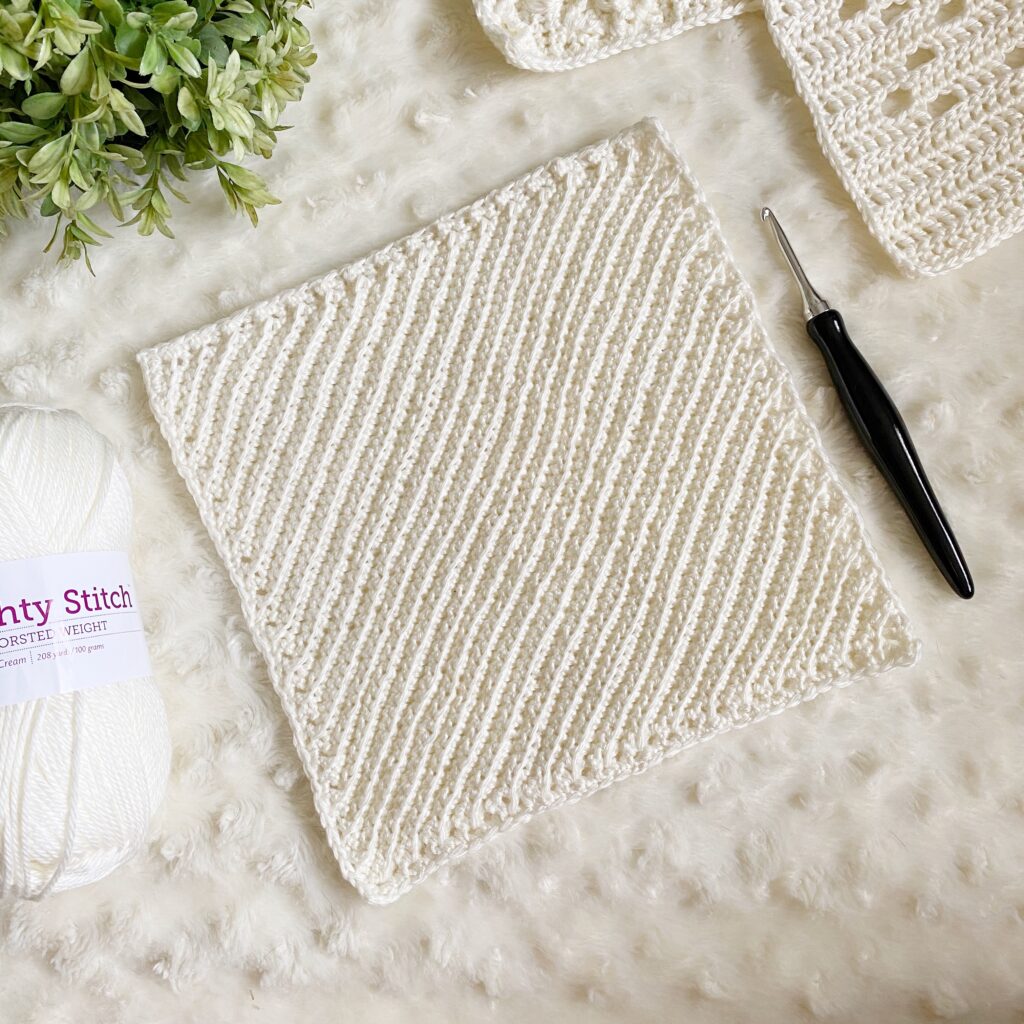
- The Kelsi Square is worked flat back and forth in rows from corner to corner in BLO to achieve a diagonal texture. When this square is complete, it will be more of a parallelogram (slanted square) than a true square. Square must be blocked to achieve desired results.
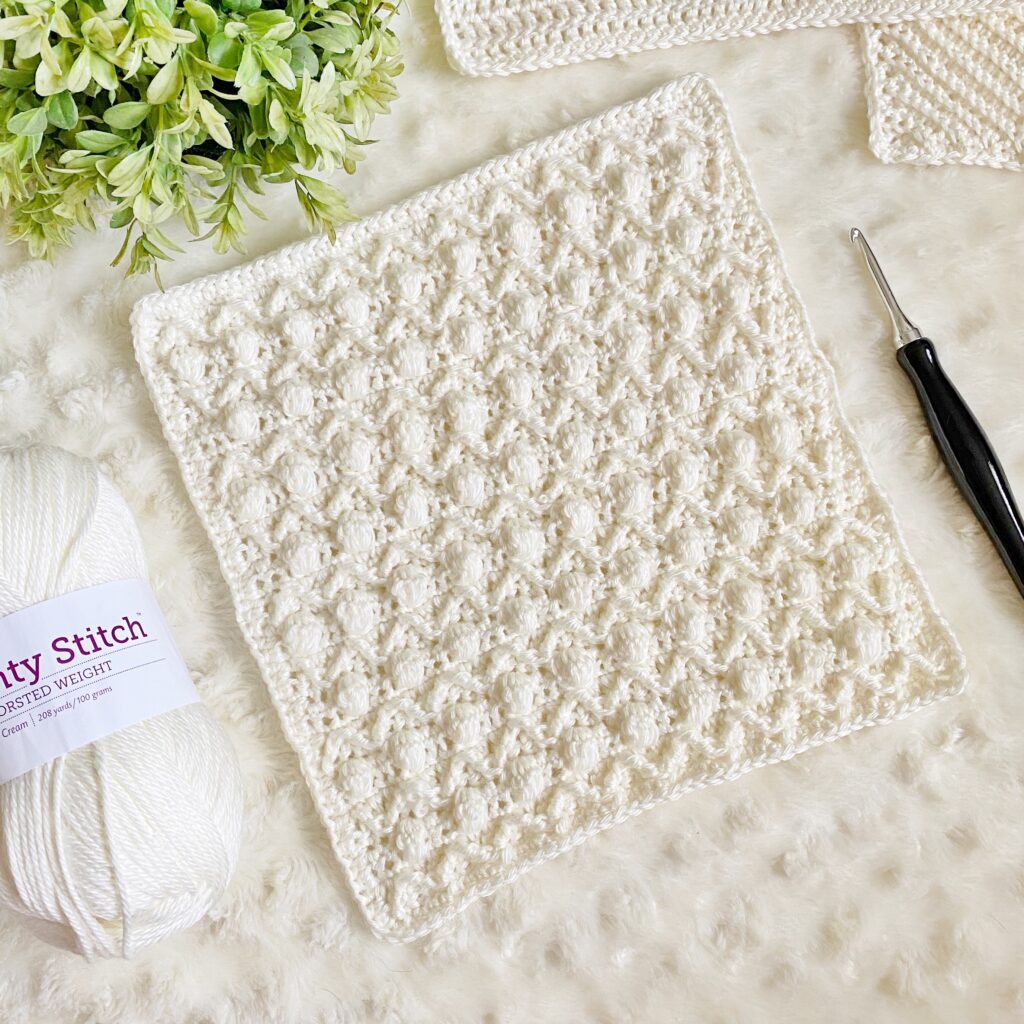
- The Diamonds & Bobbles Square is worked flat back and forth in rows. Each diamonds row consists of a set up row and a cable row. The bobble rows and diamond rows alternate until desired height is reached.
- The bobble stitch used in this pattern is a variation using five YOs instead of four. There should be 6 loops on the hook before completing the stitch. This is explained in the special stitches section.
- Use a US 7/4.50mm crochet hook
- Approximate Yardage:
| Square | Yardage |
| Leaf Filet Square | 104 |
| Kelsi Square | 137 |
| Diamonds & Bobbles Square | 156 |
- Finished measurement is approximately 10” x 10”. Blocking is necessary to achieve exact measurements.
- Beginning chains DO NOT count as a stitch.
- If you have any difficulty completing this project and would like support, please email me at aplushpineapple@gmail.com.
Special Stitches
Filet Crochet
- Filet crochet consists of “blocks” of 4 DC. Each block on a graph represents 4 DC.
- Two side-by-side blocks share the connecting wall. To calculate how many DC are needed for a row, count the number of blocks, multiply by three, and add one. #blocks x 3 + 1=row count
- One block = 4 DC
- Two blocks = 7 DC
- Three blocks = 10 DC
Essentially when reading the graph, each wall of a block represents 1 DC and each space between represents 2 DC or a [CH 2, SK 2] (if creating a space).
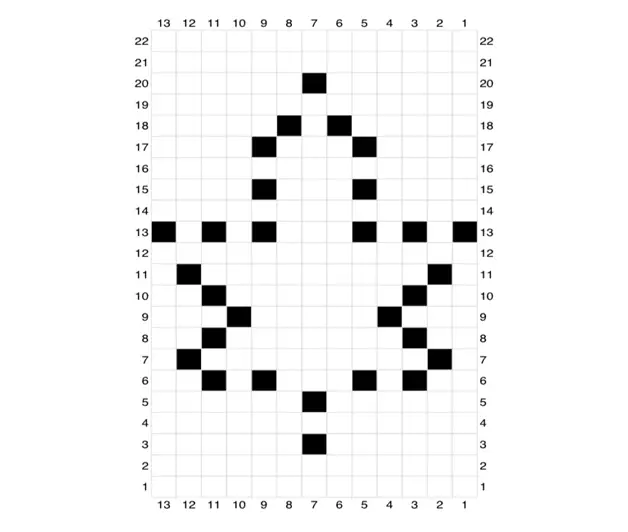
- The graph we will use consists of 13 blocks across which equals 40 DC.
- Each darkened block on the graph represents a DC, CH 2, SK 2, DC. The CH 2, SK 2 creates an opening or hole in the work that when worked in sequence according to the graph creates a pattern or design in the finished project.
- Written line-by-line instructions are also included if this method is preferred over reading a graph.
BLO Corner-to-corner
- The Kelsi square is worked from corner to corner in BLO to achieve a diagonal ribbing texture.
- The pattern begins with an increase section to build the width of the square.
- Once the width is reached, a decrease section is worked to complete the square. No height or width is achieved in this section. It merely fills in the remaining triangular section.
Diamonds & Bobbles
- This square consists of alternating Diamond Trellis stitch and Bobble stitch.
- Bobble stitch is worked as follows:
- YO, insert hook into desired stitch and pull up a loop (3 loops on hook).
- YO, pull through two loops (2 loops on hook).
- Repeat the previous two bullets into the same stitch until there are SIX loops on the hook.
- YO, pull though all six loops.
- Diamond Trellis stitch consists of a set up row and a cable row. The cable row uses FPTR and FPTR2tog to create a zig zag texture. A thorough video tutorial for working this stitch can be found below.
Leaf Filet Square Pattern

Pattern (line-by-line)
Row 1: CH 42, working in the back bump of the CH, DC in 3rd CH from hook and in every CH across. (40)
Row 2: CH 2, turn, DC in each stitch across. (40)
Row 3: CH 2, turn, DC 19, CH 2, SK 2, DC 19. (38)
Row 4: Repeat Row 2.
Row 5: Repeat Row 3.
Row 6: CH 2, turn, DC 7, *CH 2, SK 2, DC 4, CH 2, SK 2*, DC 10, repeat from * to * until 7 stitches remain, DC 7. (32)
Row 7: CH 2, turn, DC 4, CH 2, SK 2, DC 28, CH 2, SK 2, DC 4. (36)
Row 8: CH 2, turn, DC 7, CH 2, SK 2, DC 22, CH 2, SK 2, DC 7. (36)
Row 9: CH 2, turn, DC 10, CH 2, SK 2, DC 16, CH 2, SK 2, DC 10. (36)
Row 10: Repeat Row 8.
Row 11: Repeat Row 7.
Row 12: Repeat Row 2.
Row 13: CH 2, turn, DC, [CH 2, SK 2, DC 4] 2x, CH 2, SK 2, DC 10, [CH 2, SK 2, DC 4] 2x, CH 2, SK 2, DC. (28)
Row 14: Repeat Row 2.
Row 15: CH 2, turn, DC 13, CH 2, SK 2, DC 10, CH 2, SK 2, DC 13. (36)
Row 16: Repeat Row 2.
Row 17: Repeat Row 15.
Row 18: CH 2, turn, DC 16, CH 2, SK 2, DC 4, CH 2, SK 2, DC 16. (36)
Row 19: Repeat Row 2.
Row 20: Repeat Row 3.
Row 21-22: Repeat Row 2.
Piece should measure approximately 9 ½” x 9 ½”. Do not FO.
Border: CH 1, do not turn, begin working down the left edge of the square. Place 2 SC in the side of each DC row (43), [SC, CH 1, SC] in the corner, SC across the bottom edge (38), [SC, CH 1, SC] in the corner, place 2 SC in the side of each DC row (42), [SC, CH 1, SC] in the corner, SC across the top (39), CH 1, join to first SC with a SL ST.
Leave a long tail for seaming, cut yarn, FO.
Graph
Read graph from bottom to top, right to left.
Kelsi Square
Increase Rows
Row 1: CH 4, working in the back bump of the CH, SC in 2nd CH from hook and in every CH across. (3)
Row 2: CH 1, turn, working in BLO for the remainder of the project, SC INC in first stitch, SC in next stitch, SC INC in last stitch. (5)
Row 3: CH 1, turn, SC in first stitch, SC INC in next stitch, SC across until two stitches remain, SC INC in second-to-last stitch, SC in last stitch. (7)
Row 4-33: Repeat Row 3 increasing two stitches per row. Row 33 should have 67 stitches.
Decrease Rows
Row 34: CH 1, turn, SC in first stitch, SC2tog, SC across until 3 stitches remain, SC2tog, SC. (65)
Row 35-64: Repeat previous row decreasing two stitches on every row. Row 64 should have 5 stitches.
Row 65: CH 1, turn, SC2tog, SC, SC2tog. (3)
Piece should measure approximately 9 ½” x 9 ½”. Do not FO.
Border: CH 1, do not turn, begin working down the left edge of the square. Place a SC in the side of each row (31), [SC, CH 1, SC] in the corner, SC across the bottom edge (31), [SC, CH 1, SC] in the corner, place a SC in the side of each row (31), [SC, CH 1, SC] in the corner, SC across the top (30), CH 1, join to first SC with a SL ST.
Leave a long tail for seaming, cut yarn, FO.
Diamonds & Bobbles
Row 1: CH 42, working in the back bump of the CH, SC in 2nd CH from hook and in every CH across. (41)
Row 2: CH 2, turn, DC in each stitch across. (41)
Row 3: CH 1, turn, FPTR around the 2nd SC post from Row 1, *on main row, SK 1, SC 3, FPTR2tog by working a FPTR back around the last SC post worked from Row 1, DO NOT pull through the last two loops, SK 3 SC on Row 1, FPTR around next SC post from Row 1 and complete the stitch*, repeat from * to * until 5 stitches remain on main row, SK 1, SC 3, begin FPTR back around the last SC post worked from Row 1, do not pull through the last two loops, SC in last stitch. (20 FPTR, 31 SC)
Row 4: CH 1, turn, HDC in same stitch as CH and in the next stitch, *Bobble, HDC 3*, repeat from * to * until two stitches remain, HDC 2. (10 Bobbles, 31 HDC)
Row 5: CH 1, turn, SC in every stitch across. (41)
Row 6: Repeat Row 2.
Row 7: CH 1, turn, SC 2, *FPTR2tog by working a FPTR around the last TR post from Row 3, DO NOT pull through the last two loops, FPTR around next TR post from Row 3 and complete the stitch, on main row, SK 1, SC 3*, repeat from * to * until 3 stitches remain on main row, SK 1, SC 2. (20 FPTR, 31 SC)
Row 8: CH 1, turn, HDC in same stitch as CH and in the next 3, *Bobble, HDC 3*, repeat from * to * until four stitches remain, HDC 4. (9 Bobbles, 32 HDC)
Row 9: Repeat Row 5.
Row 10-35 : Repeat Rows 2-9 ending on a Row 3.
Row 36: Repeat Row 5.
Piece should measure approximately 9 ½” x 9 ½”. Do not FO.
Border: CH 1, begin working down the left side of the square, *place a HDC in the end of each SC or Bobble row, place 2 HDC in the end of each cable row (35), [HDC, CH 1, HDC] in the corner*, HDC across the bottom (39), [HDC, CH 1, HDC] in the corner, repeat from * to * (39), HDC across the top (40), CH 1, join to first HDC with a SL ST. Leave a long tail for seaming, cut yarn, FO.
Blocking

The next step of our free blanket crochet along is blocking. Before seaming your squares, be sure they are all blocked to 10″ x 10″. If they are not the right measurements, your blanket seams and edges will not be straight. There are a couple of methods that you can use to block your squares.
Steam Blocking
I used the steam-blocking method on our squares. To steam block, you will need to pin your squares to 10″ x 10″ on a blocking mat and then use the steam setting on your iron to apply steam to the square. DO NOT touch the iron to acrylic yarn, or you will ruin the finish of the yarn and possibly melt it. I hovered the iron approximately 2-3 inches over the square in sections for about 10 seconds each section. When the square is fully dry, unpin it from the mat.
Wet Blocking
To wet block your squares, fill a large bowl, bin, or the kitchen sink with warm water. Gently soak the square until it is saturated. Do not agitate or apply any friction to the square. Remove the square from the water and press the water out by folding and applying pressure. Do not wring the square. To remove more excess water, lay the square in a towel, roll the towel and square up together, and press the roll. The goal is to get the square wet without excess water dripping from it. When the square is free of excess water, pin it to 10″ x 10″ on a blocking mat and allow to air dry. When the square is fully dry, unpin it from the mat.
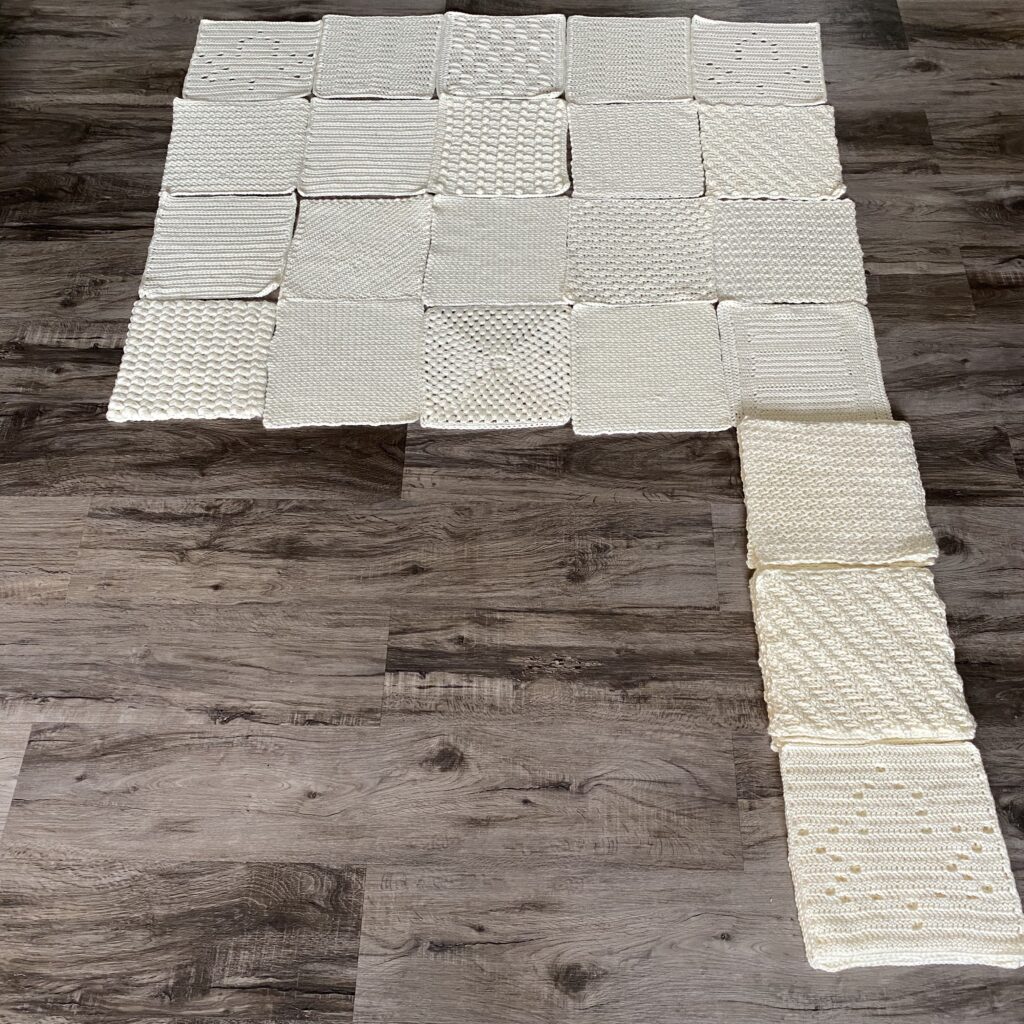
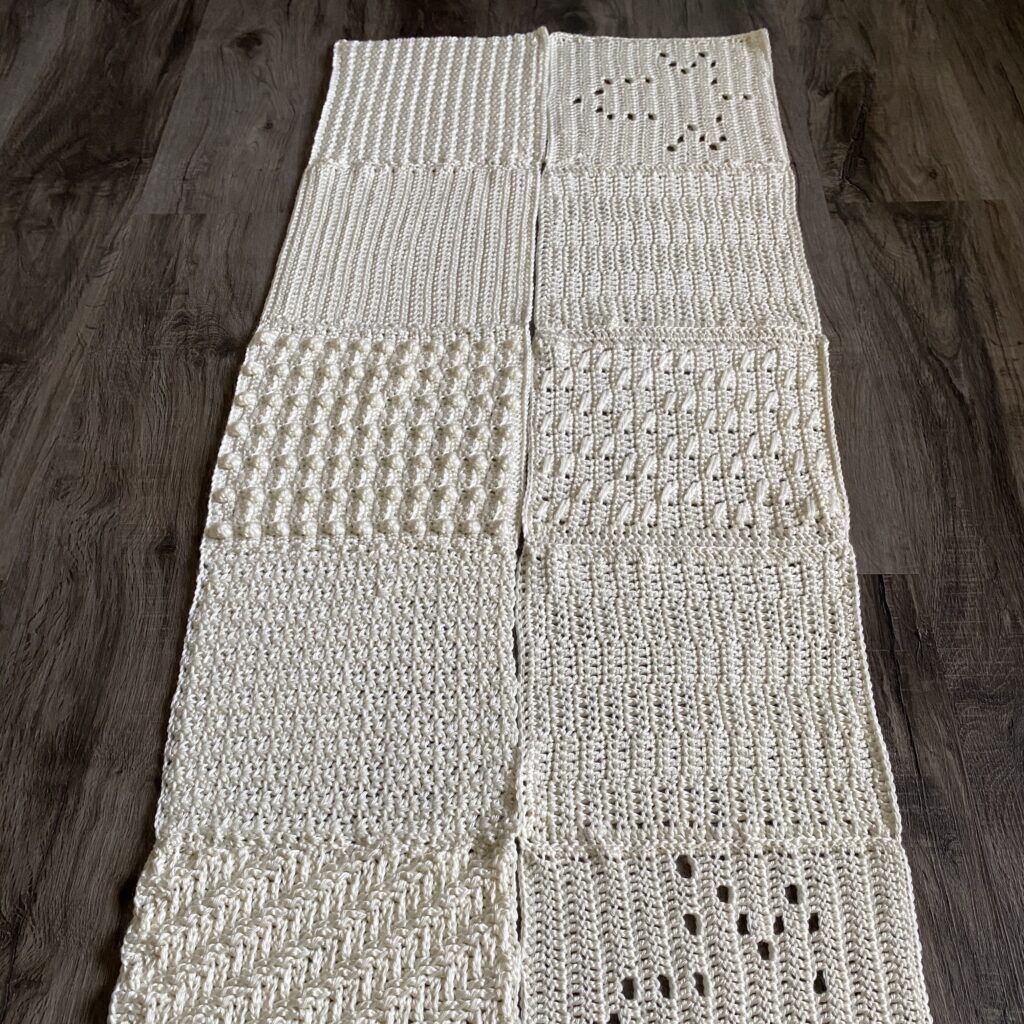
Layout

After your squares are all blocked, you need to decide what your layout will be. You can use our free blanket crochet diagram below, or you can come up with your own arrangement. This is one of my favorite parts of the blanket-making process so definitely don’t rush it. Take you time playing with layouts and make sure the finished blanket looks exactly the way you want it to. The last thing you want is to be unhappy with the final result after all of the hard work you’ve put into making it.
Layout Graph
| PP 1 | BR 1 | BR 2 | BR 1 | PP 1 |
| CN 2 | HH 1 | CN 3 | CW 1 | HH 2 |
| HH 1 | PP 2 | CN 1 | CW 2 | CW 1 |
| CW 3 | CN 1 | HH 3 | CN 1 | BR 3 |
| CW 1 | CW 2 | CN 1 | PP 2 | HH 1 |
| HH 2 | CW 1 | PP 3 | HH 1 | CN 2 |
| PP 1 | BR 1 | BR 2 | BR 1 | PP 1 |
Graph Legend
- Bear Rye Crochet Square – BR
- Cozy Nooks Designs Square – CN
- Crafting for Weeks Square – CW
- Hooked Hazel Square – HH
- A Plush Pineapple Square – PP
- Numbers indicate texture level: 1-low, 2-medium, 3-high
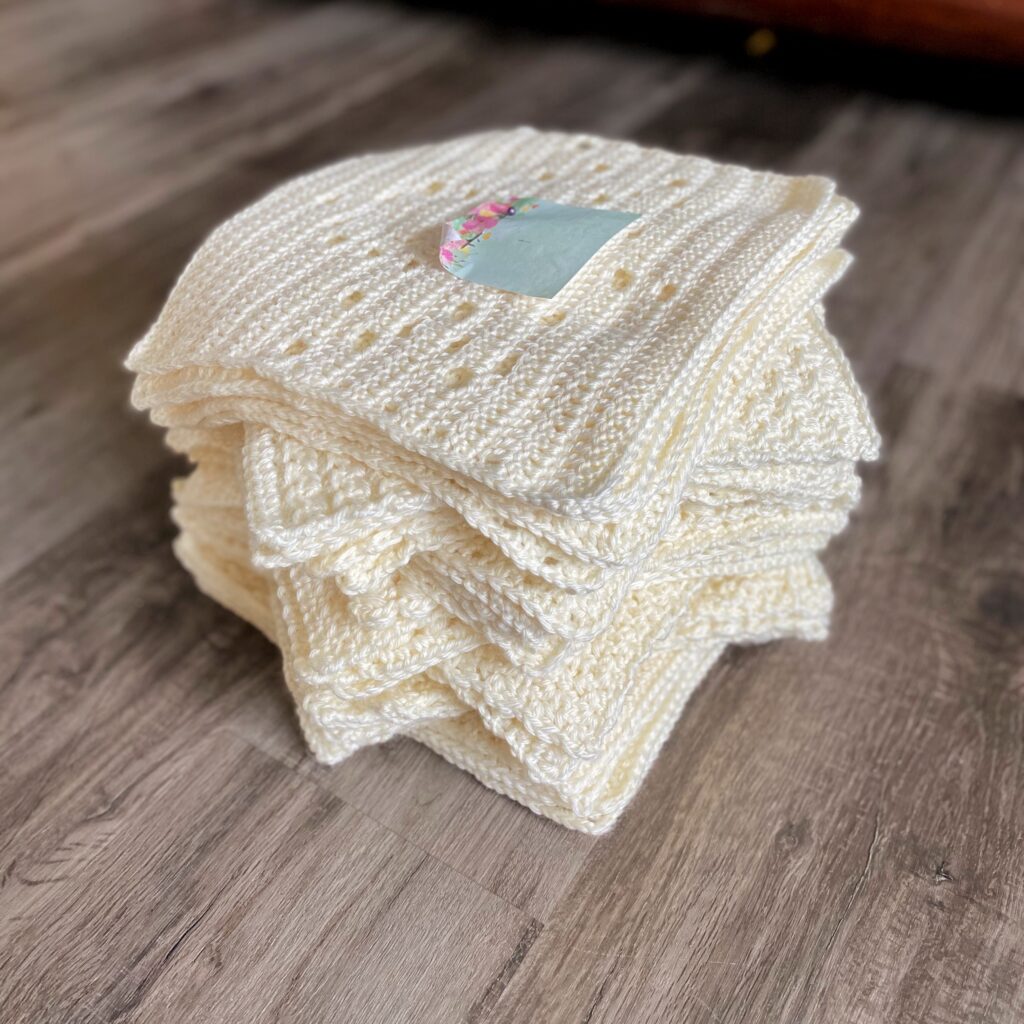
After you have decided on a layout, TAKE A PICTURE of the layout. This is very important as you will reference it several times while seaming. Next, you will want to stack up your squares in the order they need to be seamed. Stack the squares up by row beginning with the square at the far left of the row. Place the first one on top of the next one, then those two on top of the third one, and so on down the row until they are all neatly stacked. Use a post-it note and a straight pin to number each row.
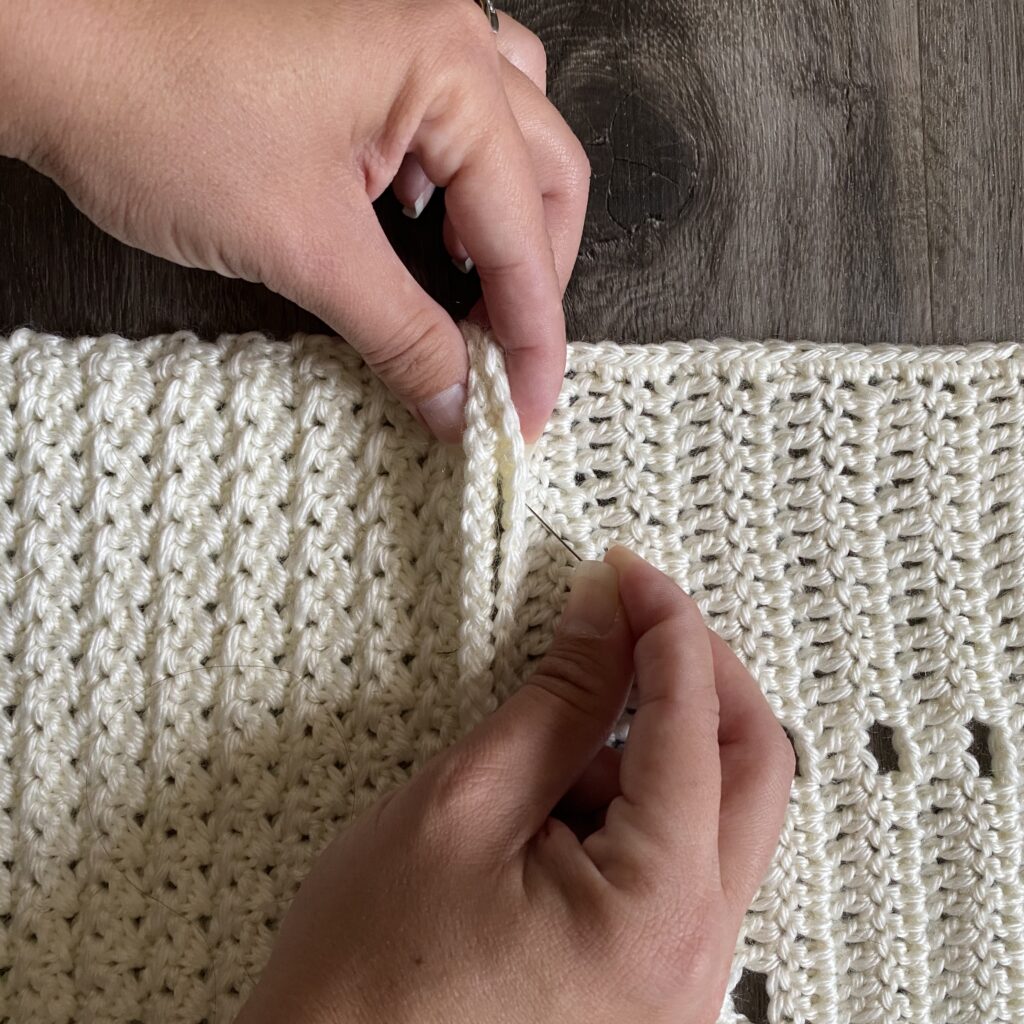
Seaming
Seaming is a tricky process. When you are seaming squares that have a different number of stitches on each side, it can be difficult to get the edges and corners to line up if you aren’t careful. Use the following video tutorial for seaming your blanket squares to ensure that the edges line up.
Seam the squares one row at time being sure to keep them in the order that you stacked them in and facing the correct direction. Reference the picture that you took of the layout EACH time you begin to seam two new squares to be sure they are the correct squares and facing the correct direction. A few seconds to check your work here can save you hours of ripping seams out down the road.
Once you have each row seamed, you will begin the process of seaming the rows. You will do this much the same way that you did the individual squares by using straight pins as your guide.


Continue seaming rows until all the rows are seamed. Now you are in the homestretch! All that is left in this free blanket crochet along is adding a border, and your blanket is DONE!
Camel Stitch Border
Now, we are on the last step of this free blanket crochet along! The finishing touch and crowning moment of any crochet blanket is…THE BORDER!
Of course the sky is the limit with border options, but in this post, we will share the pattern for the border that we chose to add. We chose a border that had some texture but did not compete with the texture of the blanket squares. It frames the blanket nicely to complement the other textures while adding a cohesive element and a finished look!
We chose to use a camel stitch border. If you are unfamiliar with the camel stitch (also known as working in the third loop), you can reference this tutorial.
Border Pattern
Begin by joining yarn with a SL ST to one of the four corners of the blanket.
Row 1: CH 1, work HDC evenly around all four sides of the blanket. On the squares with no border, place 1 HDC in each SC or HDC row, and 2 HDC in each DC row. If there is a border, simply place a HDC in each stitch. In each corner, work a [HDC, CH 2, HDC]. Join to first HDC with a SL ST.
Row 2: CH 1, working in the third loop, HDC in each stitch around. When you get to a corner, work a [HDC, CH 2, HDC] in the CH 2 space. Join to first HDC with a SL ST.
Row 3-5: Repeat Row 2.
Cut yarn. FO. Weave in all ends … and YOU’RE DONE!
Wow! What an accomplishment! Finishing a crochet blanket is one of the most rewarding experiences to be had in this craft. We hope you have enjoyed this free blanket crochet-a-long! Be sure you are signed up for our newsletter for future CALs and take the time to join the Facebook group so you can share your progress with others!


[…] Week 5 September 28 – October 4 at A Plush Pineapple […]
[…] That’s it! I hope that you enjoyed these patterns! These squares are a collaboration with the In Bloom Blanket CAL hosted by Claire of Bear Rye Crochet. Check out her website to get more information about this project and to see the other amazing squares in this collection! For more blanket patterns, check out my Pineapple Winter Square pattern and the Falling for Textures Blanket CAL! […]
I am having difficulty with the patterns my hooks are not the same as yours. I have to adjust. All the patterns so far. I am adjusting the patterns to get correct size I am a caregiver and do not have the time
I am sorry I am going to fall out of class I thought I had time but I am finding I don’t
Thank you I have enjoyed what I have done Bonnie
So sorry to hear that you have had difficulty. Due to the fact that all the squares are designed by a variety of different designers, fluctuations in gauge can occur. Checking your gauge before beginning a square to ensure you have the right hook size can expedite the process! Thanks for joining in!
[…] I have a lot of patterns and projects that I am working on this month that I hope to show everyone. I have plans to start the testing process for my Sweet Pea Wrap Top, a classic shirt that is functional for maternity and nursing wear. I am also working on a boxy crop pattern that requires velvet yarn that has been on my mind since last year. I hope to have at least one free pattern listed on my blog, which I think may be the Sweet Pea Swaddle. I am also participating in the Falling for Textures CAL hosted by @pineappleandpine in an effort to use up some of my stash yarn that is in eight different colorways even though it is all the same yarn. My blanket will probably turn out stroller sized, which will be perfect for our sweet Baby Girl who will be due just after the CAL ends. If you want to participate, the link to learn more about this CAL as well as to get access to all the patterns for free is here. […]