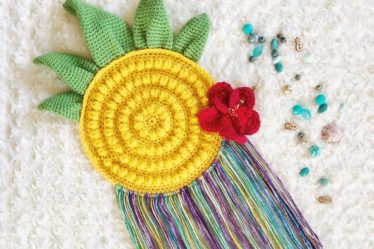
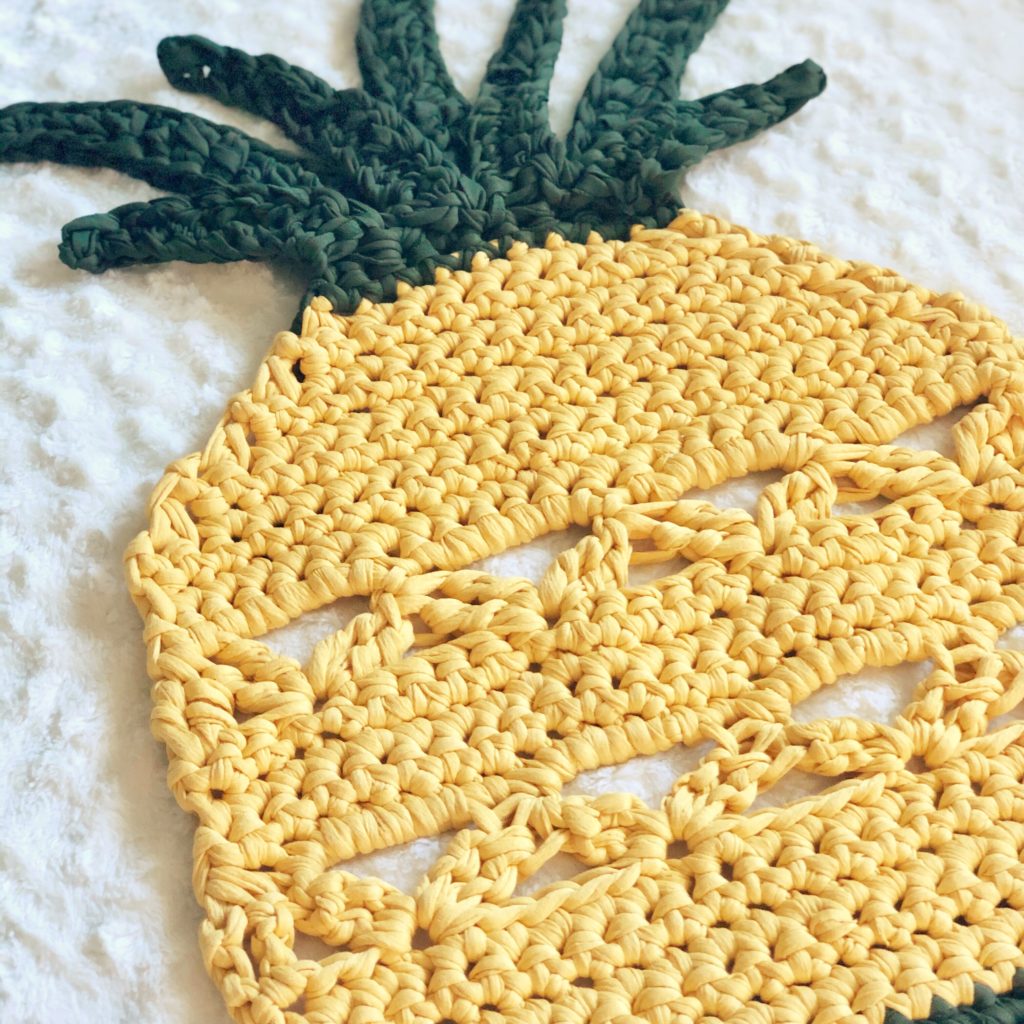
Crochet an awesome pineapple rug that can work as a kitchen sink rug, door mat, desk rug, shower mat, or decorate any floor space that you want to add some tropical vibes to!
“Sand under my feet, wind in my hair, salt on my skin…”
-Unknown
You may not be able to have sand under your feet, but this pineapple rug is the next best thing!
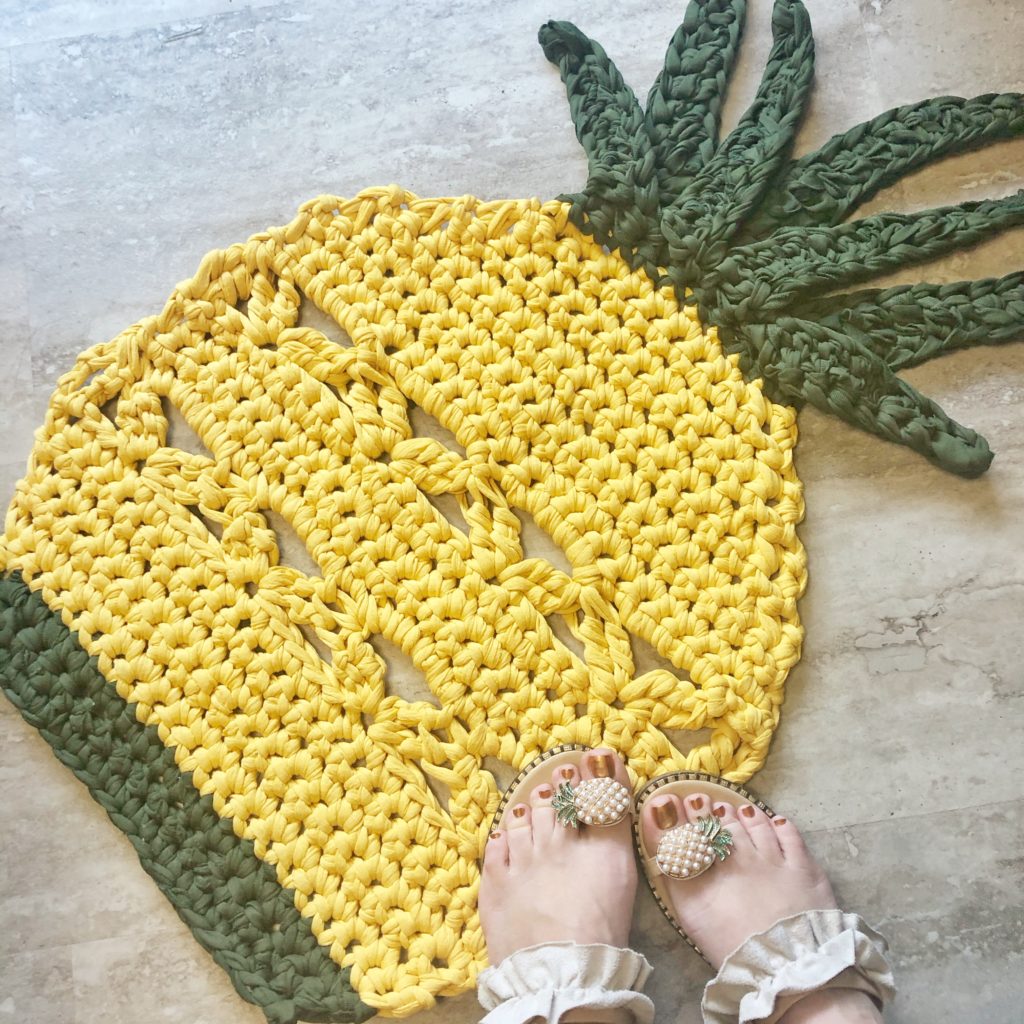
Do you ever just want to run away to a tropical location, not tell anyone, and live in a hut sipping out of a coconut on a beach somewhere for the rest of your life? Just me? C’mon. I know I’m not the only one! Since that can’t legitimately be our reality, we must settle for making things like this pineapple-y rug to sink our toes into while we imagine life in the tropics. Amiright??? Not only did making this rug give me all the pineapple vibes, but also provided near instant satisfaction because the chunky t-shirt yarn works up SO quickly!
Pineapple Vibes
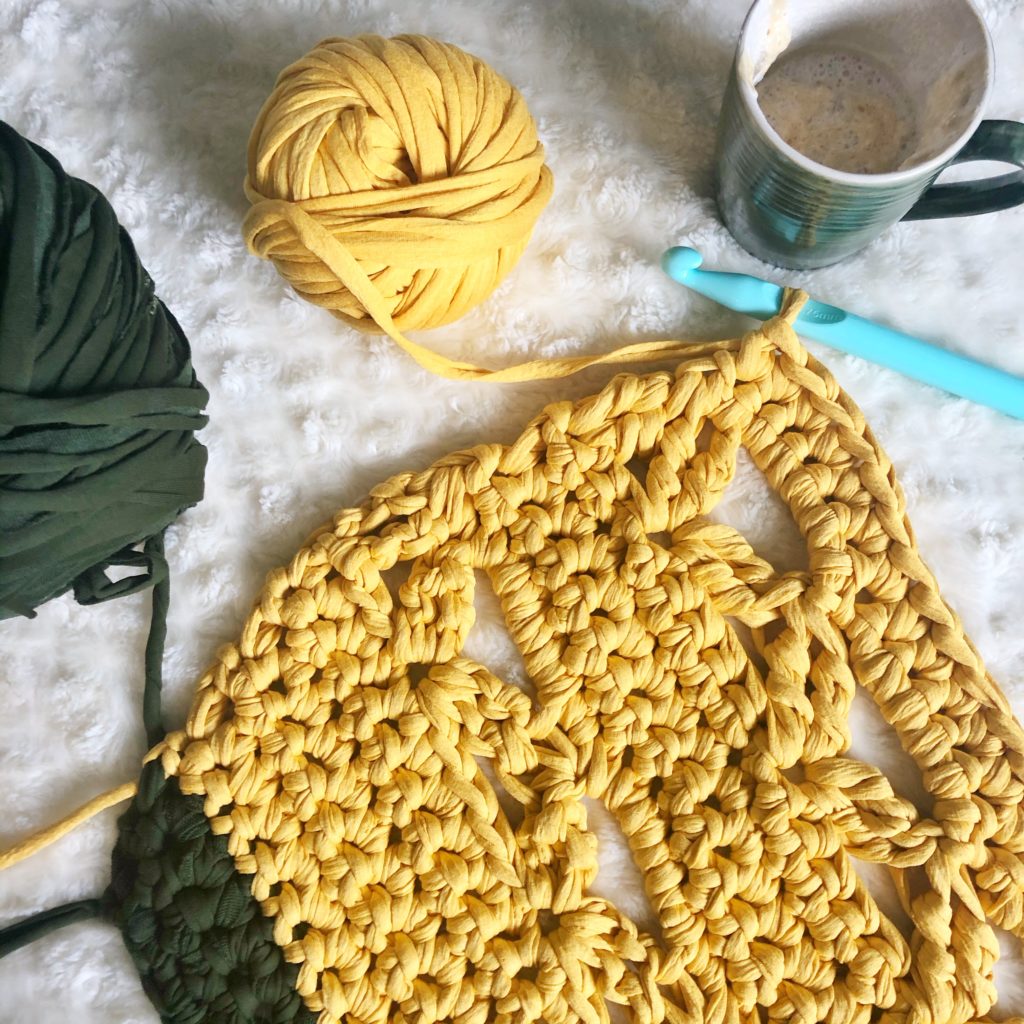
When Fox Yarn Co reached out to me and asked if I would design a project with their yarn, I was thrilled! It’s always exciting to be given the opportunity to collaborate with other designers, bloggers, and companies. I didn’t know exactly what I would design with their yarn because, to be honest, I did not have much experience working with t-shirt yarn, but I did know one thing. It. Would be. PINEAPPLE-Y! So I ordered the yellowest yellow and the greenest green I could find on their website. “Bring on the pineapple vibes,” was my only thought.
Quick and Easy Project
As I began working with this amazing yarn, I went through a bit of a learning curve. What hook size is best? What type of project is best? As a designer, I am used to just grabbing a hook size based off of experience with a design already in mind and twirling that hook. However, this project took a lot of trial and error. The amazing part was that even though I had to frog this design more times than I want to admit or even try to go back and count, it still worked up (designed up?) quickly because of the chunky yarn!
Many Uses
This rug would look amazing in so many scenarios! I can see it in a girl’s tropical-themed bedroom as a play rug, or at a kitchen sink in a pineapple kitchen. It could work as a back door mat, on a deck or patio, or as a shower rug. There are so many places you could use it to…
…bring the tropics into your home!
Skill Level – Intermediate
Materials
Disclaimer: This post contains affiliate links to the products used in this project. If you make a purchase through any of these links, we will get a small commission at no additional cost to you.
- T-shirt yarn in two colors
- Approximately 153 yards of MC and 75 yards of CC
- US Q17-15.75mm crochet hook
- Tapestry needle
- Scissors (Check out these pineapple scissors!)
Abbreviations
- CH – Chain
- DC – Double crochet
- HDC – Half double crochet
- SC – Single crochet
- SC DEC – Single crochet decrease
- SC INC – Single crochet increase
- SK – Skip
- SL ST – Slip stitch
- TR – Treble crochet
- TRGR – Treble crochet group
- TRGR2tog – Treble crochet group two together
- YO – Yarn over
Gauge
Gauge is not essential to this pattern.
Measurements
- Height (without leaves): 21”
- Height (including leaves): 34”
- Width (across body of pineapple): 19”
Notes
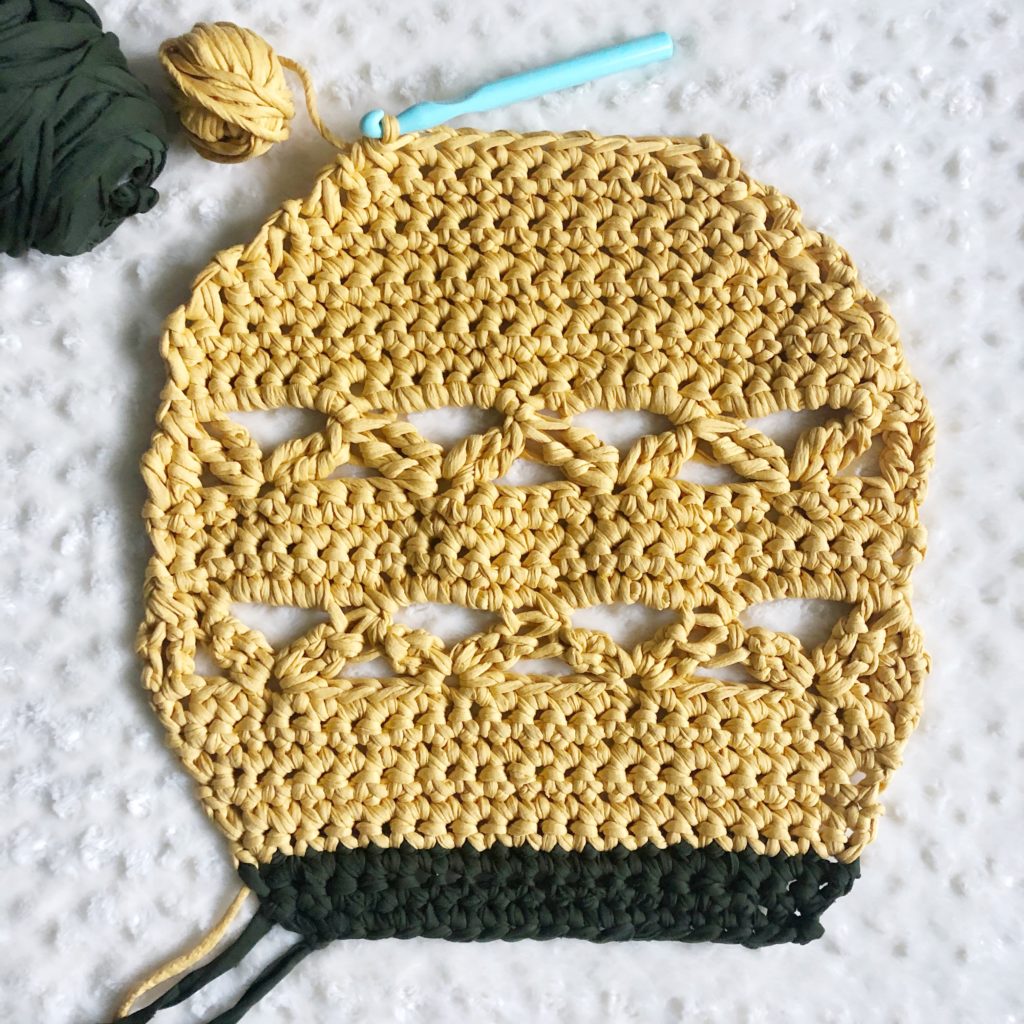
- This rug is worked from the bottom up back and forth in rows. After the body is complete, the leaves are made by working a series of chains upward from the top of the body and then working back down the chains and anchoring the leaves to the body.
- Beginning CHs do not count as a stitch unless otherwise noted.
- If you have any difficulty completing this project and would like support, please email me at theplushpineappleshop@gmail.com.
Special Stitches
- Treble Group (TRGR)
- YO 2x, insert hook into desired stitch and pull up a loop.
- YO, pull through two until two loops remain on the hook.
- YO 2x, insert hook back into the same stitch and pull up a loop.
- YO, pull through two until only one loop remains on the hook.
- Treble Group two together (TRGR2tog)
- Begin TRGR in desired stitch, but do not pull through the last two loops.
- SK designated amount of stitches and work another TRGR in the next stitch.
Pattern
Body
Begin with CC.
Row 1: CH 18, working in the back bump of the CH, SC in 2nd CH from hook and in each CH across. (17)

Row 2: CH 1, turn, SC INC, SC across to last stitch, SC INC. (19)
Row 3: CH 1, turn, SC in every stitch across. (19)
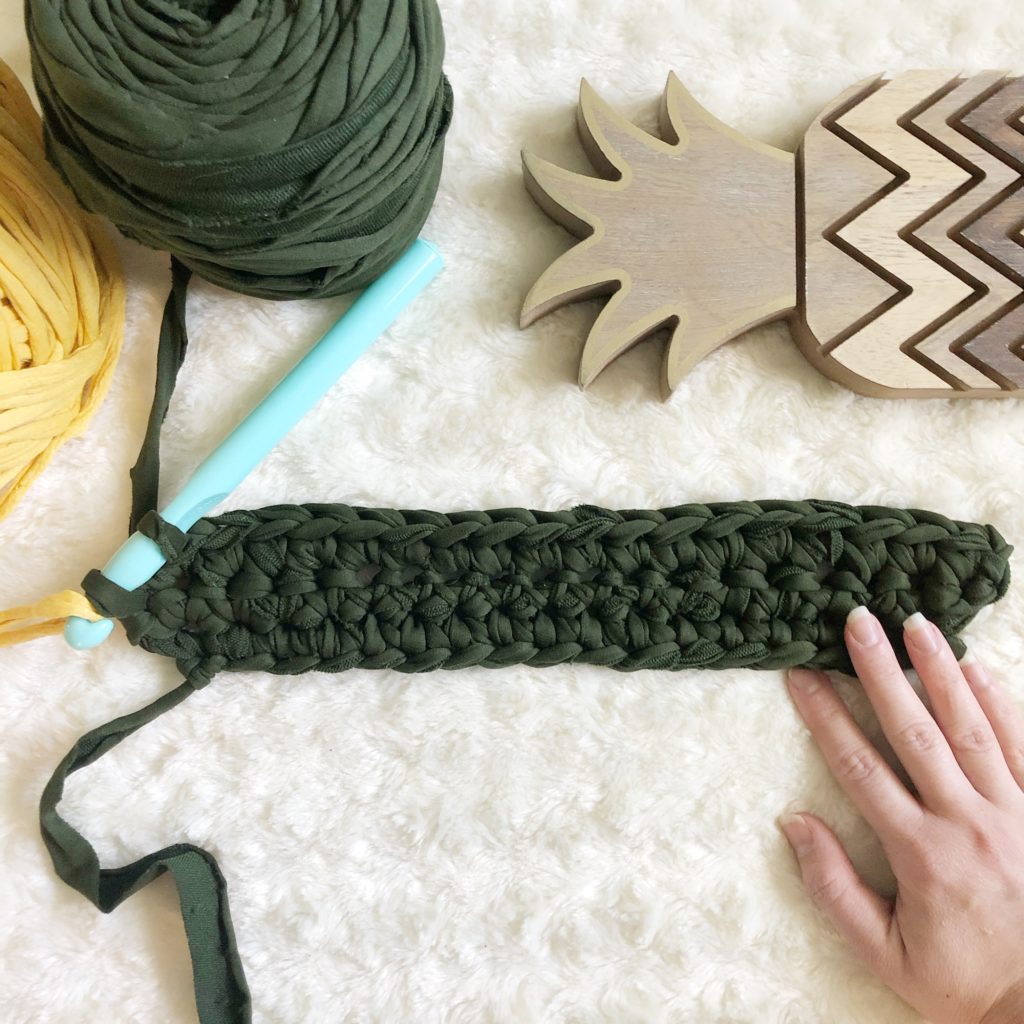
Change to MC.
Row 4-9: Repeat Rows 2 and 3 increasing two stitches on every even row. Row 9 should have 25 stitches.
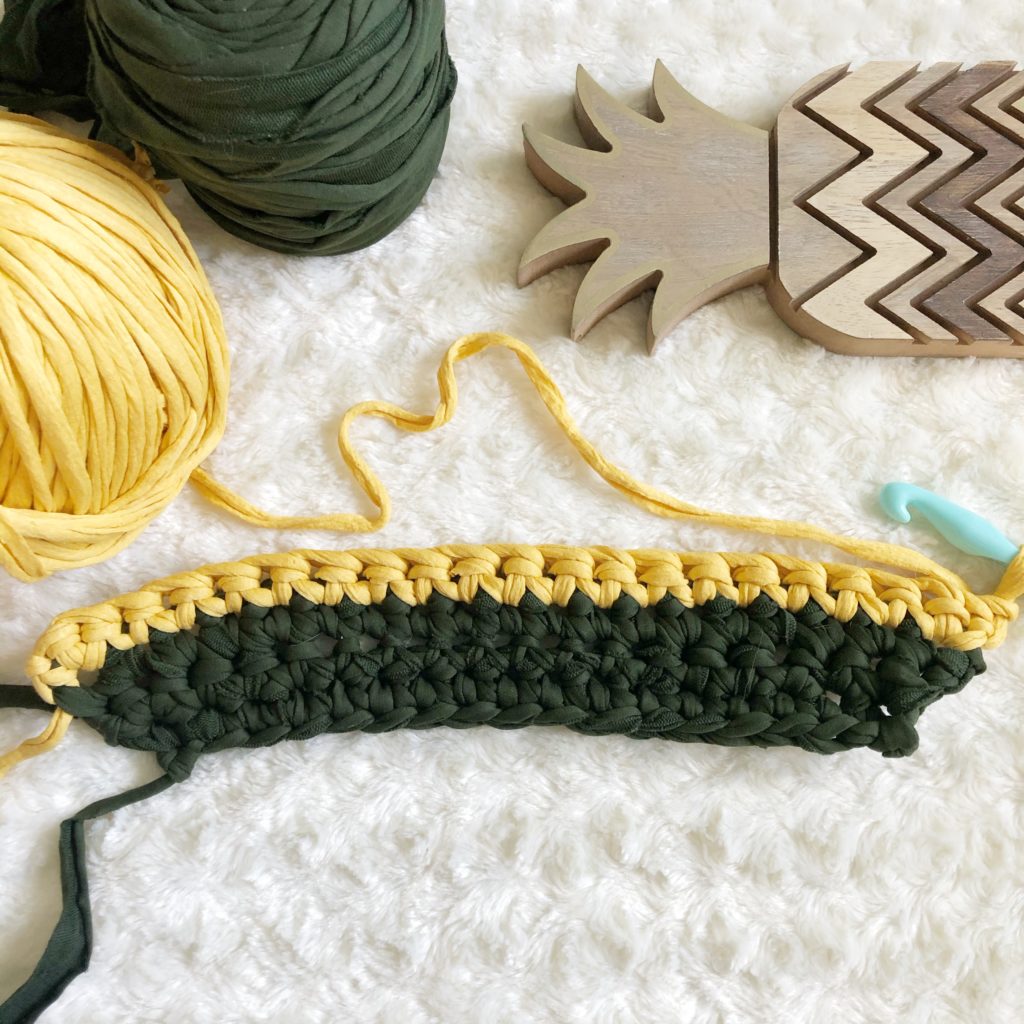
Row 10: CH 4 (counts as TR), turn, TR in same stitch as turning CH, SK 2, TRGR in next stitch, *CH 5, begin TRGR2tog in same stitch as last, SK 5, complete TRGR2tog in next stitch*, repeat from * to * until 3 stitches remain, CH 5, begin TRGR2tog in same stitch as last, SK 2, complete TRGR2tog in last stitch. (5 TRGR2tog clusters)
For Row 11, work the SC stitches in the space between the TR stitches in the 2nd TRGR of each cluster for a sturdier stitch.
Row 11: CH 1, turn, SC in first stitch, *5 SC in the CH 5 space, SC in the top of the TRGR2tog cluster*, repeat from * to * across to last CH 5 space, 5 SC in the CH 5 space, SC DEC over last two stitches. (25)
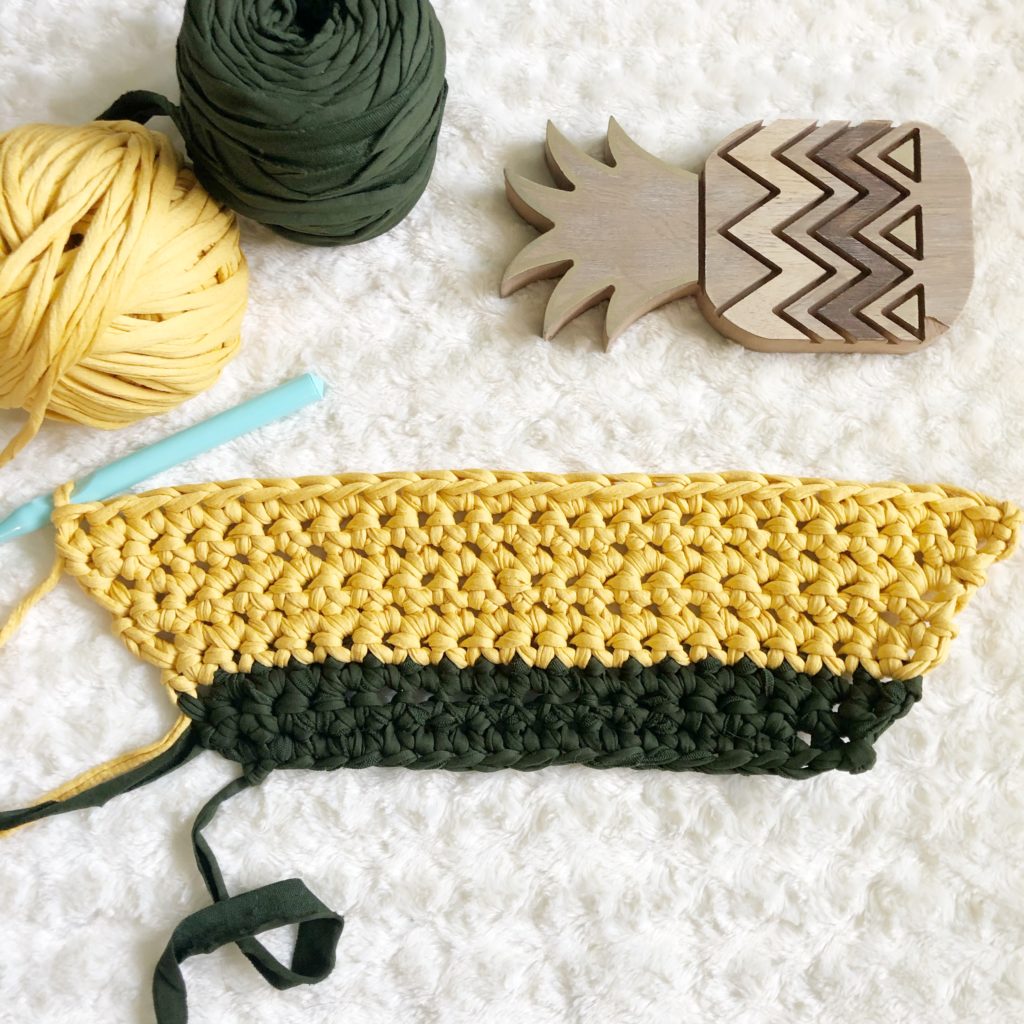
Row 12-14: CH 1, turn, SC in every stitch across. (25)
Row 15-16: Repeat Row 10-11.
Row 17: CH 1, turn, SC in every stitch across. (25)
Row 18: CH 1, turn, SC DEC, SC across to last two stitches, SC DEC. (23)
Row 19-25: Repeat Row 18 decreasing two stitches on every row. Row 25 should have 9 stitches.
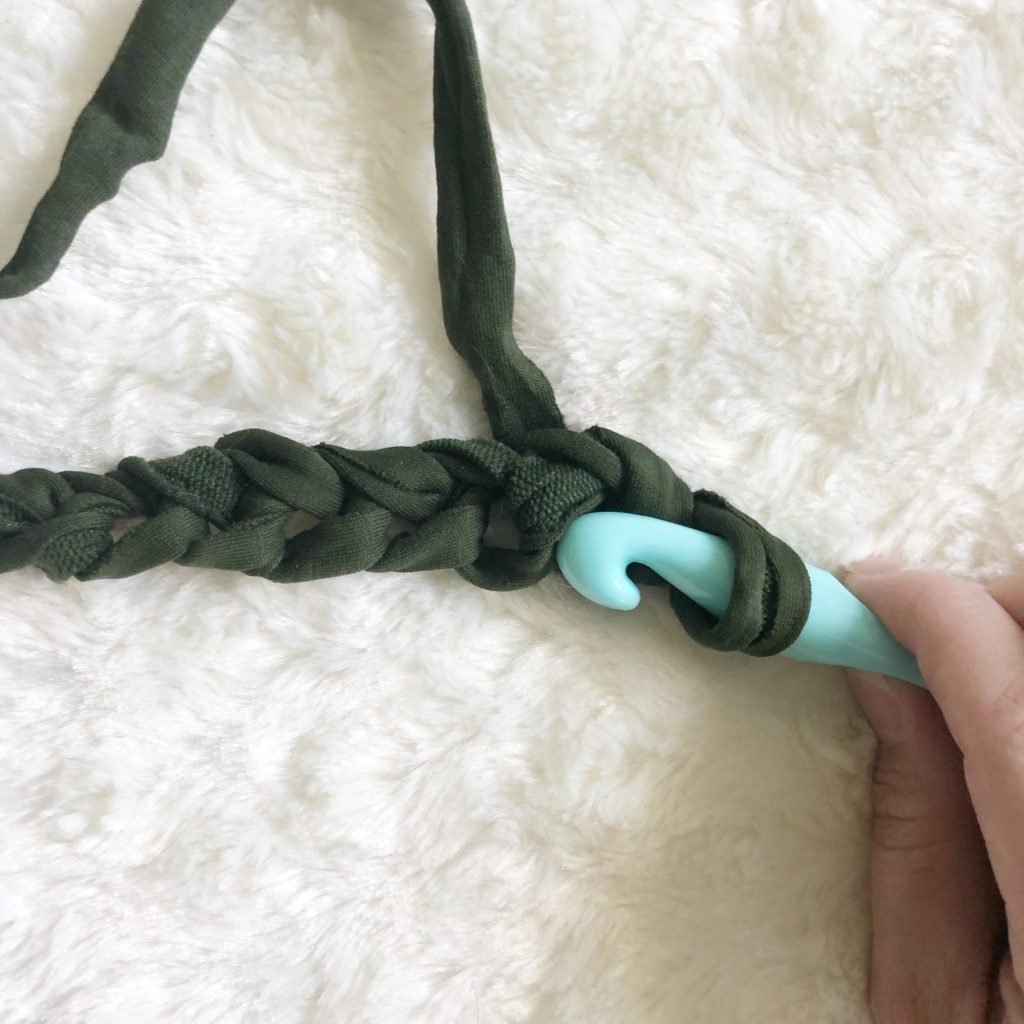
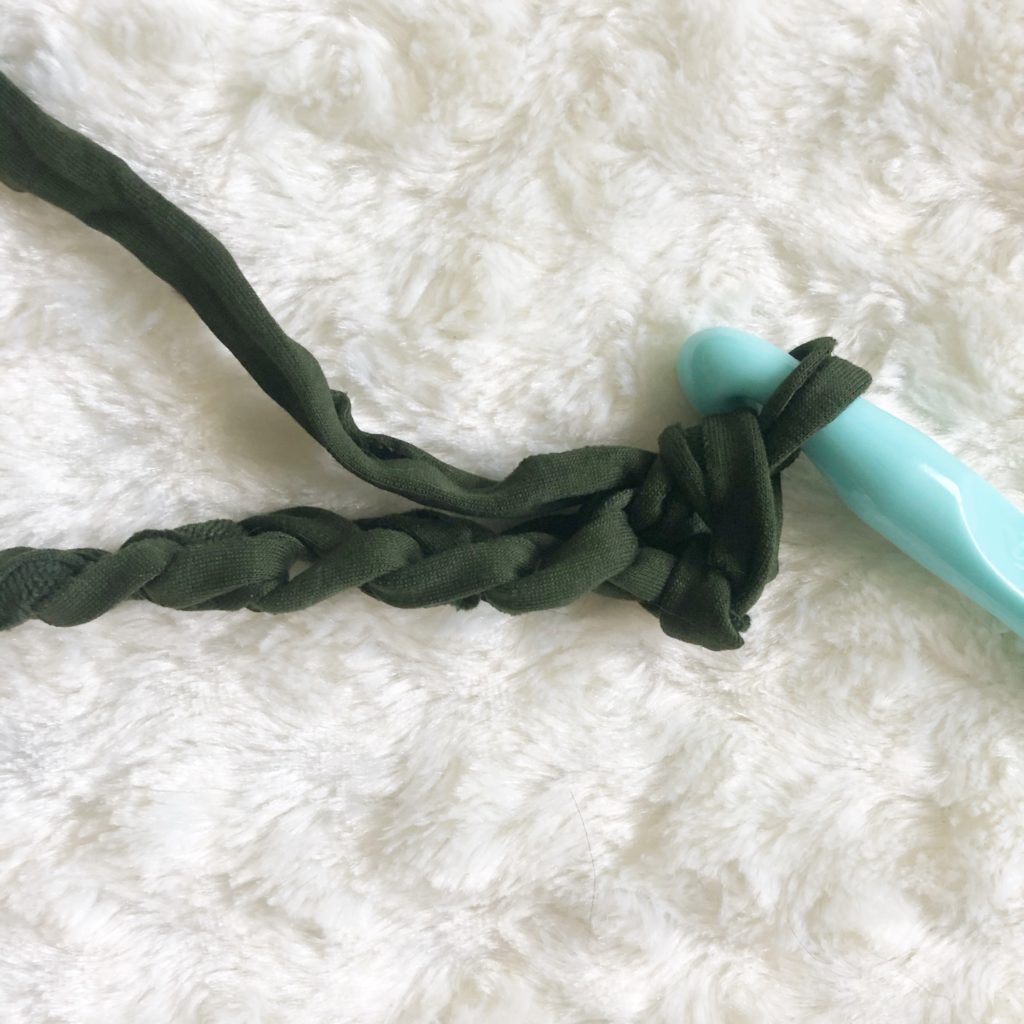
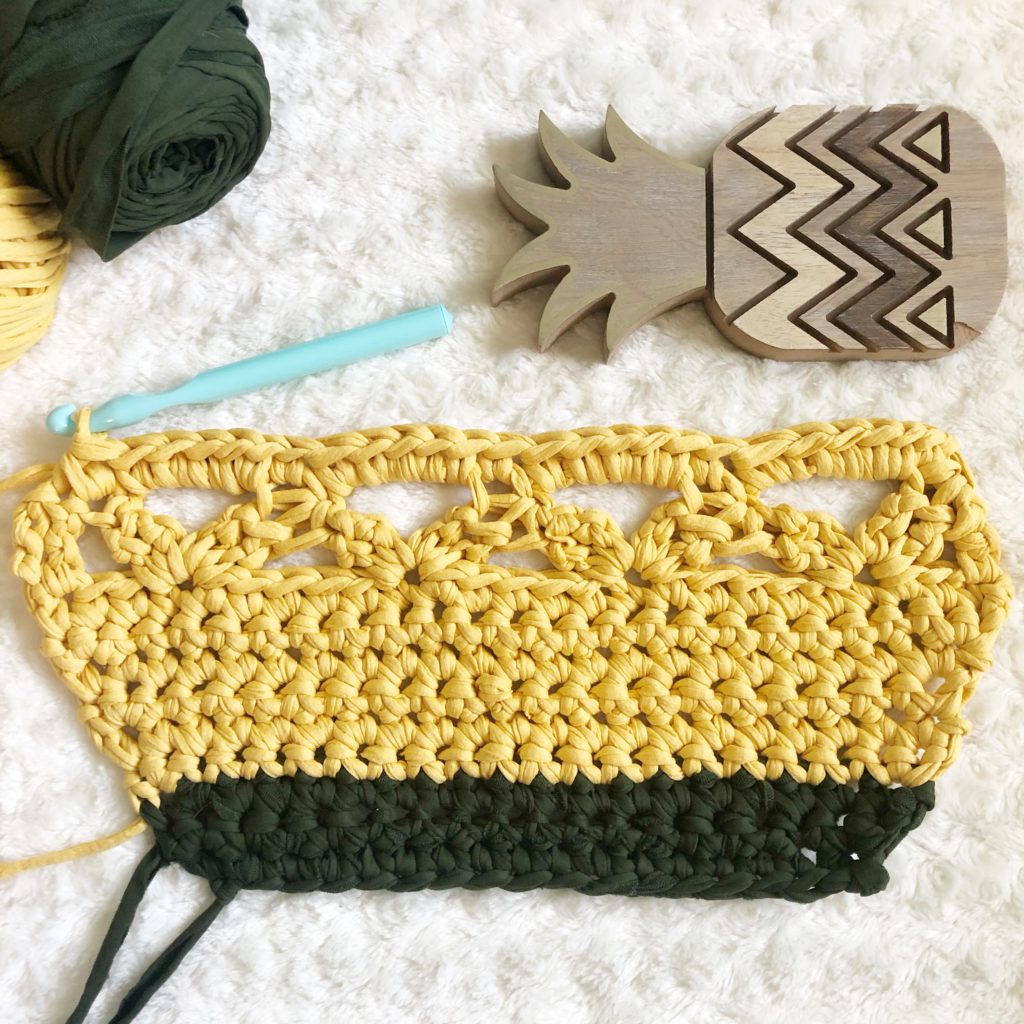
Leaves
Change to CC.
Row 1: CH 1, turn, SC in every stitch across. (9)
Row 2: CH 17, SL ST in 3rd CH from hook, SC 2, HDC 2, DC 5, TR 5, SL ST to 3rd stitch on main row. (15 + last SL ST)
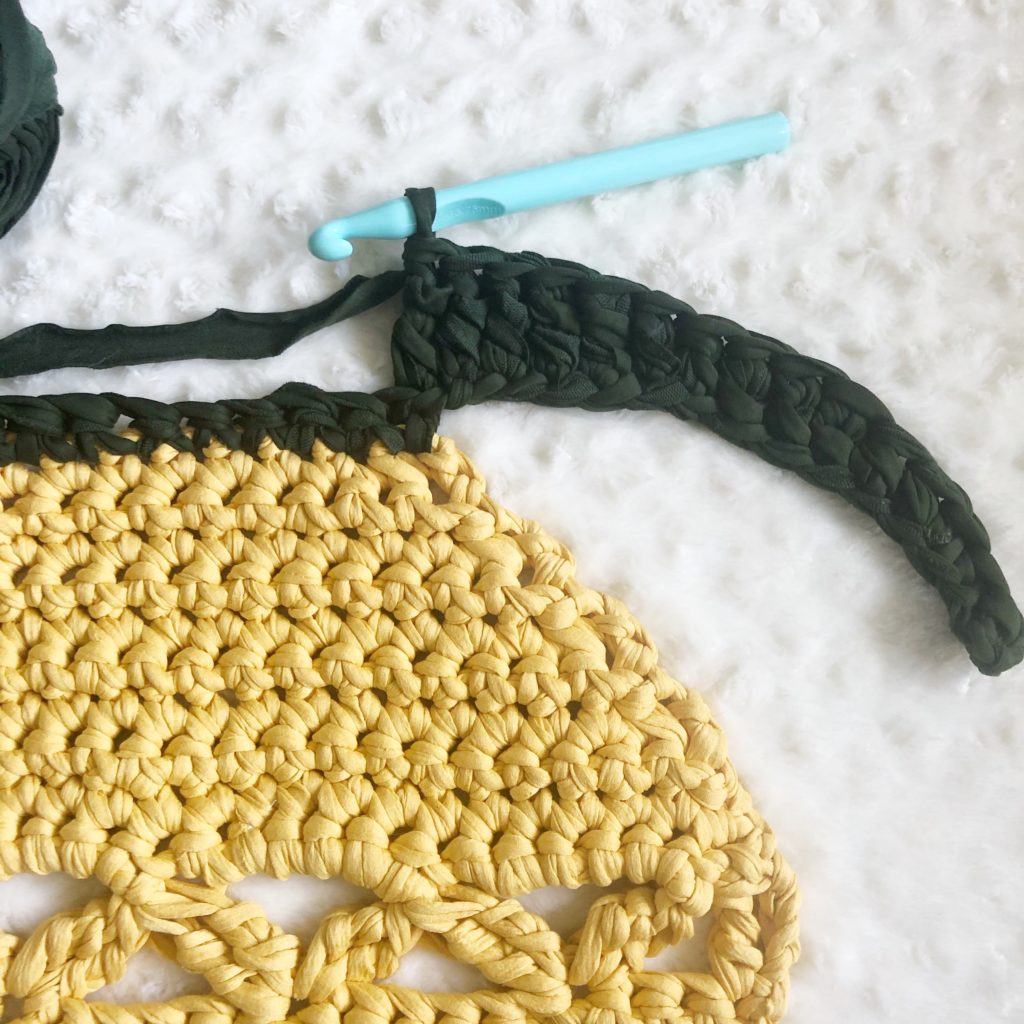
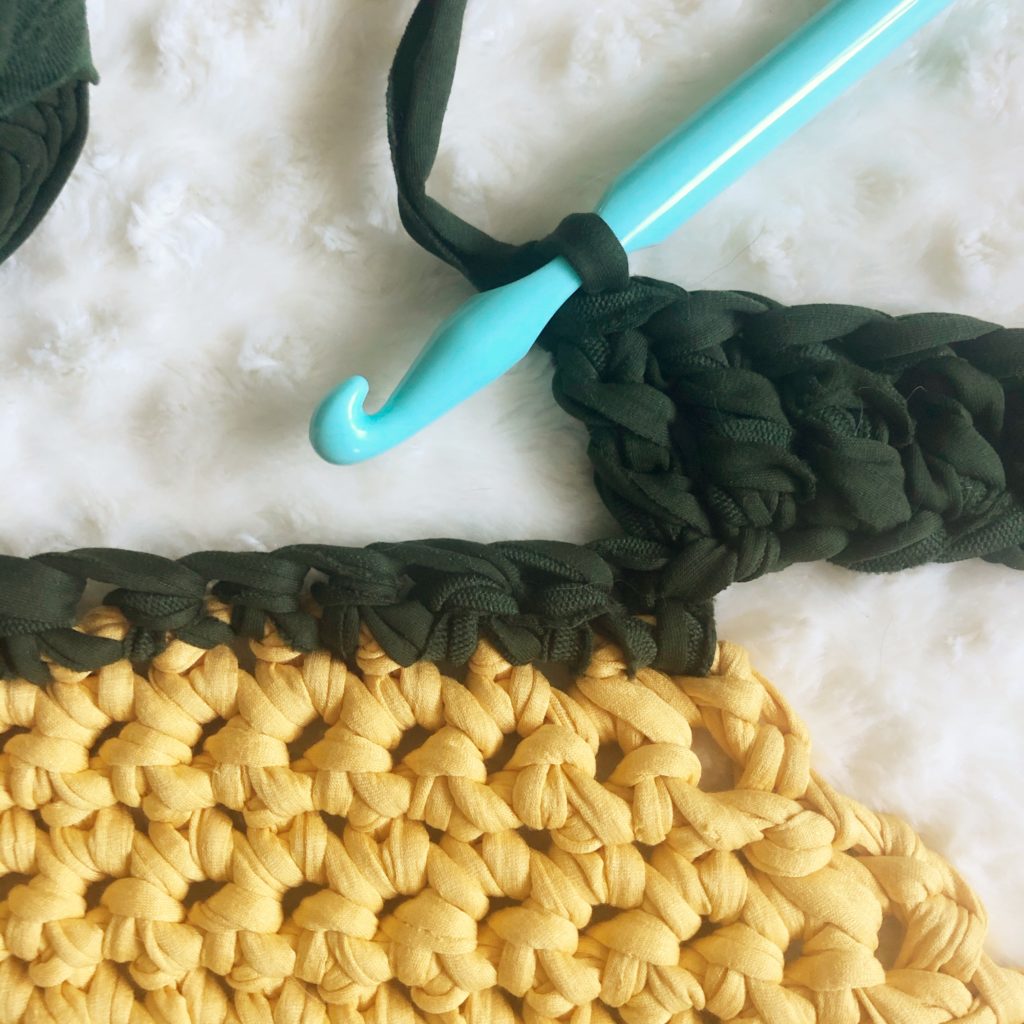
Row 3: CH 19, SL ST in 3rd CH from hook, SC 2, HDC 2, DC 6, TR 6, SK 2 stitches on main row, SL ST to next stitch. (17 + last SL ST)
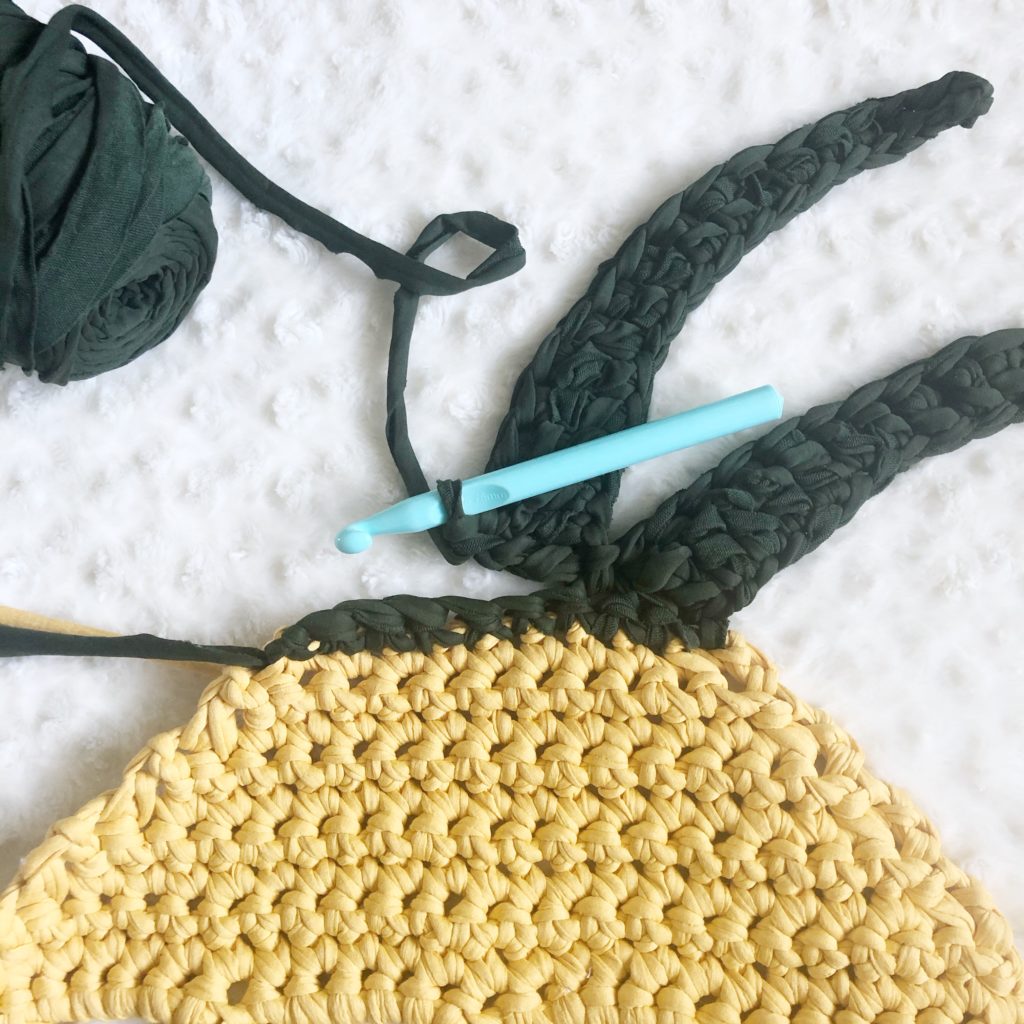
Row 4: Repeat Row 2 until last SL ST, SK 2 stitches on main row, SL ST to next stitch.
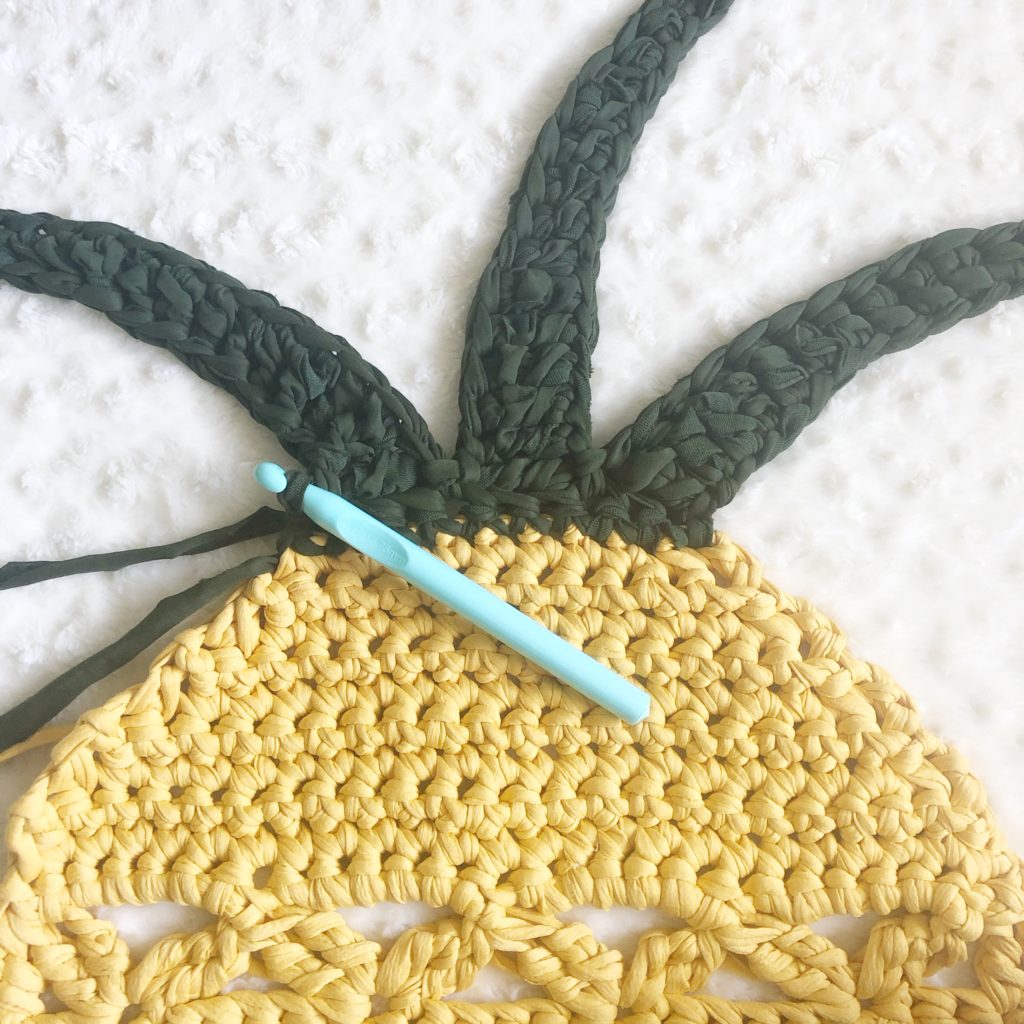
Turn project to WS. Work the following rows of leaves from the same row as the first set of leaves.
Row 5: CH 10, SL ST in 3rd CH from hook, SC, HDC, DC 5, SL ST in 3rd stitch of main row. (8 + last SL ST)
Row 6: CH 13, SL ST in 3rd CH from hook, SC 2, HDC 2, DC 5, TR, SK 1 stitch on main row, SL ST to next stitch. (11 + last SL ST)
Row 7: Repeat Row 6.
Row 8: Repeat Row 5 until last SL ST, SL ST in last stitch of main row.
Cut yarn, FO.
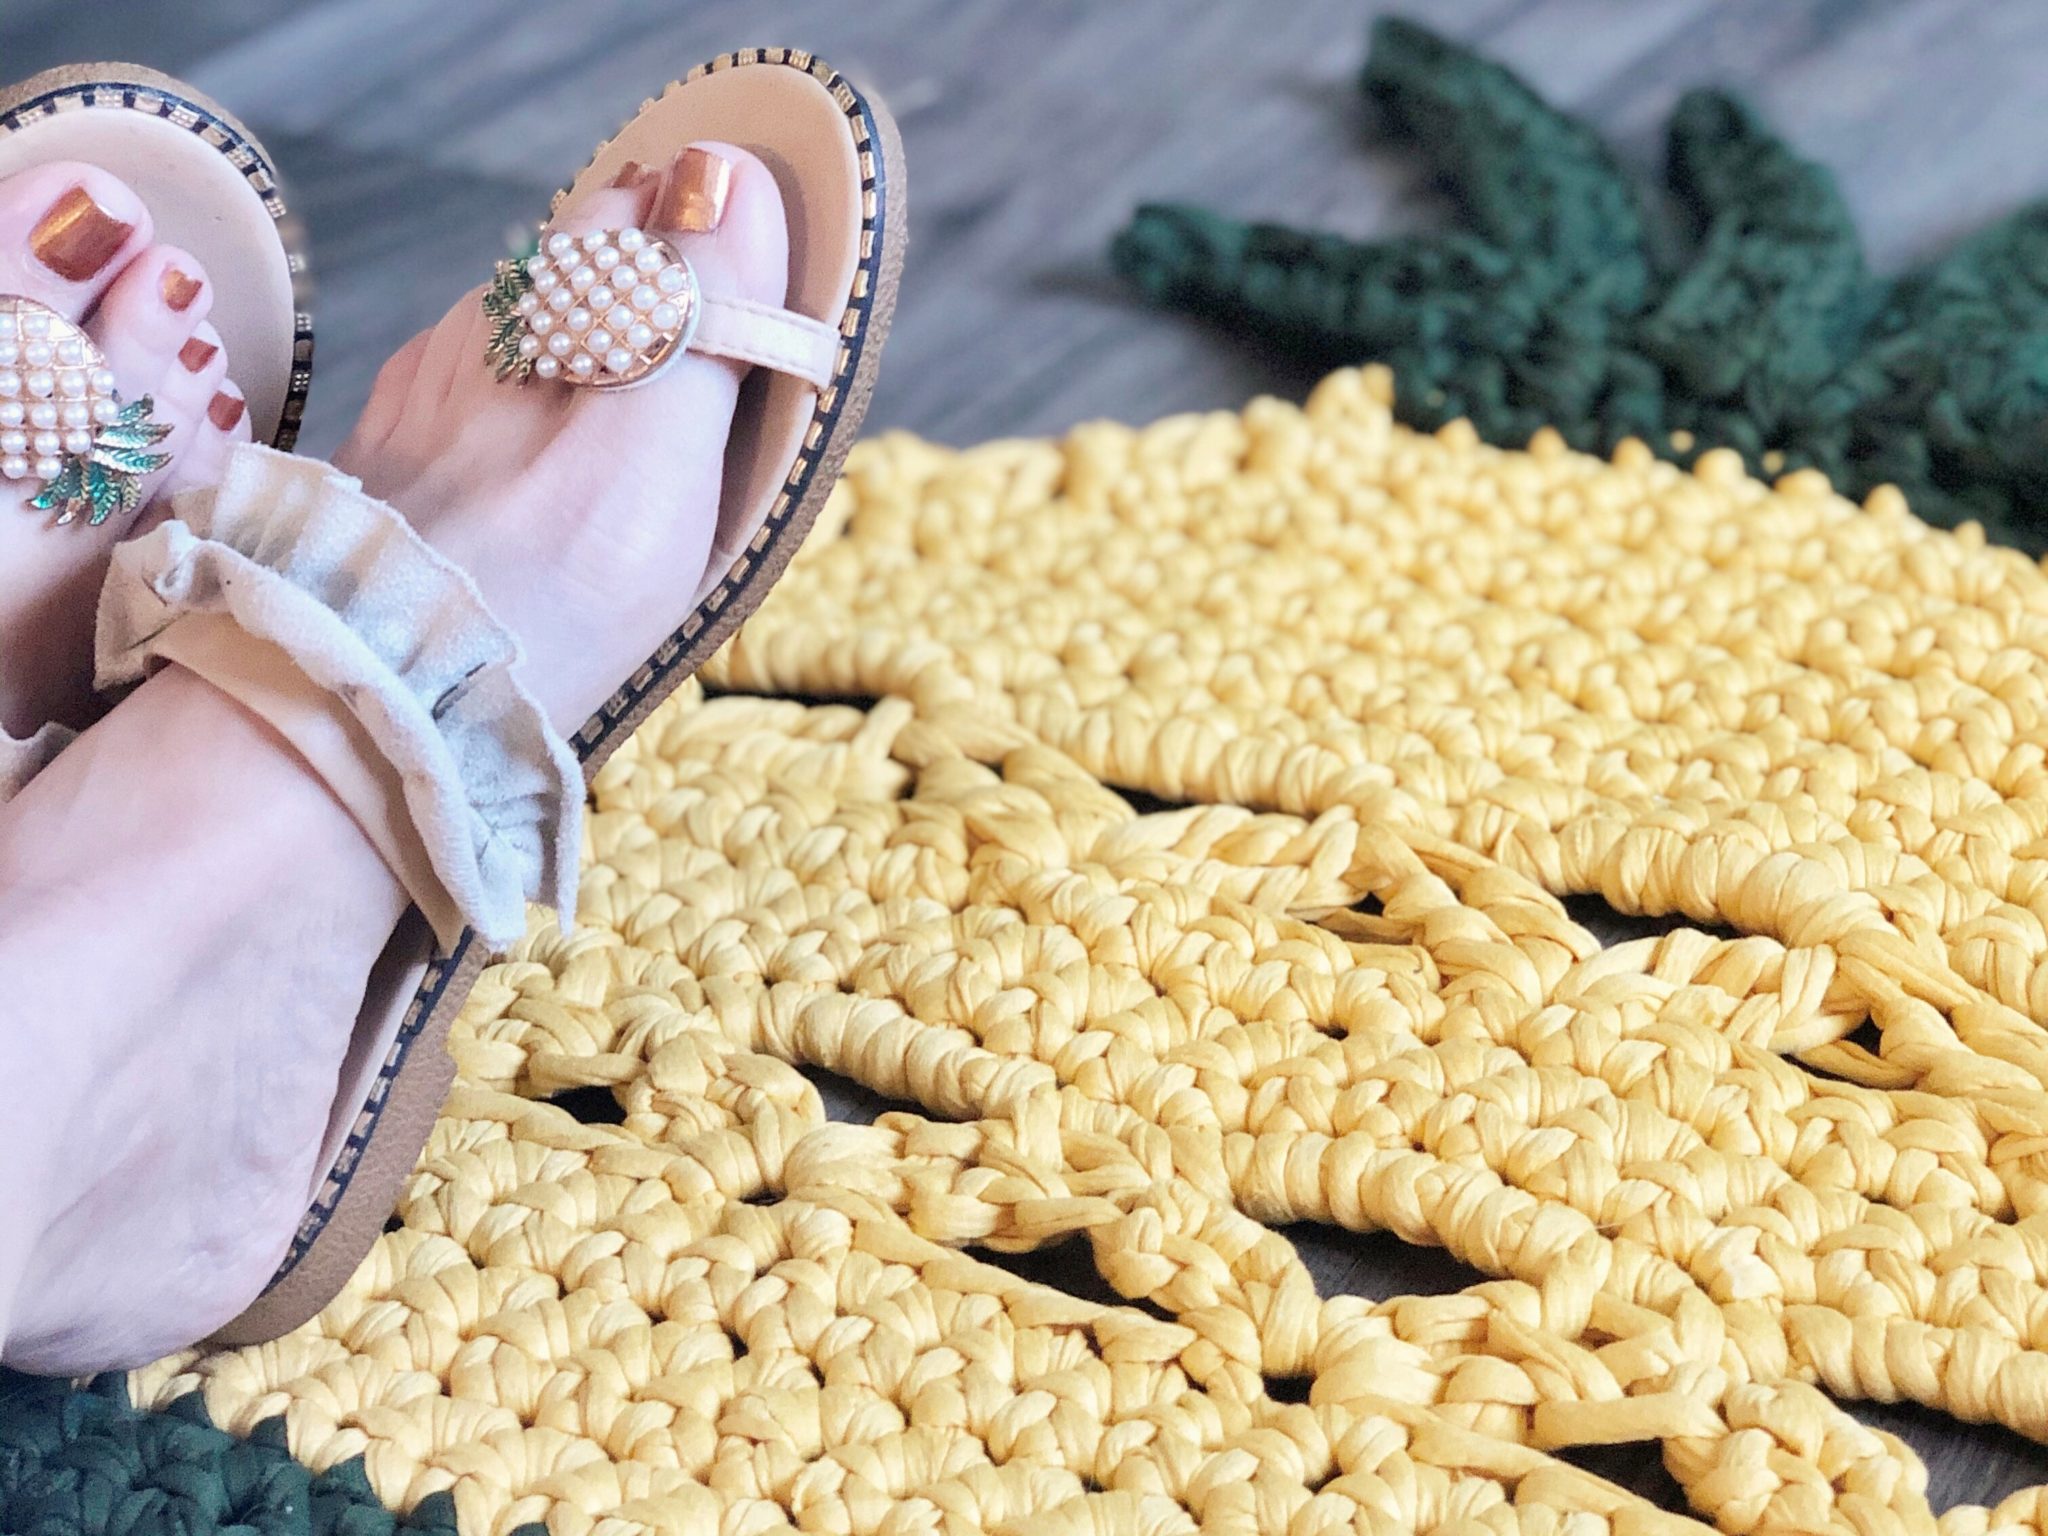
Weave in all tails, and you’re done! Now you can kick those shoes off, and sink your toes into some pineapple-y goodness!
Summer Vibes Blog Hop
If you are participating in the Summer Vibes Blog Hop, welcome! Click the link below to snag your FREE DOWNLOAD of this pattern today, July 17, ONLY! I hope you enjoy this pattern. Be sure to tag me on Instagram and Facebook with your finished makes so I can see and feature you in my stories!
Click the link below to see all of the other patterns that were featured in this blog hop! Many of them may be available in a free version on the designer’s website OR you may purchase them from her Ravelry shop!

If you make this rug, please share it! I would love to see your work! You can tag me on Instagram and Facebook @theplushpineapple. Use the tag #theplushpineapple.
“Much love, sunshine, and pineapples”
Sarah
The photographs and pattern contained in this document are the property of A Plush Pineapple. Unauthorized reproduction, in whole or in part, or distribution of this pattern or content is prohibited. ALL FINISHED PRODUCTS created using this pattern may be sold locally or online. If selling finished products online, please give my blog credit for the pattern by posting a link to my website.