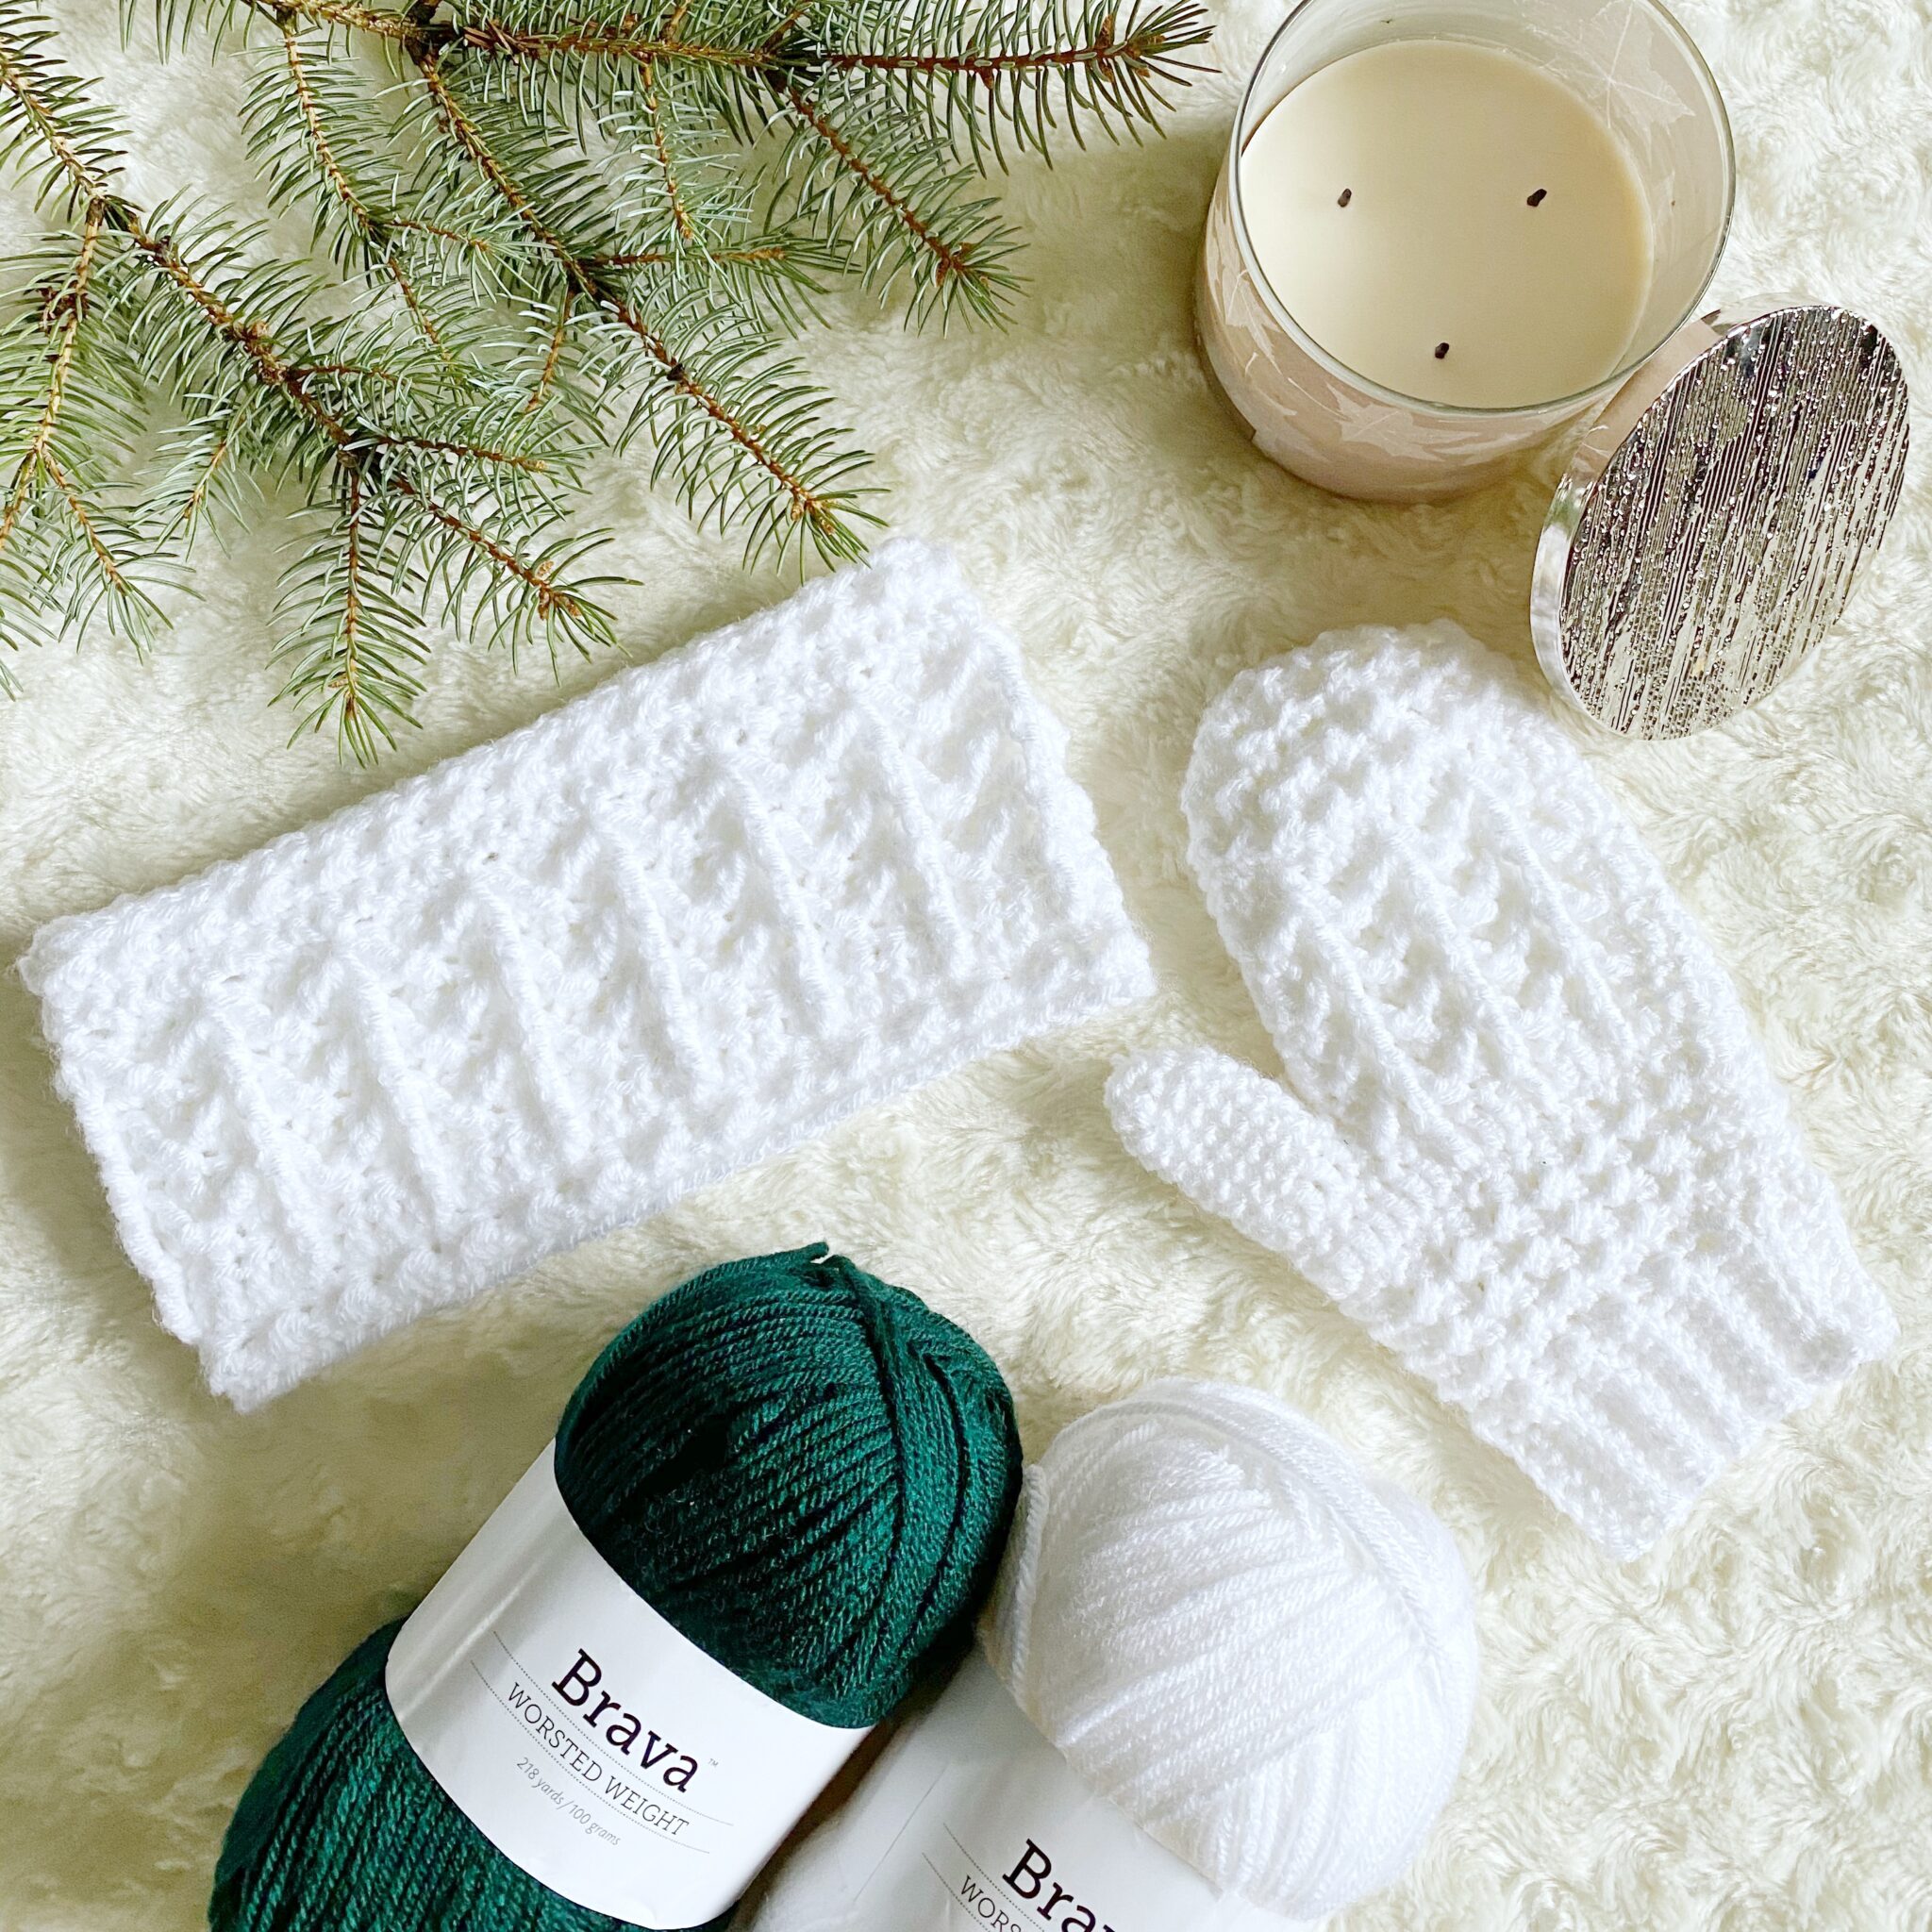

Make a matching crochet headband and mittens set featuring unique cabling that represents pine trees with these free crochet patterns.
Time spent amongst trees is never wasted time.
Katrina Mayer

There is something about the woods early in the morning that speaks to my soul.
Have you ever gone camping or on a trip to a secluded cabin in the woods? There is something therapeutic about the early morning hours between night and sunrise when the smell of the pines is fresh on the breeze, and the world is rubbing the sleep out of its eyes.
I enjoy being in the woods alone with my thoughts and seemingly far away from the cares and duties of life. It is as if, for a brief span of time, all the little worries dissolve temporarily as I take in the awe-inspiring beauty around me.
As Kelsie of Crafting for Weeks and I were going through stitches for this crochet-a-long, she lighted upon the arrow stitch. After swatching and playing with the stitch for a bit, I came up with the concept of a third FPTR in the middle that would represent a tree trunk, and the Rustic Pines stitch was born!
This was an especially enjoyable collaboration as we were able to watch this new stitch pattern take place. From there, Kelsie began playing with varying the heights of the trees for even more visual interest. She decided to turn it into a beanie and cowl set, and I went with a crochet headband and mittens set. We couldn’t be more thrilled with how the finished patterns turned out! We have even made the entire PDF bundle available for sale at 50% off the usual price for the duration of the CAL. You can purchase the bundle if you don’t want to wait on each section to release.
Developing this new pattern invoked within me all of those same feelings from memories of those quiet times in the woods…memories of a different place, time, and life when all was right with the world. As you join us for this crochet-a-long, I hope this unique cabling will take you back to some of those same types of moments in your life where the space between two trees…
…was a doorway to a new world.


CAL Schedule
- Week One – Rustic Pines Beanie – November 2-8 – hosted by Crafting for Weeks
- Week Two – Rustic Pines Headband – November 9-15 – hosted by A Plush Pineapple
- Week Three – Rustic Pines Cowl – November 16-22 – hosted by Crafting for Weeks
- Week Four – Rustic Pines Mittens – November 23-29 – hosted by A Plush Pineapple
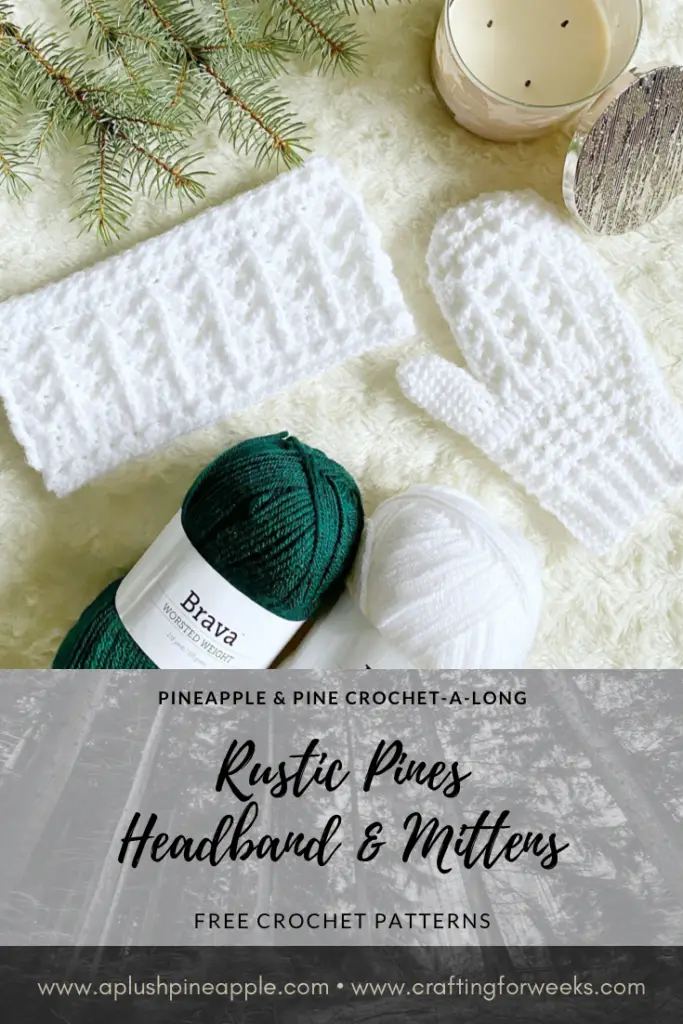

Skill Level – Intermediate
Materials
Disclaimer: This post contains affiliate links to the products used in this project. If you make a purchase through any of these links, we will get a small commission at no additional cost to you.
- Worsted (4) weight yarn – Yarn pictured is Brava by We Crochet Official in the color White
- US 7/4.50mm crochet hook for mittens (or hook necessary to obtain gauge)
- US H8/5.00mm crochet hook for headband (or hook necessary to obtain gauge)
- Tapestry needle
- Scissors
- Measuring tape
Yardage
| Newborn | Baby | Child | Teen/Adult | |
| Headband | 65 yards | 75 yards | 85 yards | 95 yards |
| Mittens | n/a | n/a | n/a | 160 yards |
Abbreviations
- BLO – Back loop only
- CH – Chain
- DC – Double crochet
- FO – Finish off
- FPTR – Front post treble crochet
- FPTR3tog – Front post treble three stitches together
- SC – Single crochet
- SC INC – Single crochet increase
- SK – Skip
- SL ST – Slip stitch
- SLST3tog – Slip stitch three stitches together
- YO – Yarn over
Gauge
14 DC x 6 rows = 4” x 4”
Notes
- The headband is worked flat (back and forth in rows) and then seamed up the width of the work to form a tube.
- The mittens are begun with SC ribbing that is worked back and forth in rows. The ribbing is seamed to form a continuous band and the mittens are then worked in the round from the ribbing to the fingertips. An opening is worked into the mitten for the thumb and yarn is then joined to the opening and the thumb is worked in the round.
- Beginning CHs do not count as stitches.
- Sizes for the headband are indicated by parenthesis respectively Newborn, Baby, Child, Teen/Adult
- Brackets [ ] indicate to repeat the stitches enclosed the specified number of times.
- This headband is a part of a four-piece matching collection including a beanie, cowl, and mittens. Be sure to check out the other patterns and make an entire set!
- If you have any difficulty completing this project and would like support, please email me at aplushpineapple@gmail.com.
Measurements
Headband
- Newborn – 13” circumference x 3 ½” wide
- Baby – 16” circumference x 3 ½” wide
- Child – 18” circumference x 4 ½” wide
- Teen/Adult – 19 ½” circumference x 4 ½” wide
Mittens
- Length: 8”
- Width across palm: 4
Special Stitches
Crunch Stitch
The crunch stitch consists of working a HDC and a SL ST alternatively. When working more than one row of this stitch, it is important to remember that a HDC is always worked into a SL ST from the previous row and vice versa. If this sequence is altered, then there is an error in the stitch count.
FPTR3tog
- YO 2x, insert hook around the post of indicated stitch
- YO, pull through two loops 2x (2 loops on hook)
- YO 2x, insert hook around the post of next indicated stitch
- YO, pull through two loops 2x (3 loops on hook)
- Repeat previous two steps (4 loops on hook)
- YO, pull through all four loops
Pine Stitch
This pattern utilizes a new stitch pattern developed by Pineapple & Pine. Below is a video showing how to work a sample swatch of this stitch.
Week One


Week Two


Pattern
Row 1: CH 42 (50, 58, 62) loosely, working in the back bump of the CH, SC in 2nd CH from hook and in each CH across. (41, 49, 57, 61)
Crunch Stitch
Row 2: CH 1, turn, *HDC, SL ST*, repeat from * to * across row, HDC in the last stitch. (41, 49, 57, 61)
Row 3: CH 1, turn, SC in each stitch across. (41, 49, 57, 61)
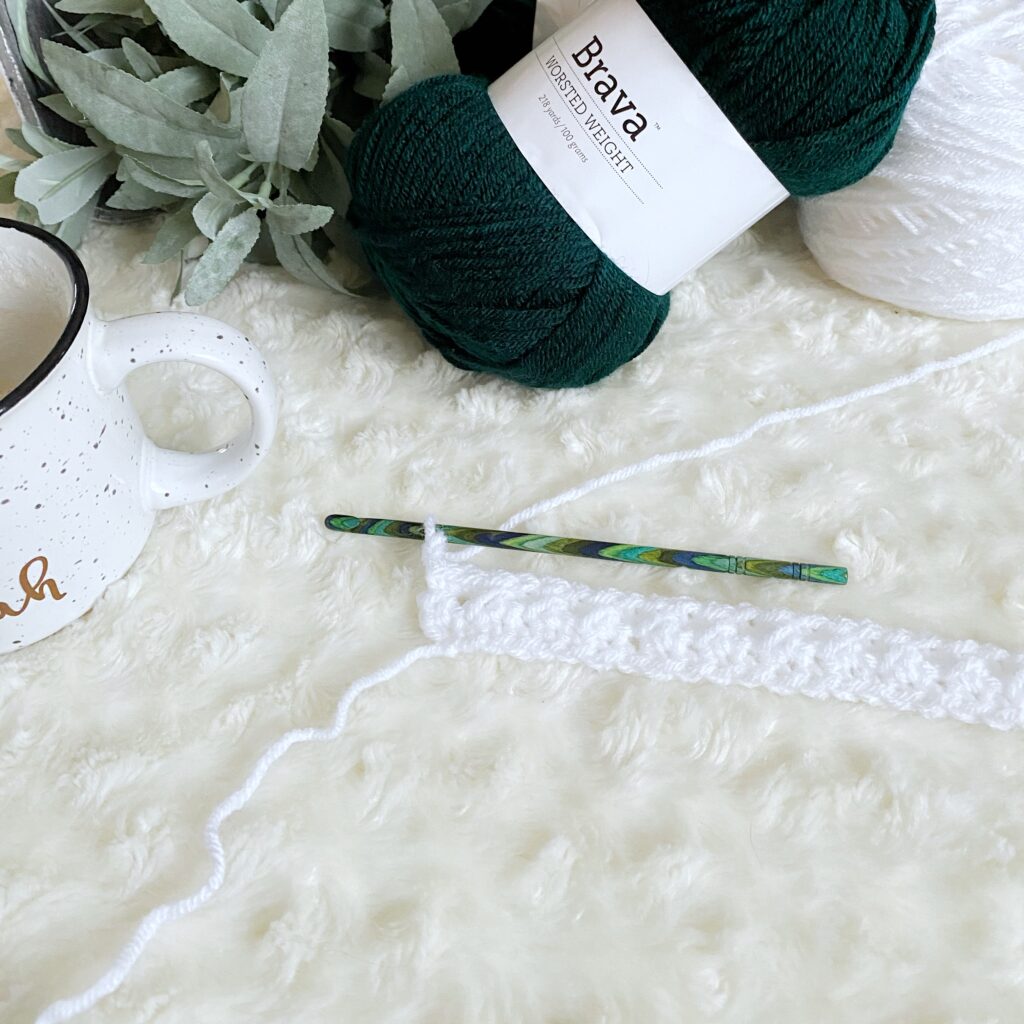

Pine Stitch
Row 4: CH 2, turn, DC in each stitch across. (41, 49, 57, 61)
Row 5: CH 1, turn, SC 2, *FPTR around the post of the SC stitch below next DC, on current row SK 1, SC 3*, repeat from * to * across row until 3 stitches remain (ending repeat on a FPTR), on current row SK 1, SC 2. (10, 12, 14, 15 FPTR / 31, 37, 43, 46 SC)
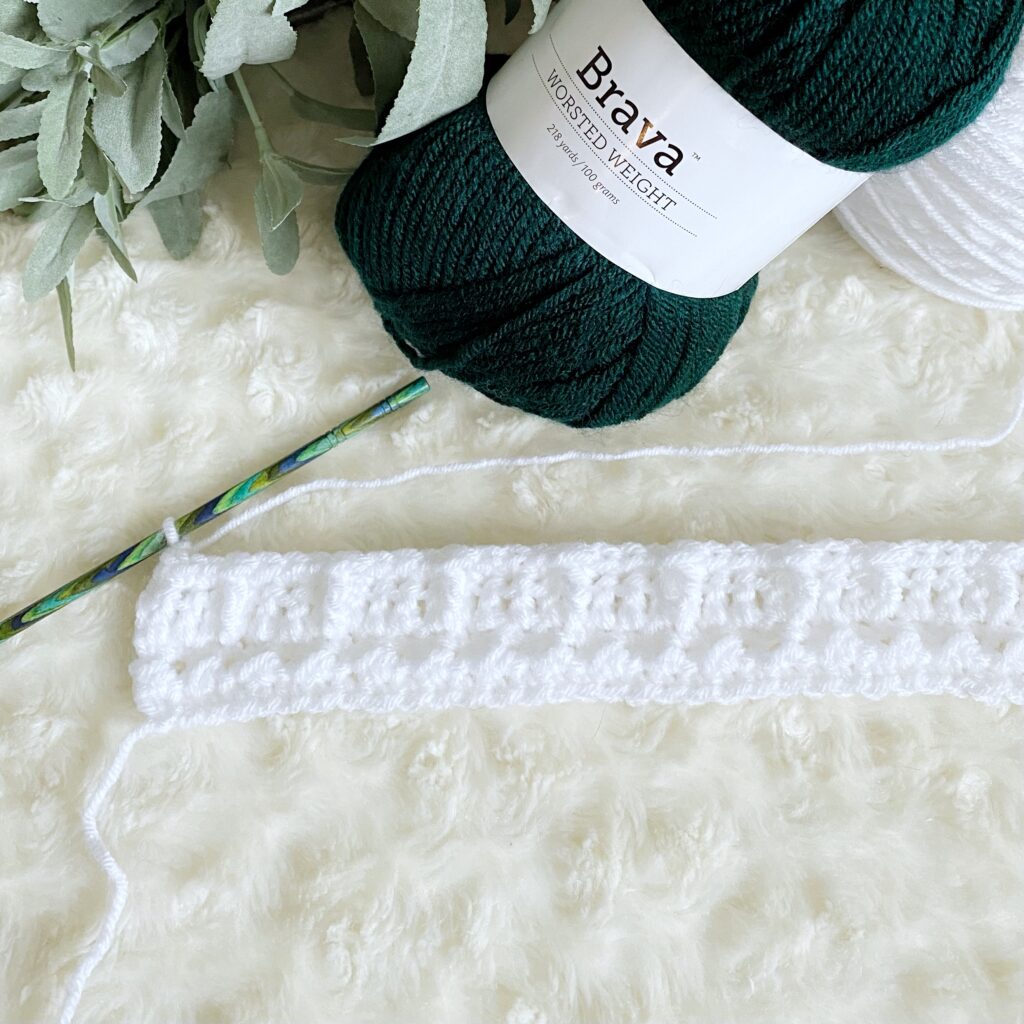

Row 6: Repeat Row 4.
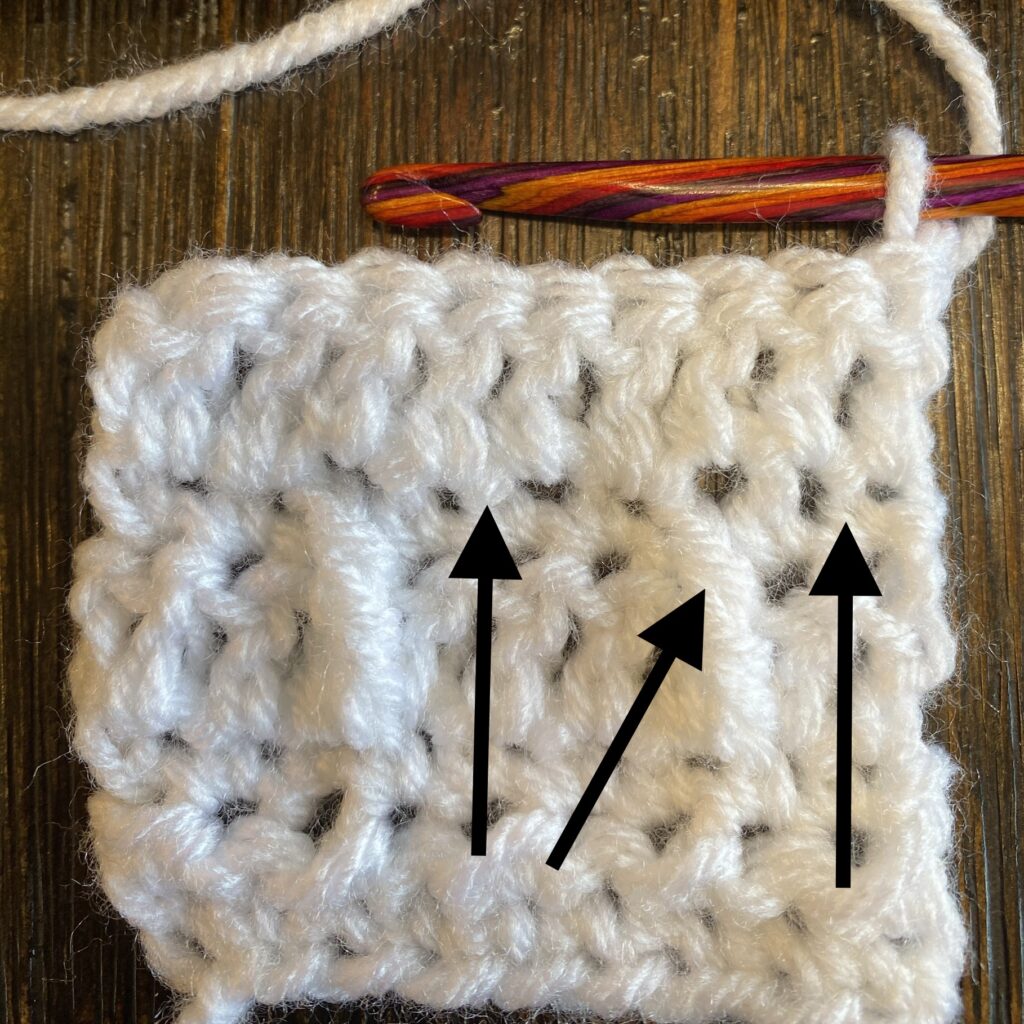
Row 7: CH 1, turn, SC 2, *Begin FPTR3tog around the 1st SC post from two rows back, work the 2nd post around the FPTR from previous row, on previous SC row SK 1 SC and finish 3rd post around next SC post, on main row, SK 1, SC 3*, repeat from * to * across row until 3 stitches remain, *Begin FPTR3tog around same SC post as last FPTR stitch, work the 2nd post around the FPTR from previous row, finish 3rd post around the last SC post from two rows back, SK 1, SC 2. (10, 12, 14, 15 FPTR3tog; 31, 37, 43, 46 SC)

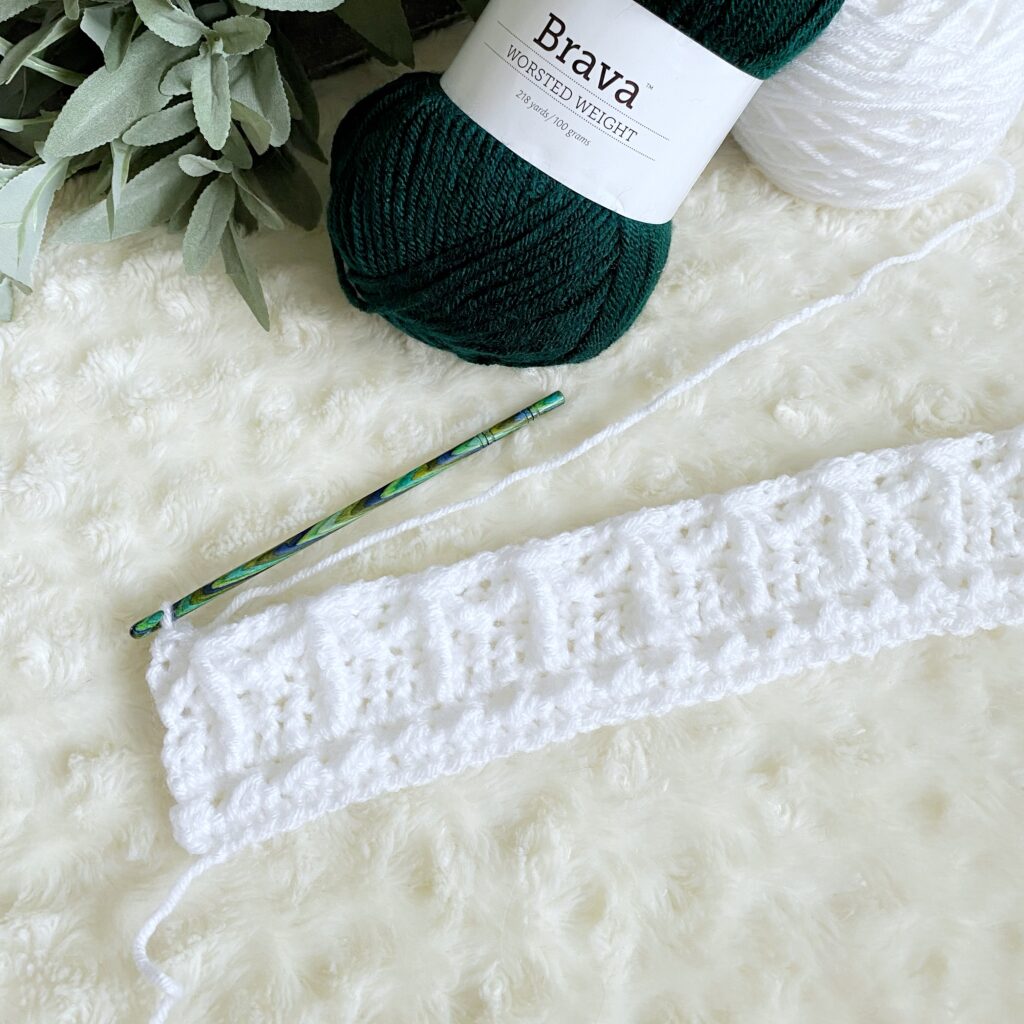

Row 8-11: Repeat Rows 4 & 7 2x.
*On repeats of row 7, be sure to insert hook behind the middle post only when working the 2nd post of a FPTR3tog. Do not insert the hook around all three cables.*
*When working the third cable of each FPTR3tog, you should always be working around the middle SC post of the three SC between each “tree.”
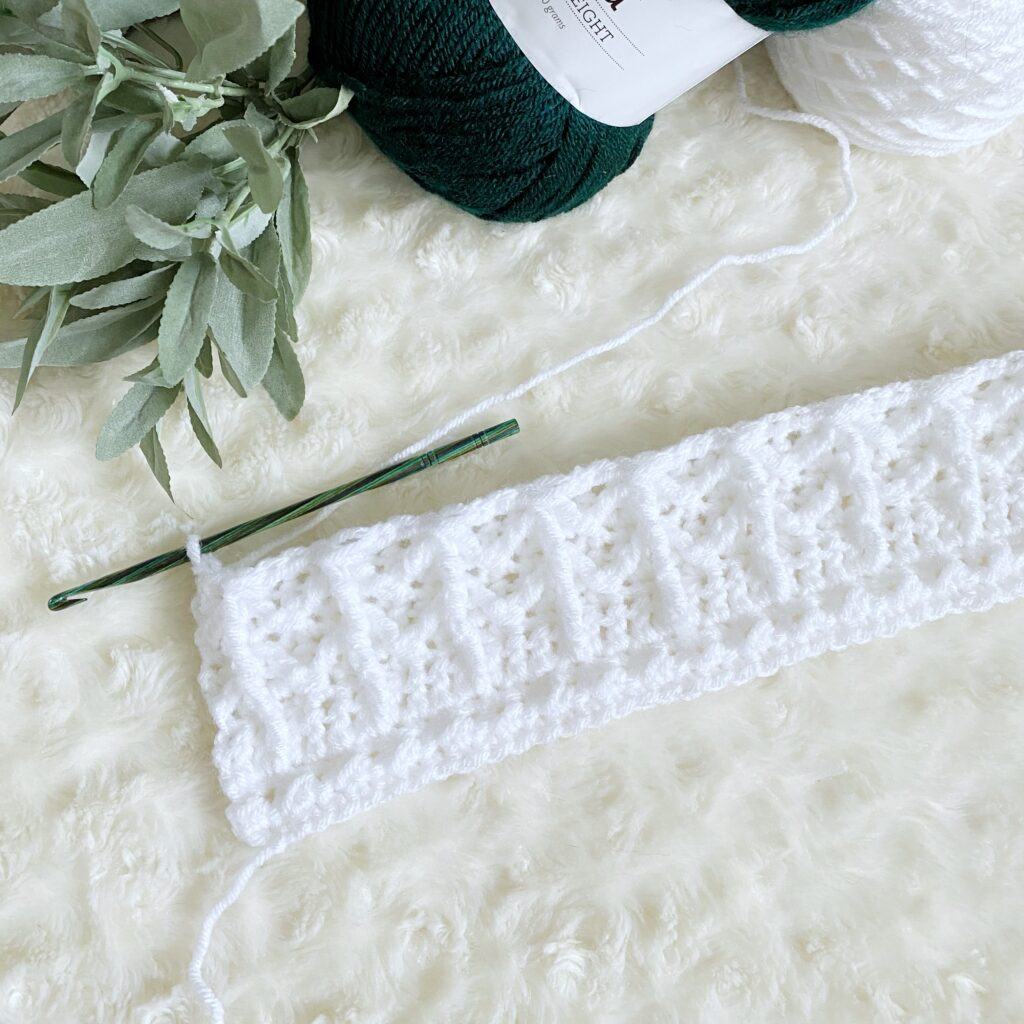


Row 12-13: Repeat Row 3
Row 14: Repeat Row 2.
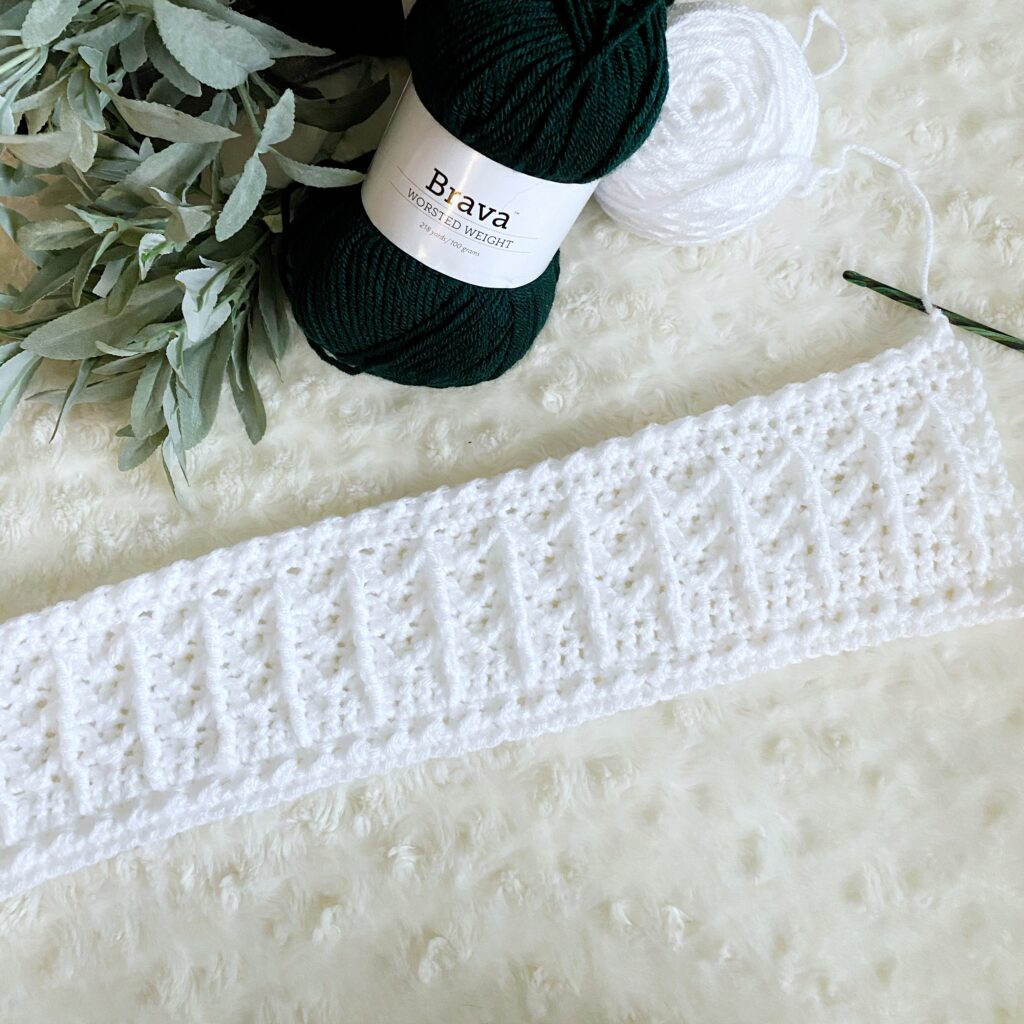

Row 15: Repeat Row 3.
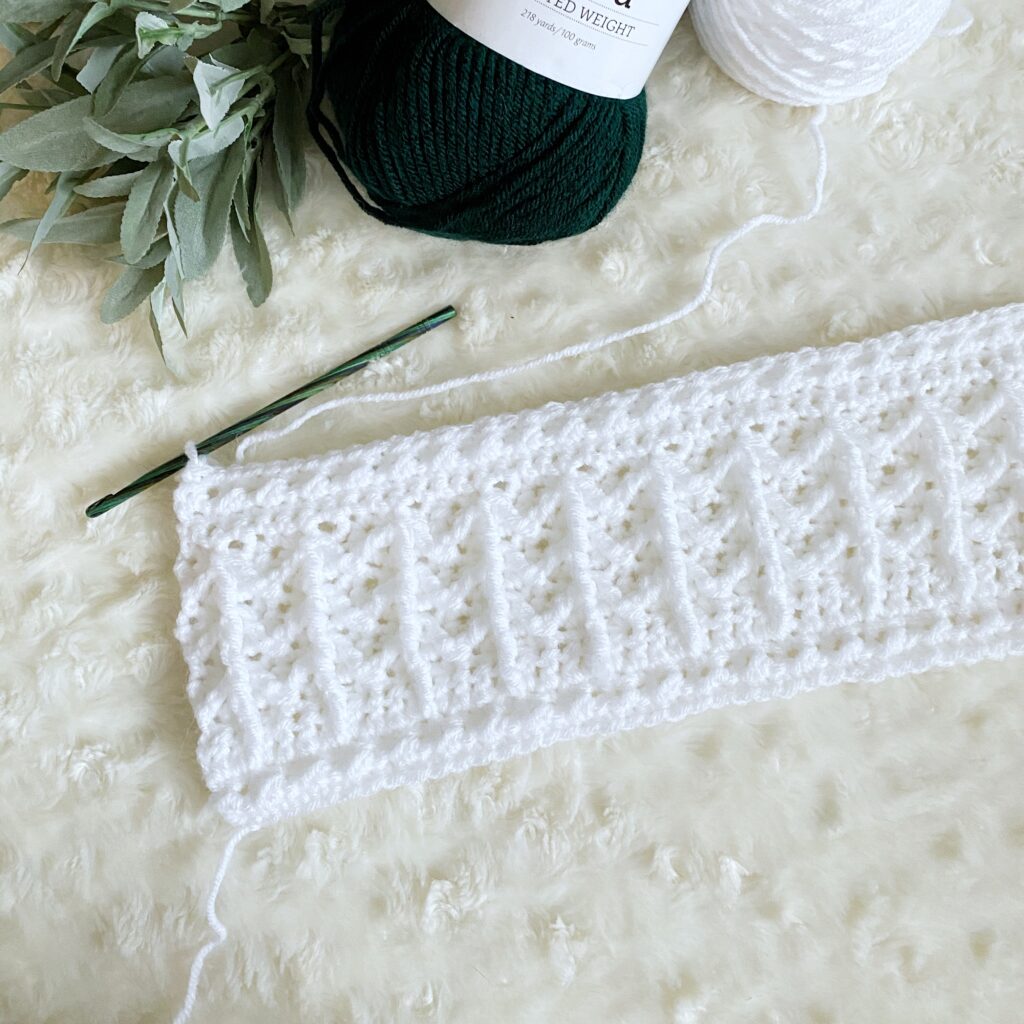

Leave a long tail (approximately 18”), FO.
Finishing
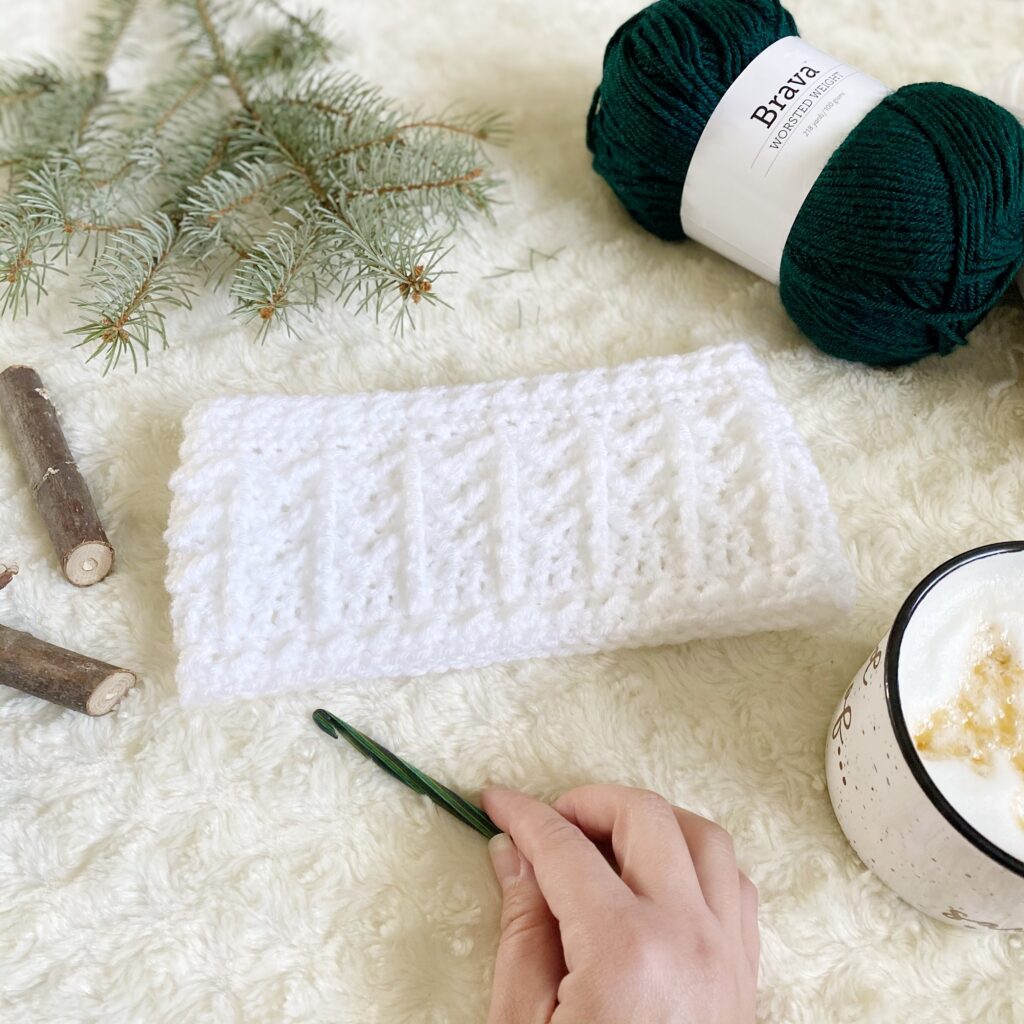
Insert the long tail into your darning needle. Using the invisible stitch, seam the short ends of the headband together. The invisible stitch is worked by inserting the needle from the bottom of the fabric to the top alternating sides. Be sure to line up the rows as you go.

Week Three


Week Four


Pattern – Band
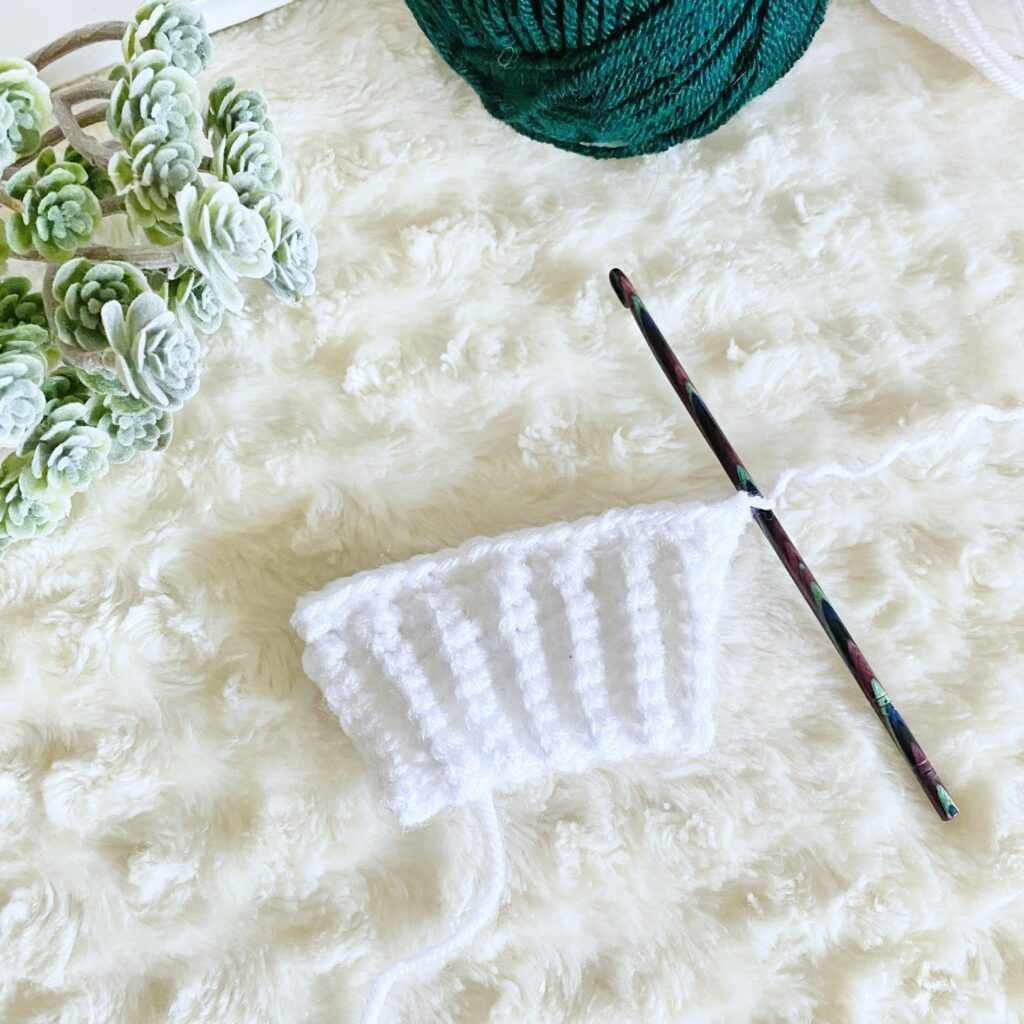
Row 1: CH 9, working in BLO, SC in 2nd CH from hook and in every CH across. (8)
Row 2: CH 1, turn, SC BLO in each stitch across. (8)
Row 3-26: Repeat Row 2.
After Row 26, you should have a ribbed, rectangular strip. Fold the strip with right sides together (you will know you are looking at the right side if the crochet hook is at the top right corner). Once the piece is folded, turn your work so that the working side is closest to you and the beginning chain is furthest from you. The crochet hook should be on the right end. CH 1 and SL ST through the back loop of the stitch closest to you and the corresponding beginning chain. Continue joining each stitch in this manner until the band is completely joined. Turn the band right side out before beginning the body portion.
Pattern – Body Right Mitten
Begin working in the round. At the end of each round, join to first stitch with a SL ST.
Round 1: CH 1, work 2 SC in the end of the first row, 1 SC in the end of each row around to last, and 2 SC in the last row. (28)
Round 2: CH 1, *SC 3, SC INC*, repeat from * to * around. (35)

Crunch Stitch
*While working this section, it is necessary to TURN the work at the end of each round in order for the texture to develop.*
*Keep in mind that you should always be placing a HDC into a SL ST from the previous row and vice versa. If this sequence is altered, then there is an error in the stitch count.*
Round 3: CH 1, *HDC, SL ST*, repeat from * to * around to last, HDC in the last stitch. (35)
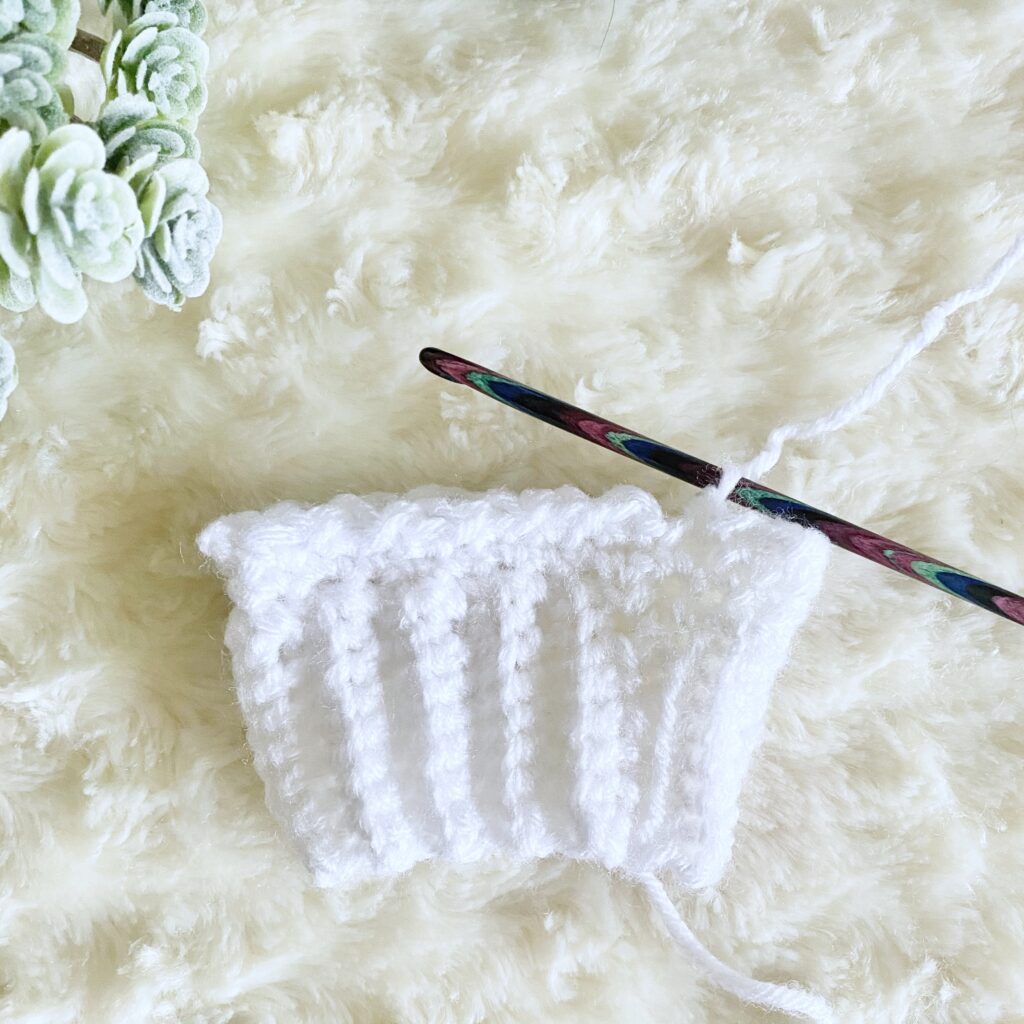

When working in the round, turning the work can be confusing. Use the diagram below to ensure you are beginning in the correct stitch.
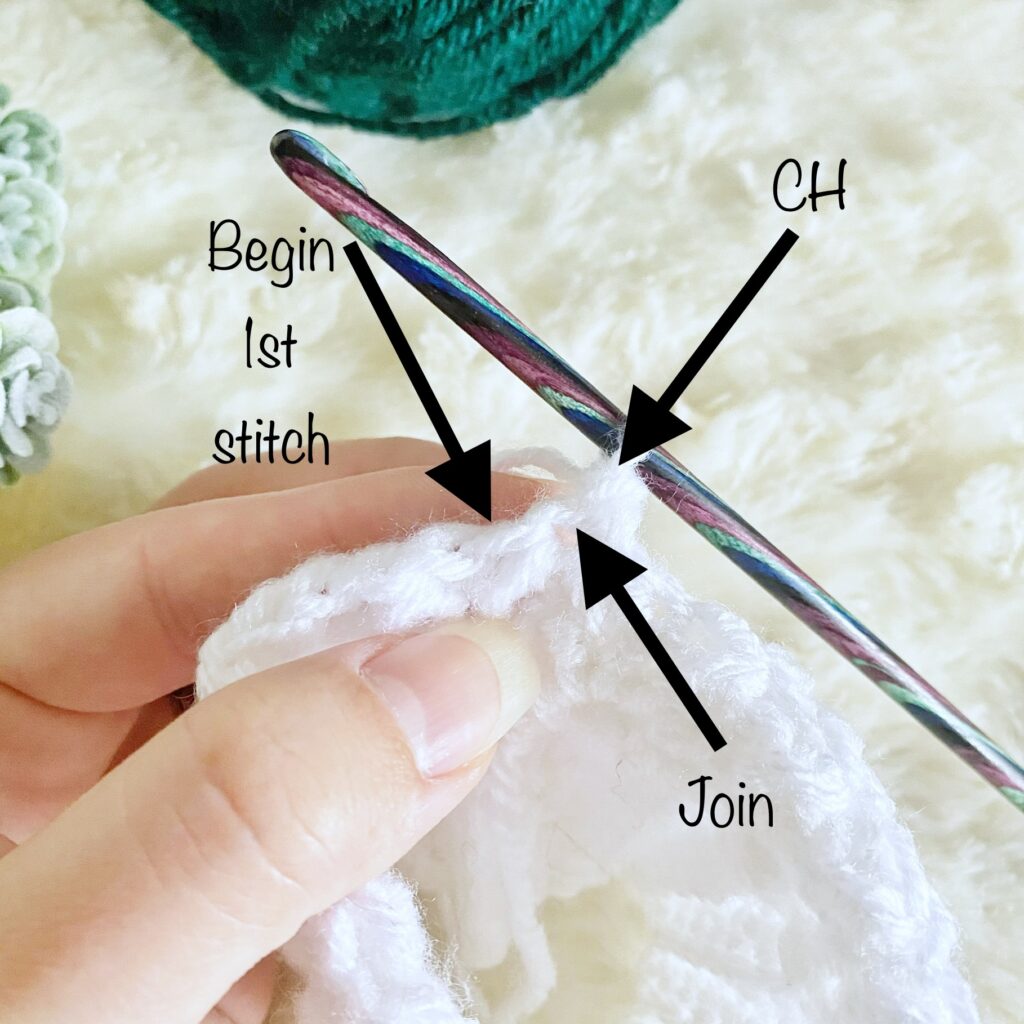

Round 4: CH 1, TURN, *SL ST, HDC*, repeat from * to * around to last, SL ST in the last stitch. (35)
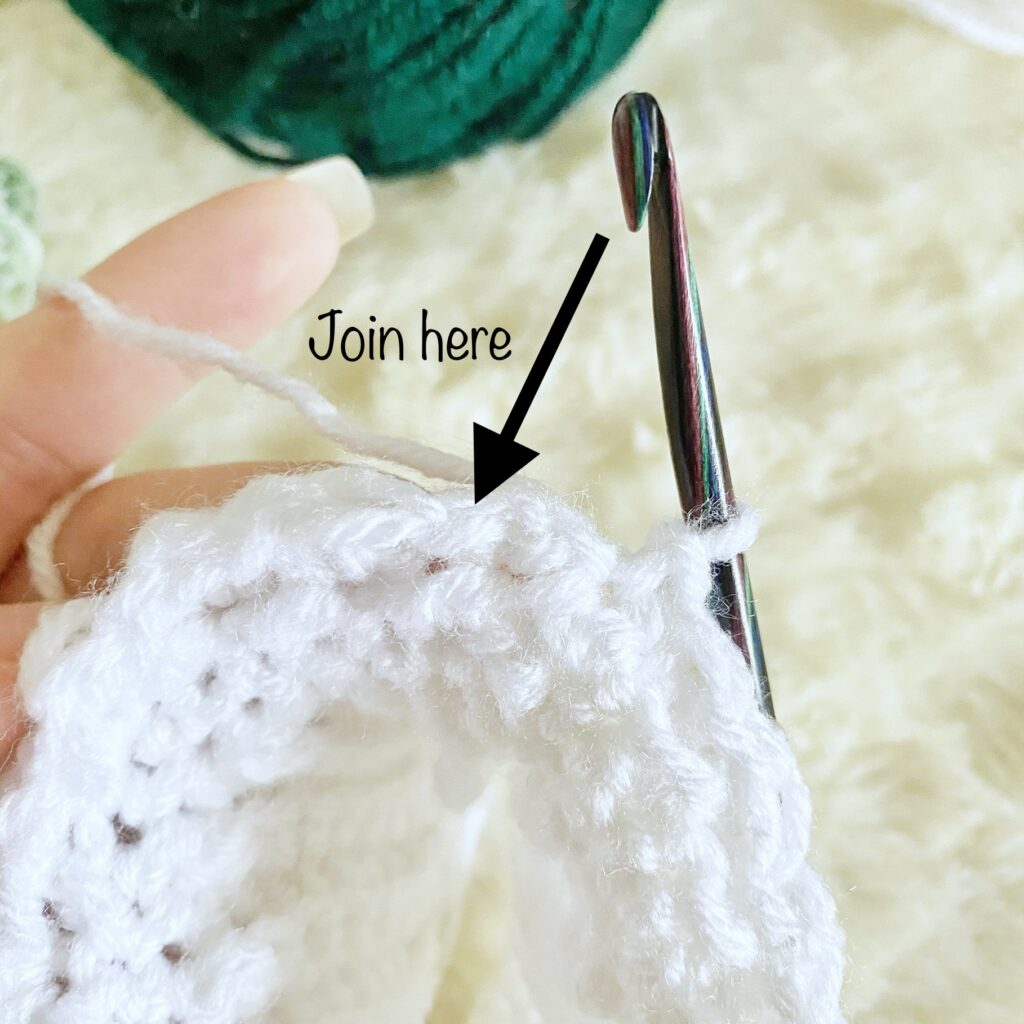

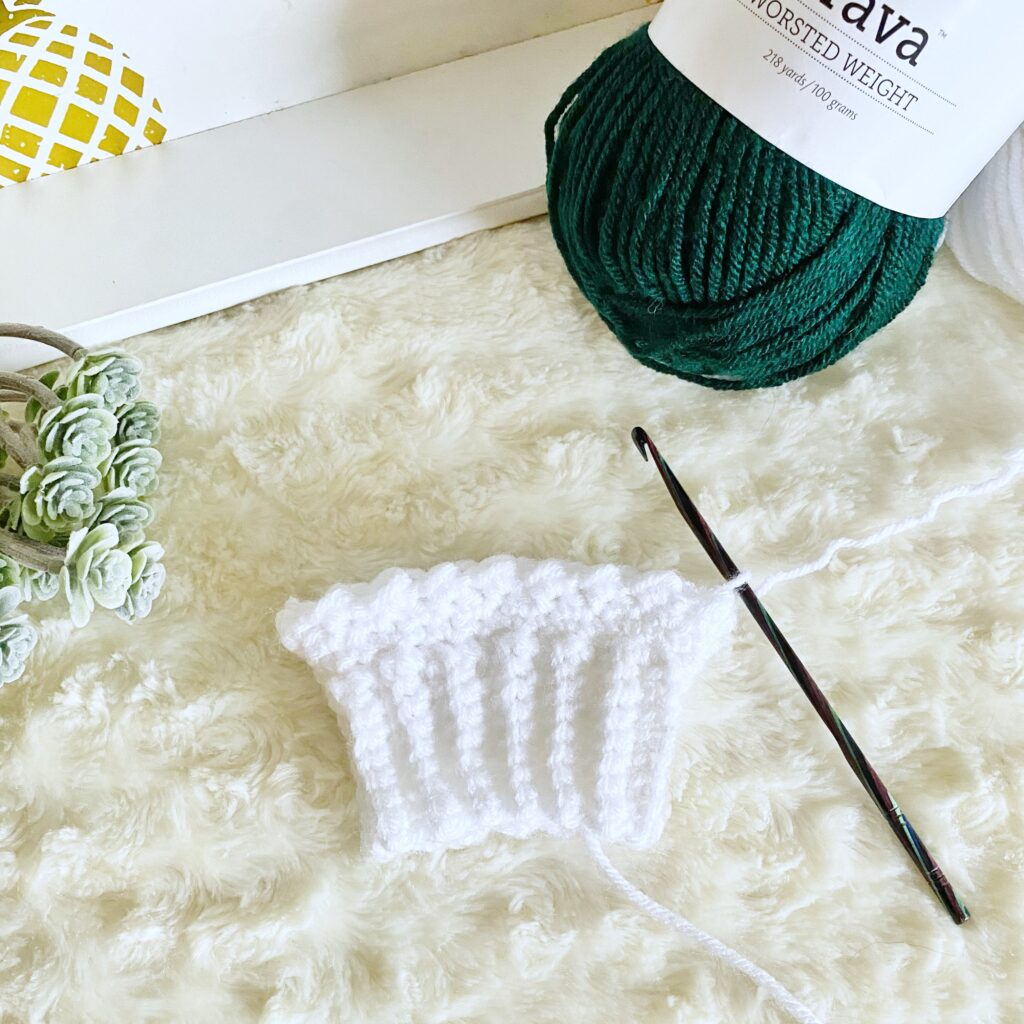

Round 5: CH 1, TURN, *HDC, SL ST*, repeat from * to * around to last, HDC in the last stitch. (35)
Round 6-8: Repeat Rounds 4-5 ending on a Round 4.
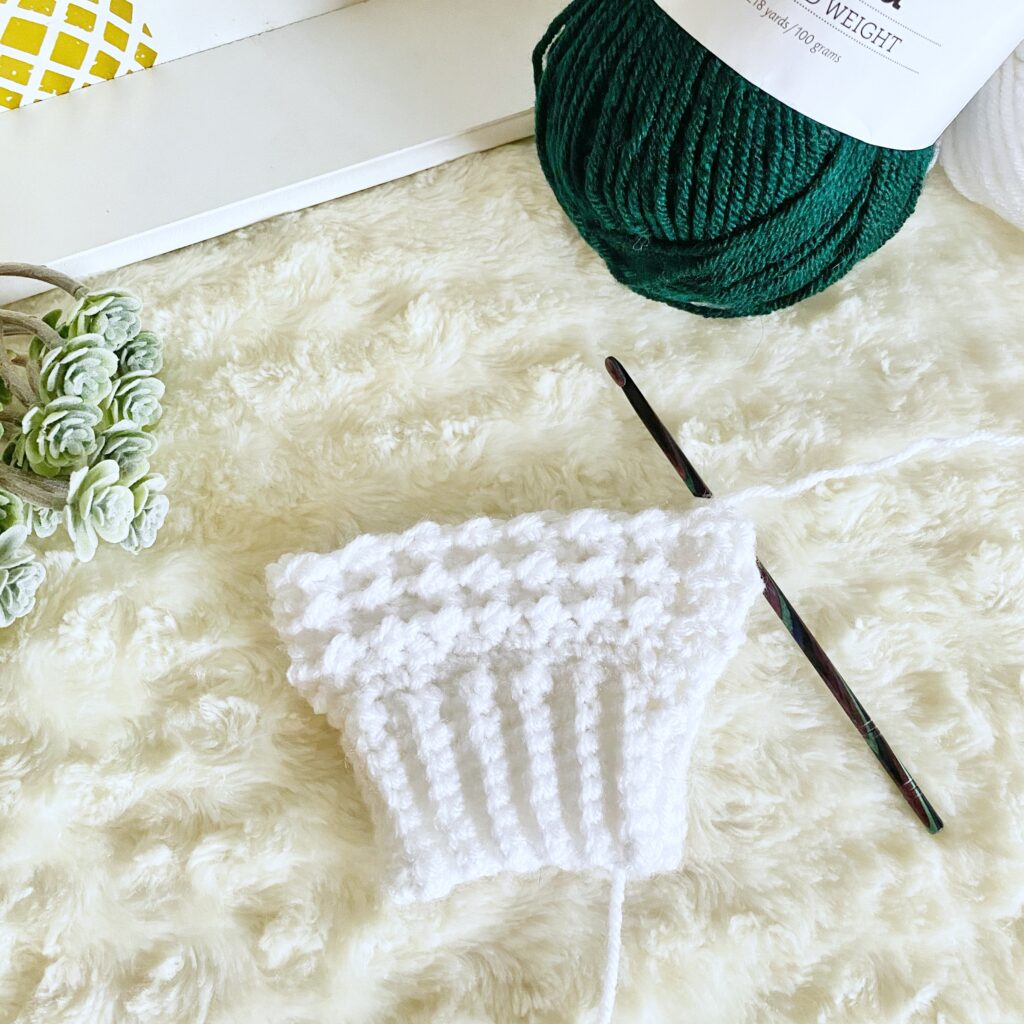

Round 9: CH 1, turn, *SC 4, SC INC*, repeat from * to * around. (42)
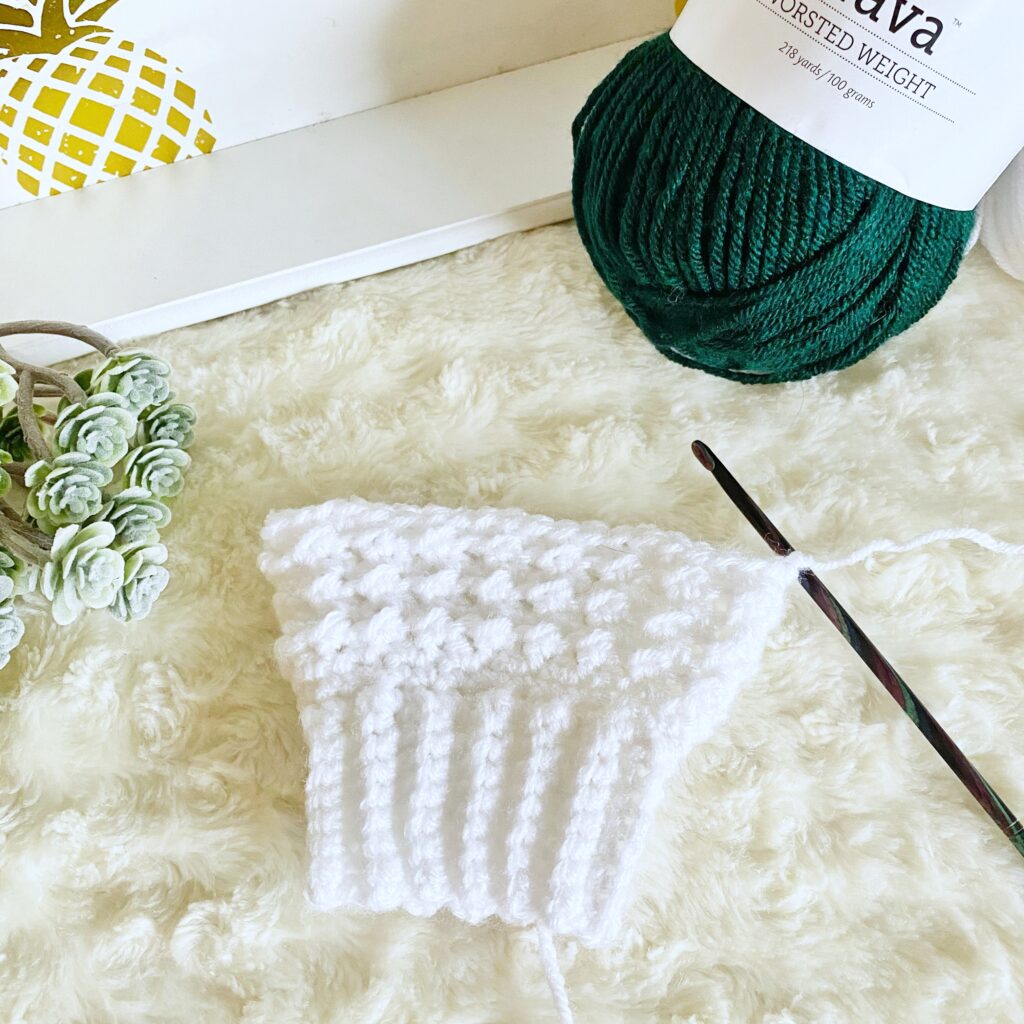

*Begin working in the round as normal with no TURN at the beginning of a round.*
Pine Stitch
Round 10: CH 2, DC in each stitch around. (42)
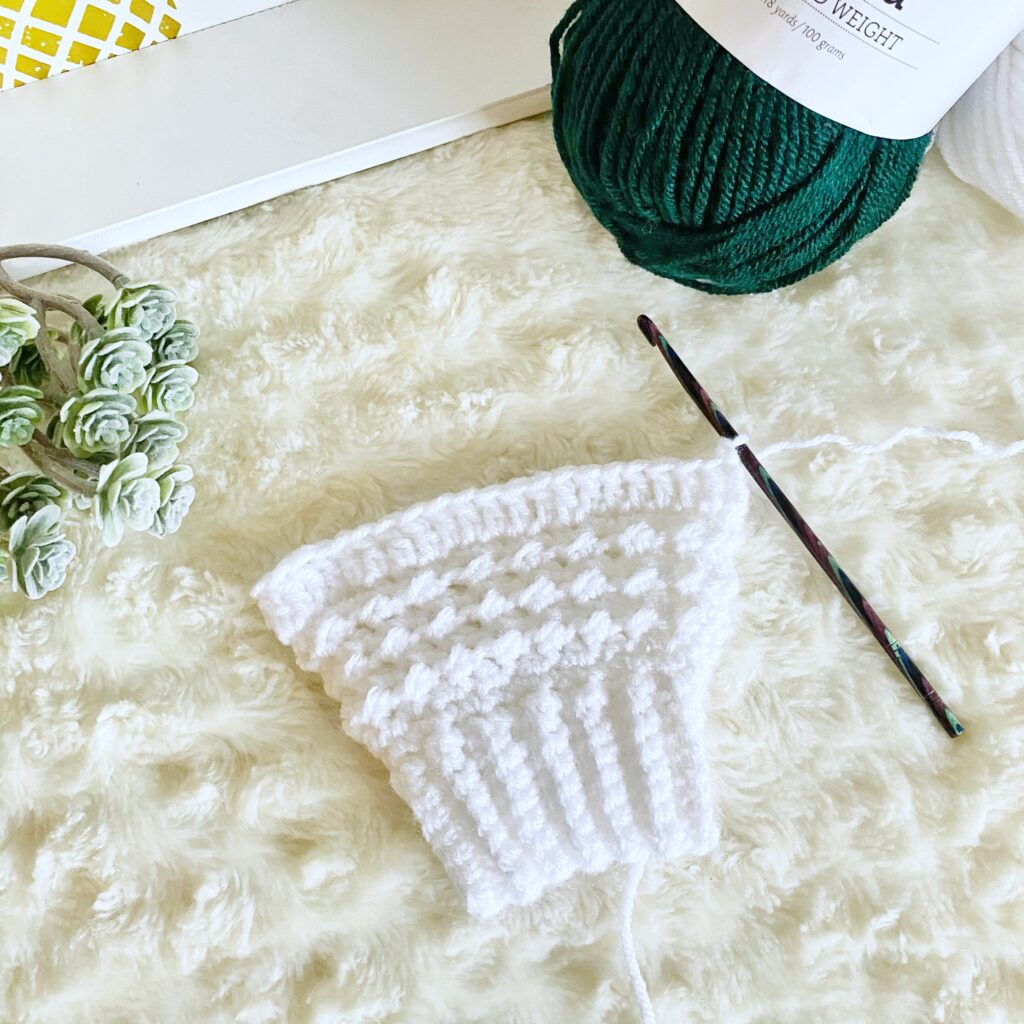

Round 11: CH 1, [SC 3, FPTR around the post of the SC stitch below next DC, on current round SK 1] 3x, SC 30. (3 FPTR / 39 SC)
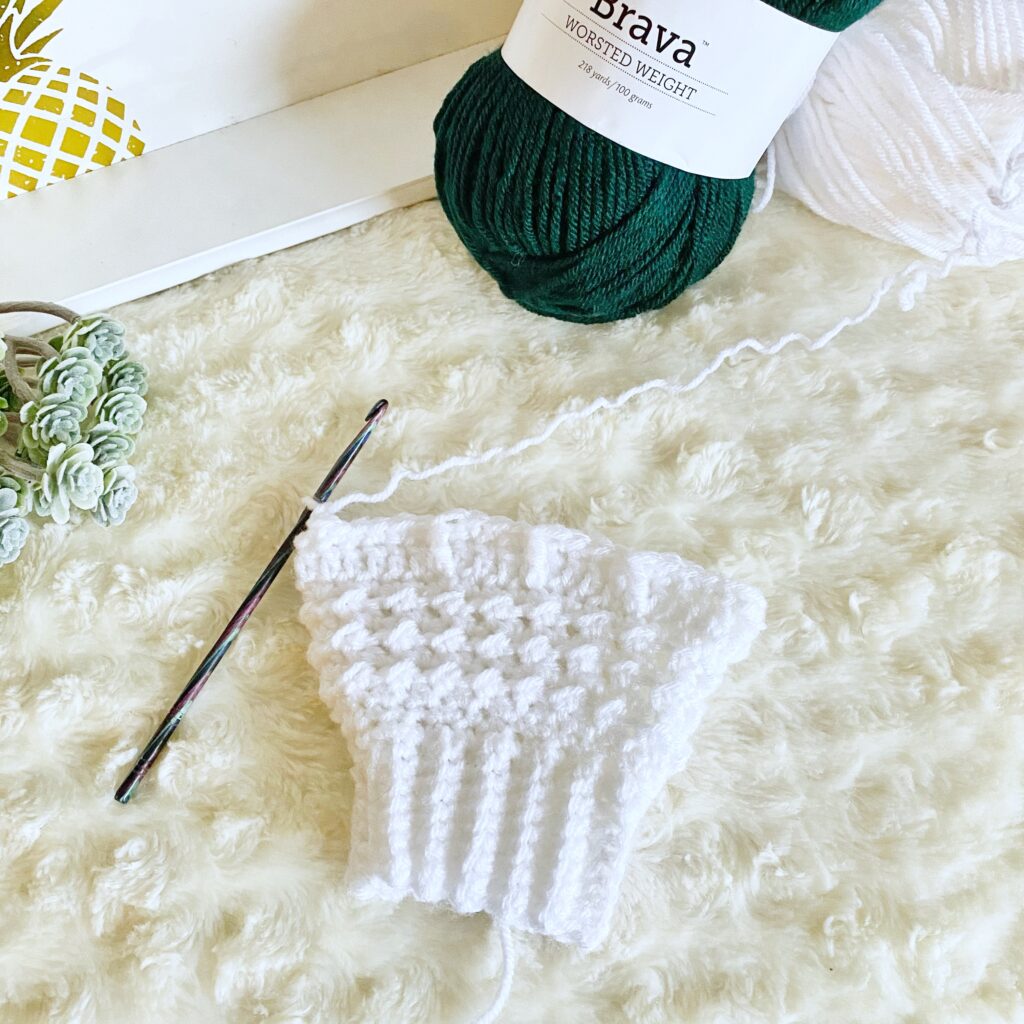

*This round is where you will split for the thumb opening.*
Round 12: CH 2, DC 15, SK 9, DC 18. (33)
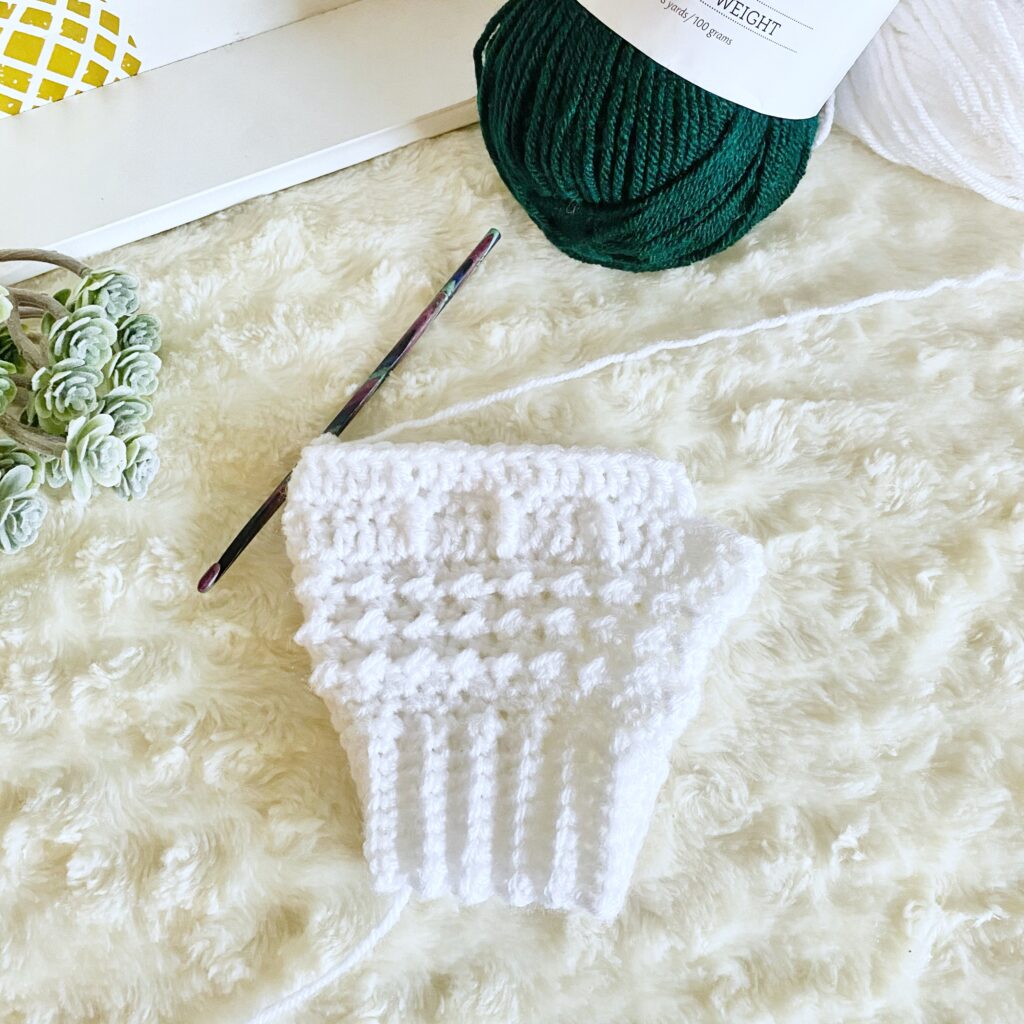

Round 13: CH 1, [SC 3, Begin FPTR3tog around the SC post two stitches back from two rounds back, work the 2nd post around the FPTR from previous round, SK next SC from two rounds back and finish 3rd post around next SC post, on main round, SK 1] 3x, SC 21. (3 FPTR3tog; 30 SC)
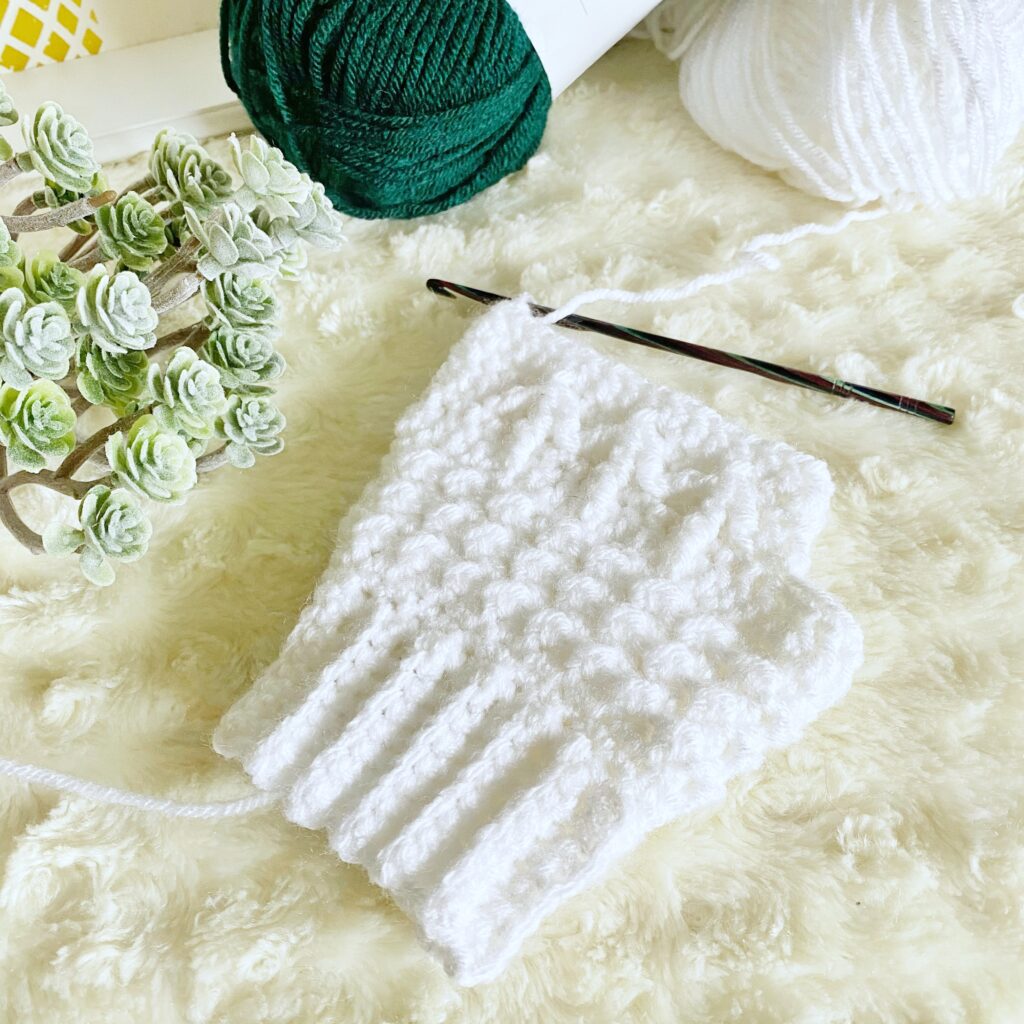

Round 14: CH 2, DC in every stitch around (33)
Round 15-19: Repeat Rounds 13-14 ending on a Round 13.
Round 20: CH 1, SC in every stitch around. (33)
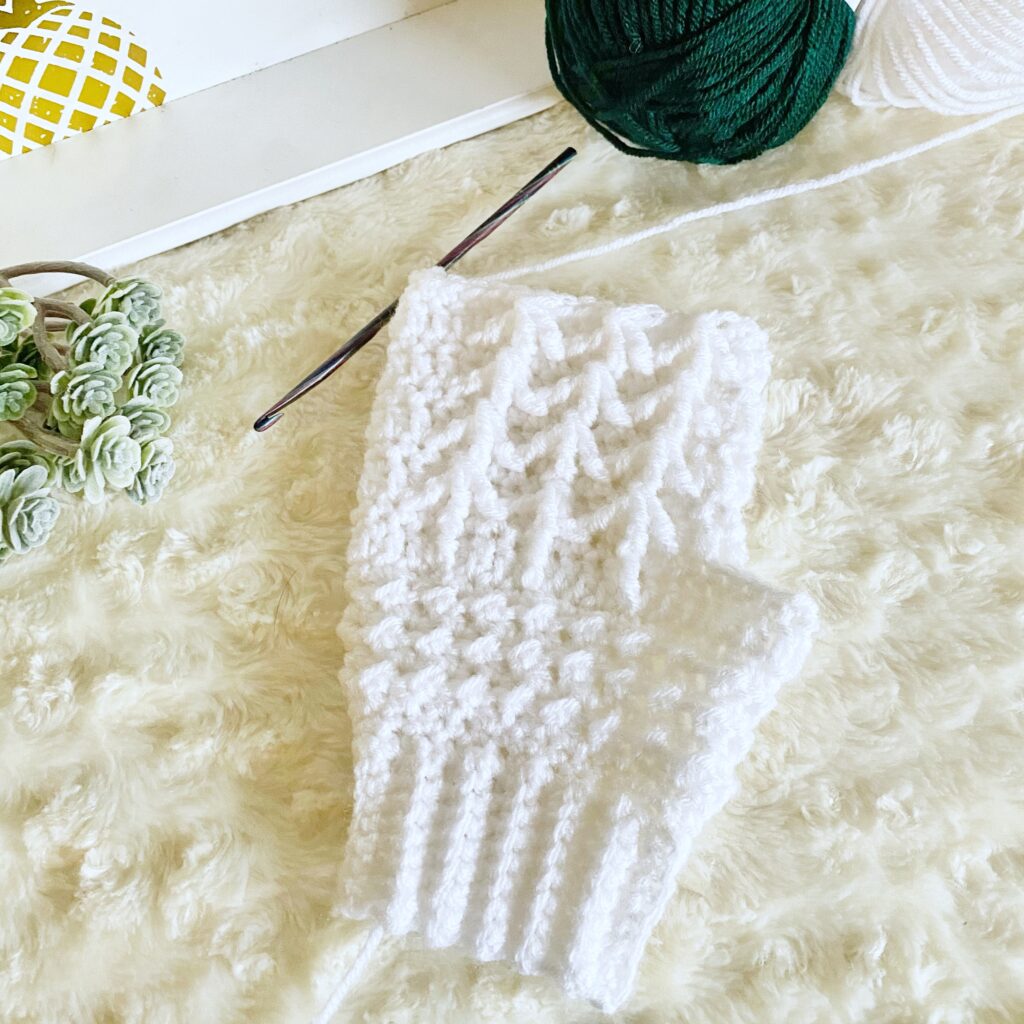

Crunch Stitch
*While working this section, it is necessary to TURN the work at the end of each round in order for the texture to develop.*
*Keep in mind that you should always be placing a HDC into a SL ST from the previous row and vice versa. If this sequence is altered, then there is an error in the stitch count.*
Round 21-22: Repeat Rounds 5 and 4. (33)
Decrease
Round 23: CH 1, TURN, [HDC, SL ST] 3x, HDC, SLST3tog, [HDC, SL ST] 4x, HDC, SLST3tog, [HDC, SL ST] 3x, HDC, SLST3tog, HDC. (27)
Round 24: CH 1, TURN, [SL ST, HDC] 3x, SLST3tog, [HDC, SL ST] 2x, HDC, SLST3tog, [HDC, SL ST] 3x, HDC, SLST3tog. (21)
Round 25: CH 1, TURN, HDC, SL ST, HDC, SLST3tog, [HDC, SL ST] 2x, HDC, SLST3tog, HDC, SL ST, HDC, SLST3tog, HDC. (15)
Round 26: CH 1, TURN, SLST3tog, HDC, SL ST, HDC, SLST3tog, HDC, SLST, HDC, SLST3tog. (9)
Cut yarn, FO. Insert the tail into a tapestry needle. Using a basting stitch, insert the needle through each of the last 9 stitches and pull tight to cinch the opening closed. Work a cross stitch or x-shaped stitch over the closed opening to secure.
Pattern – Thumb
Leave a long tail (approximately 18”) and join yarn to the thumb opening on the 16th DC of Round 12. Work the thumb in the round. Do not join at the end of rounds. Use a stitch marker to keep track of the beginning and end of each round.
Round 1: CH 1, [SC 2, SC INC] 3x. (12)
Round 2-11: SC in each stitch around (12)
Round 12: [SC 2, SC DEC] 3x. (9)
Cut yarn, FO. Insert the tail into a tapestry needle. Using a basting stitch, insert the needle through each of the last 9 stitches and pull tight to cinch the opening closed. Work a cross stitch or x-shaped stitch over the closed opening to secure. There will be a gap where the thumb is joined to the body of the mitten. Use the tail from the joined yarn to stitch this opening closed.
Pattern – Body Left Mitten
Begin with the pattern for the band and Rounds 1-10 of the pattern for the body of the right mitten.
Round 11: CH 1, SC 27, [FPTR around the post of the SC stitch below next DC, on current round SK 1, SC 3] 3x, SC 3. (3 FPTR / 39 SC)
*This round is where you will split for the thumb opening.*
Round 12: CH 2, DC 15, SK 9, DC 18. (33)
Round 13: CH 1, SC 18, [Begin FPTR3tog around the SC post two stitches back from two rounds back, work the 2nd post around the FPTR from previous round, SK next SC from two rounds back and finish 3rd post around next SC post, on main round, SK 1, SC 3] 3x, SC 3. (3 FPTR3tog; 30 SC)
Round 14: CH 2, DC in every stitch around (33)
Round 15-19: Repeat Rounds 13-14 ending on a Round 13.
Repeat Rounds 20-26 and finishing instructions from the pattern of the body of the right mitten. Repeat thumb pattern instructions.
Weave in all ends.
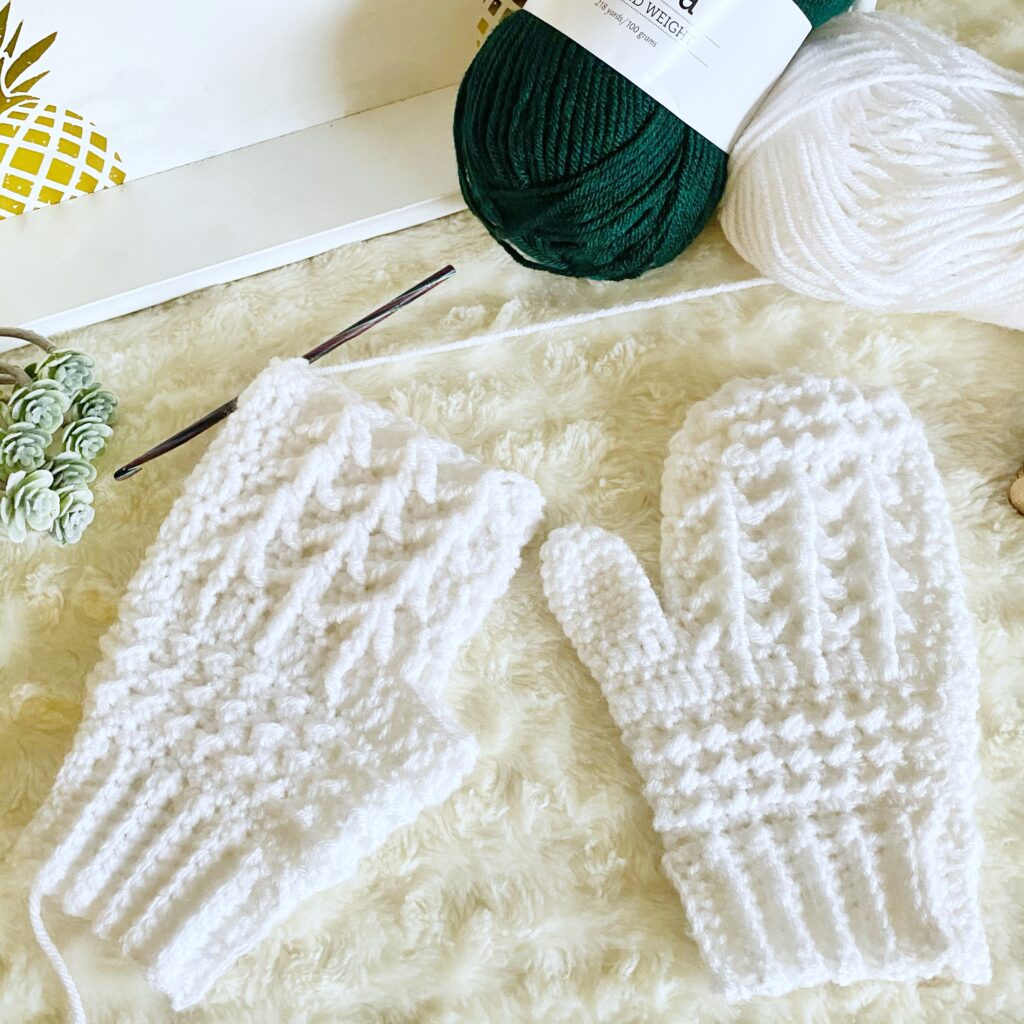

We hope that you enjoyed this CAL! Be sure to sign up for our newsletter so you don’t miss any future CALs and join our Facebook group so you can share your work in progress photos with us!

The photographs and pattern contained in this document are the property of A Plush Pineapple. Unauthorized reproduction, in whole or in part, or distribution of this pattern or content is prohibited. ALL FINISHED PRODUCTS created using this pattern may be sold locally or online. If selling finished products online, please give my blog credit for the pattern by posting a link to my website.



[…] Headband – Week 2: November 9 – November 15 at A Plush Pineapple […]
Is your webdesigner looking for a job. I think your site is great. Melinda Konrad Shafer
Thanks so much!
I reallly like your writing style, exceellent info, regards for posting :D. Siusan Baily Weathers
Thank you so much!