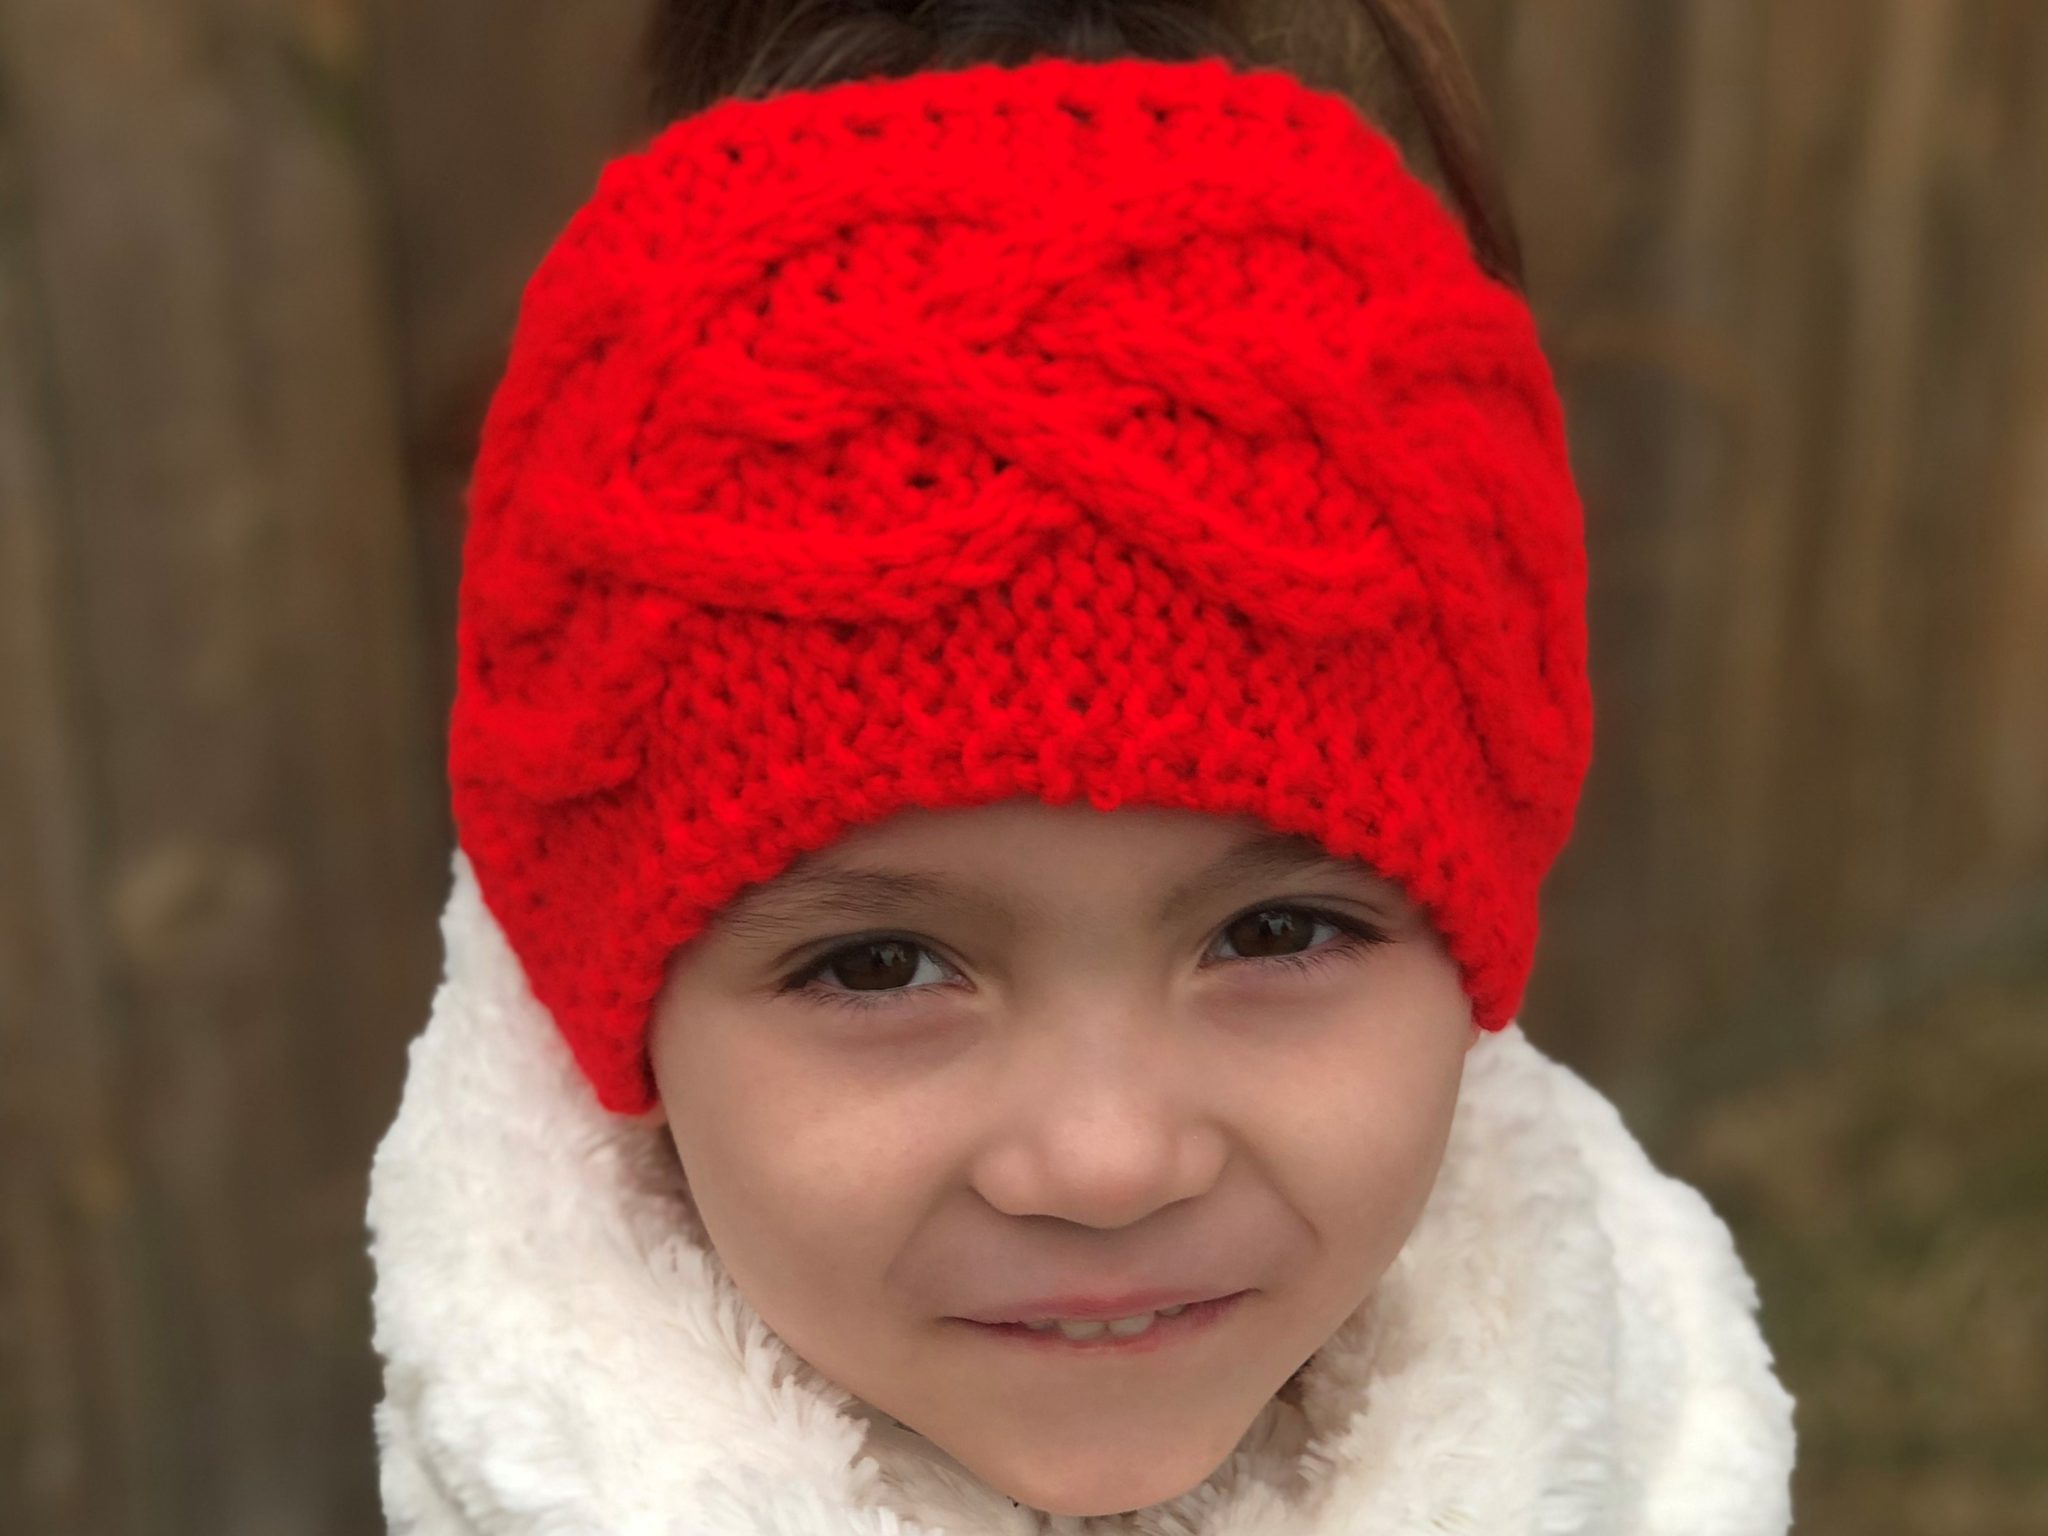
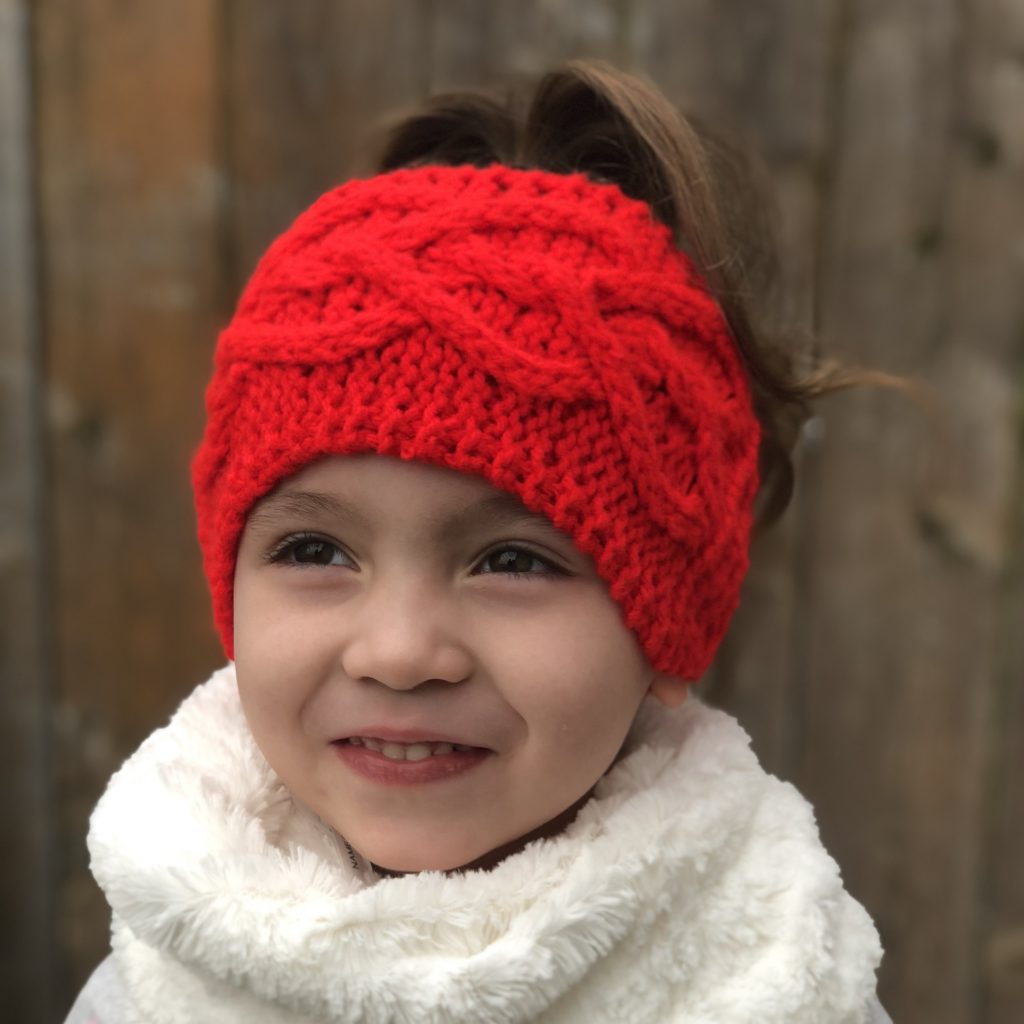
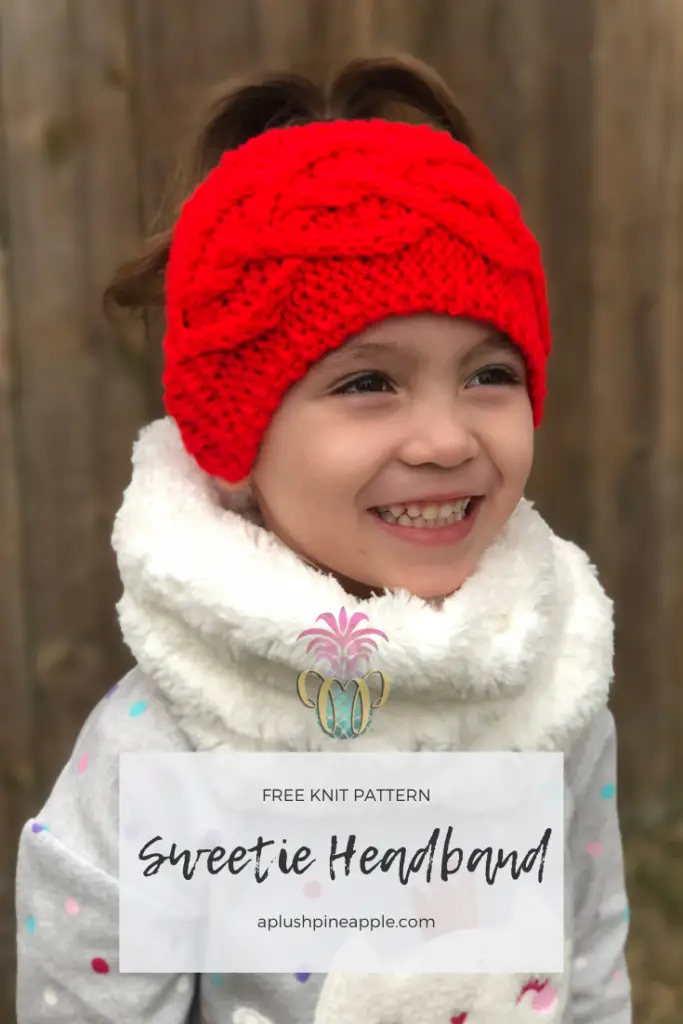
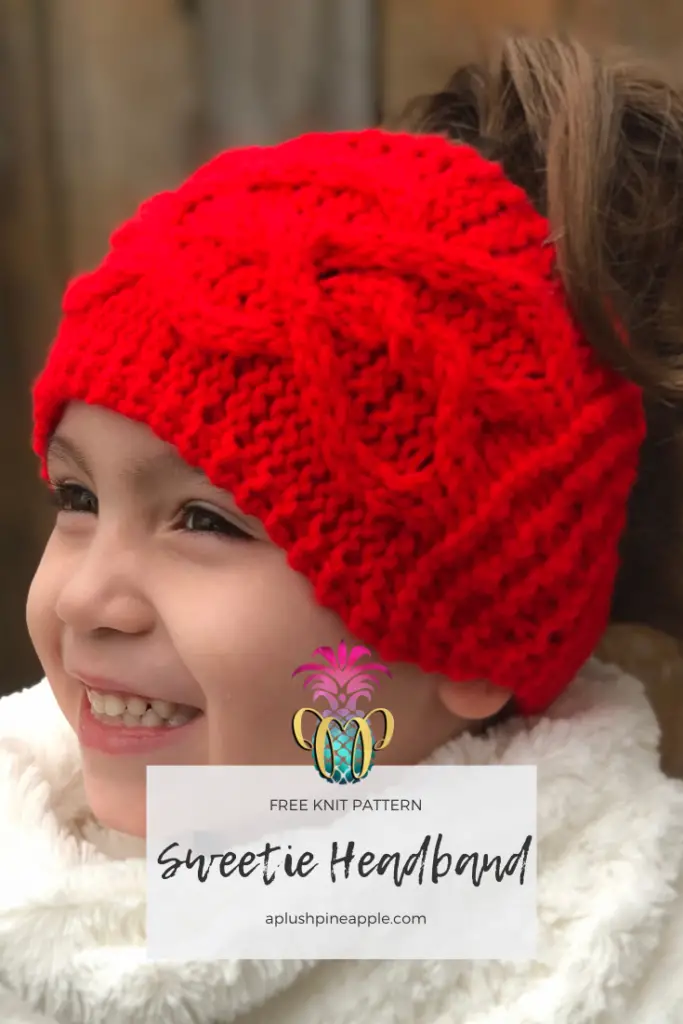
This knit headband is perfect for Valentine’s Day! It also makes a great gift for anybody that you want to shower with some extra love!
“A daughter is God’s way of saying, ‘I thought you could use a lifelong friend.'”
Unknown
“Let’s play Mom and Sweetie. I’ll be the Mom, and you be the Sweetie. Ok, Mom?”
Little girl is a girly girl through and through. She loves to play house. She especially likes to be the one in charge. I am completely at a loss for where she gets that trait from…(heavy on the sarcasm). Another of her favorite past times is playing dress up, and she loves wearing ALLLLL the accessories with an outfit. I also am clueless as to where she gets that trait from…(typed while applying my hot pink pineapple lip balm). Since she enjoys playing “Mom and Sweetie,” AND she loves to be in style, I thought it appropriate to name this knit headband design The Sweetie Headband!
Sweetie
Originally, I was not quite sure where this word “sweetie” originated from. Sweetie is not one of the nicknames I use for her. I had an inkling that it came from her cousin. I overheard the two of them playing one day, and when I heard one address the other as “sweetie,” I looked quizzically at my sister-in-law. She smiled knowingly and explained that one was the mom and the other was the sweetie. How adorable is that?! Later, I found out that they adopted this term from my mother-in-law who calls them both “sweetie”! Even more adorable is her love of fashion!
Style
This girl changes her outfit more in a day than any other five-year-old I’ve known. She doesn’t play with toys. She plays in the form of dress up. Half…yes…HALF of her closet is occupied by princess dresses. Every princess dress that you can imagine is hanging in there. She also has a tote of dress up shoes, wands, tiaras, … you name it! She just loves being EXTRA! What FANCY little girl doesn’t have a great headband with heart detail?
Sweetie Headband
As I was designing this knit headband, her response was, “Ooooo, Mommy! Is that for ME?!” It was calling her name while it was still on the needles. To top it all off, she LOVES red (just like her Lola). One of the goals of my brand is to showcase love, sunshine, and pineapples through my work, and this design definitely gets…
…all the heart eyes!
Skill Level – Intermediate
Disclaimer: This post contains affiliate links to the products used in this project. If you make a purchase through any of these links, we will get a small commission at no additional cost to you.
Materials
Abbreviations
- K – Knit
- P – Purl
- P1F&B – Purl one stitch in the front and back loop. (I actually do the back loop first. I find it easier to manipulate.)
- P2tog – Purl two stitches together.
- C4B – Slip two stitches onto cable needle and hold behind the work. K2 stitches from main needle. K2 stitches from cable needle.
- C4F – Slip two stitches onto cable needle and hold in front of the work. K2 stitches from main needle. K2 stitches from cable needle.
- CR4B – Slip two stitches onto cable needle and hold behind the work. K2 stitches from main needle. P2 stitches from cable needle.
- CL4F – Slip two stitches onto cable needle and hold in front of the work. P2 stitches from main needle. K2 stitches from cable needle.
- CR3B – Slip one stitch onto cable needle and hold behind the work. K2 stitches from main needle. P1 stitch from cable needle.
- CL3F – Slip two stitches onto cable needle and hold in front of the work. P1 stitch from main needle. K2 stitches from cable needle.
Notes
- This knit headband is worked as a flat piece starting and ending in the middle of the back band and seamed together when finished.
- Be sure to use a thicker worsted weight. The headband is meant to double as an ear warmer. Thinner worsted weight yarns such as Caron Simply Soft or Lion Brand Heartland simply do not hold the shape of the band well and are not as functional for warmth. I used I Love This Yarn and Caron One Pound. If you do decide to use a thinner worsted weight yarn, you will HAVE to steam block the finished product for it to hold its shape, but it will still be very thin.
- The cabled heart portion (Rows 26-37/22-33) of this headband is a pattern developed by Studio Knit. You can find a video tutorial there on how to complete the various cable stitches in this pattern.
- Be sure to check out my other headband pattern The Kelsi Headband!
- If you have any difficulty completing this project and would like support, please email me at theplushpineappleshop@gmail.com
Pattern
Adult Size
Cast on 8 stitches. (Even rows are RS rows.)
Band
Row 1-14: Purl across. (8)
Increase Rows
Row 15: P1, P1F&B, repeat to end of row. (12)
Row 16: Purl across. (12)
Row 17: P1, P1F&B, repeat to end of row. (18)
Row 18: Purl across. (18)
Row 19: P2, P1F&B, repeat to end of row. (24)
Row 20-25: Purl across. (24)
Set-up Rows (for heart pattern)
Row 26: K2, P4, K2, C4B, C4F, K2, P4, K2. (24)
Row 27: K6, P12, K6. (24)
Repeat Rows
Row 28: K2, P4, CR4B, K4, CL4F, P4, K2. (24)
Row 29: K6, P2, K2, P4, K2, P2, K6. (24)
Row 30: K2, P3, CR3B, P2, C4B, P2, CL3F, P3, K2. (24)
Row 31: K5, P2, K3, P4, K3, P2, K5. (24)
Row 32: K2, P2, CR3B, P3, K4, P3, CL3F, P2, K2. (24)
Row 33: K4, P2, K4, P4, K4, P2, K4. (24)
Row 34: K2, P2, K2, P4, C4B, P4, K2, P2, K2. (24)
Row 35: K4, P2, K4, P4, K4, P2, K4. (24)
Row 36: K2, P2, CL4F, C4B, C4F, CR4B, P2, K2. (24)
Row 37: K6, P12, K6. (24)
Rows 38-67: Repeat Rows 28-37. (24)
*NOTE: The cabled heart portion of the headband (rows 28-67) should measure approximately 8 inches. If you are using a yarn with less stretch, you may need to repeat rows 28-37 until you reach the desired length.
Decrease Rows
Row 68-73: Purl across. (24)
Row 74: P2, P2tog, repeat across. (18)
Row 75: Purl across. (18)
Row 76: P1, P2tog, repeat across. (12)
Row 77: Purl across. (12)
Row 78: P1, P2tog, repeat across. (8)
Row 79-92: Purl across. (8)
Purl Bind Off. Seam together using desired method. (I used the mattress stitch.)
Child
Cast on 8 stitches. (Even rows are RS rows.)
Band
Row 1-12: Purl across. (8)
Increase Rows
Row 13: P1, P1F&B, repeat to end of row. (12)
Row 14: Purl across. (12)
Row 15: P1, P1F&B, repeat to end of row. (18)
Row 16: Purl across. (18)
Row 17: P2, P1F&B, repeat to end of row. (24)
Row 18-21: Purl across. (24)
Set-up Rows (for heart pattern)
Row 22: K2, P4, K2, C4B, C4F, K2, P4, K2. (24)
Row 23: K6, P12, K6. (24)
Repeat Rows
Row 24: K2, P4, CR4B, K4, CL4F, P4, K2. (24)
Row 25: K6, P2, K2, P4, K2, P2, K6. (24)
Row 26: K2, P3, CR3B, P2, C4B, P2, CL3F, P3, K2. (24)
Row 27: K5, P2, K3, P4, K3, P2, K5. (24)
Row 28: K2, P2, CR3B, P3, K4, P3, CL3F, P2, K2. (24)
Row 29: K4, P2, K4, P4, K4, P2, K4. (24)
Row 30: K2, P2, K2, P4, C4B, P4, K2, P2, K2. (24)
Row 31: K4, P2, K4, P4, K4, P2, K4. (24)
Row 32: K2, P2, CL4F, C4B, C4F, CR4B, P2, K2. (24)
Row 33: K6, P12, K6. (24)
Rows 34-63: Repeat Rows 24-33. (24)
*NOTE: The cabled heart portion of the headband (rows 24-63) should measure approximately 8 inches. If you are using a yarn with less stretch, you may need to repeat rows 24-33 until you reach the desired length.
Decrease Rows
Row 64-67: Purl across. (24)
Row 68: P2, P2tog, repeat across. (18)
Row 69: Purl across. (18)
Row 70: P1, P2tog, repeat across. (12)
Row 71: Purl across. (12)
Row 72: P1, P2tog, repeat across. (8)
Row 73-84: Purl across. (8)
Purl Bind Off. Seam together using desired method. (I used the mattress stitch.)
If you make this knit headband, please share it! I would love to see your work! You can tag me on Instagram and Facebook @theplushpineapple. Use the tag #theplushpineapple.
“Much love, sunshine, and pineapples”
Sarah
The photographs and pattern contained in this document are the property of A Plush Pineapple. Unauthorized reproduction, in whole or in part, or distribution of this pattern or content is prohibited. ALL FINISHED PRODUCTS created using this pattern may be sold locally or online. If selling finished products online, please give my blog credit for the pattern by posting a link to my website.