
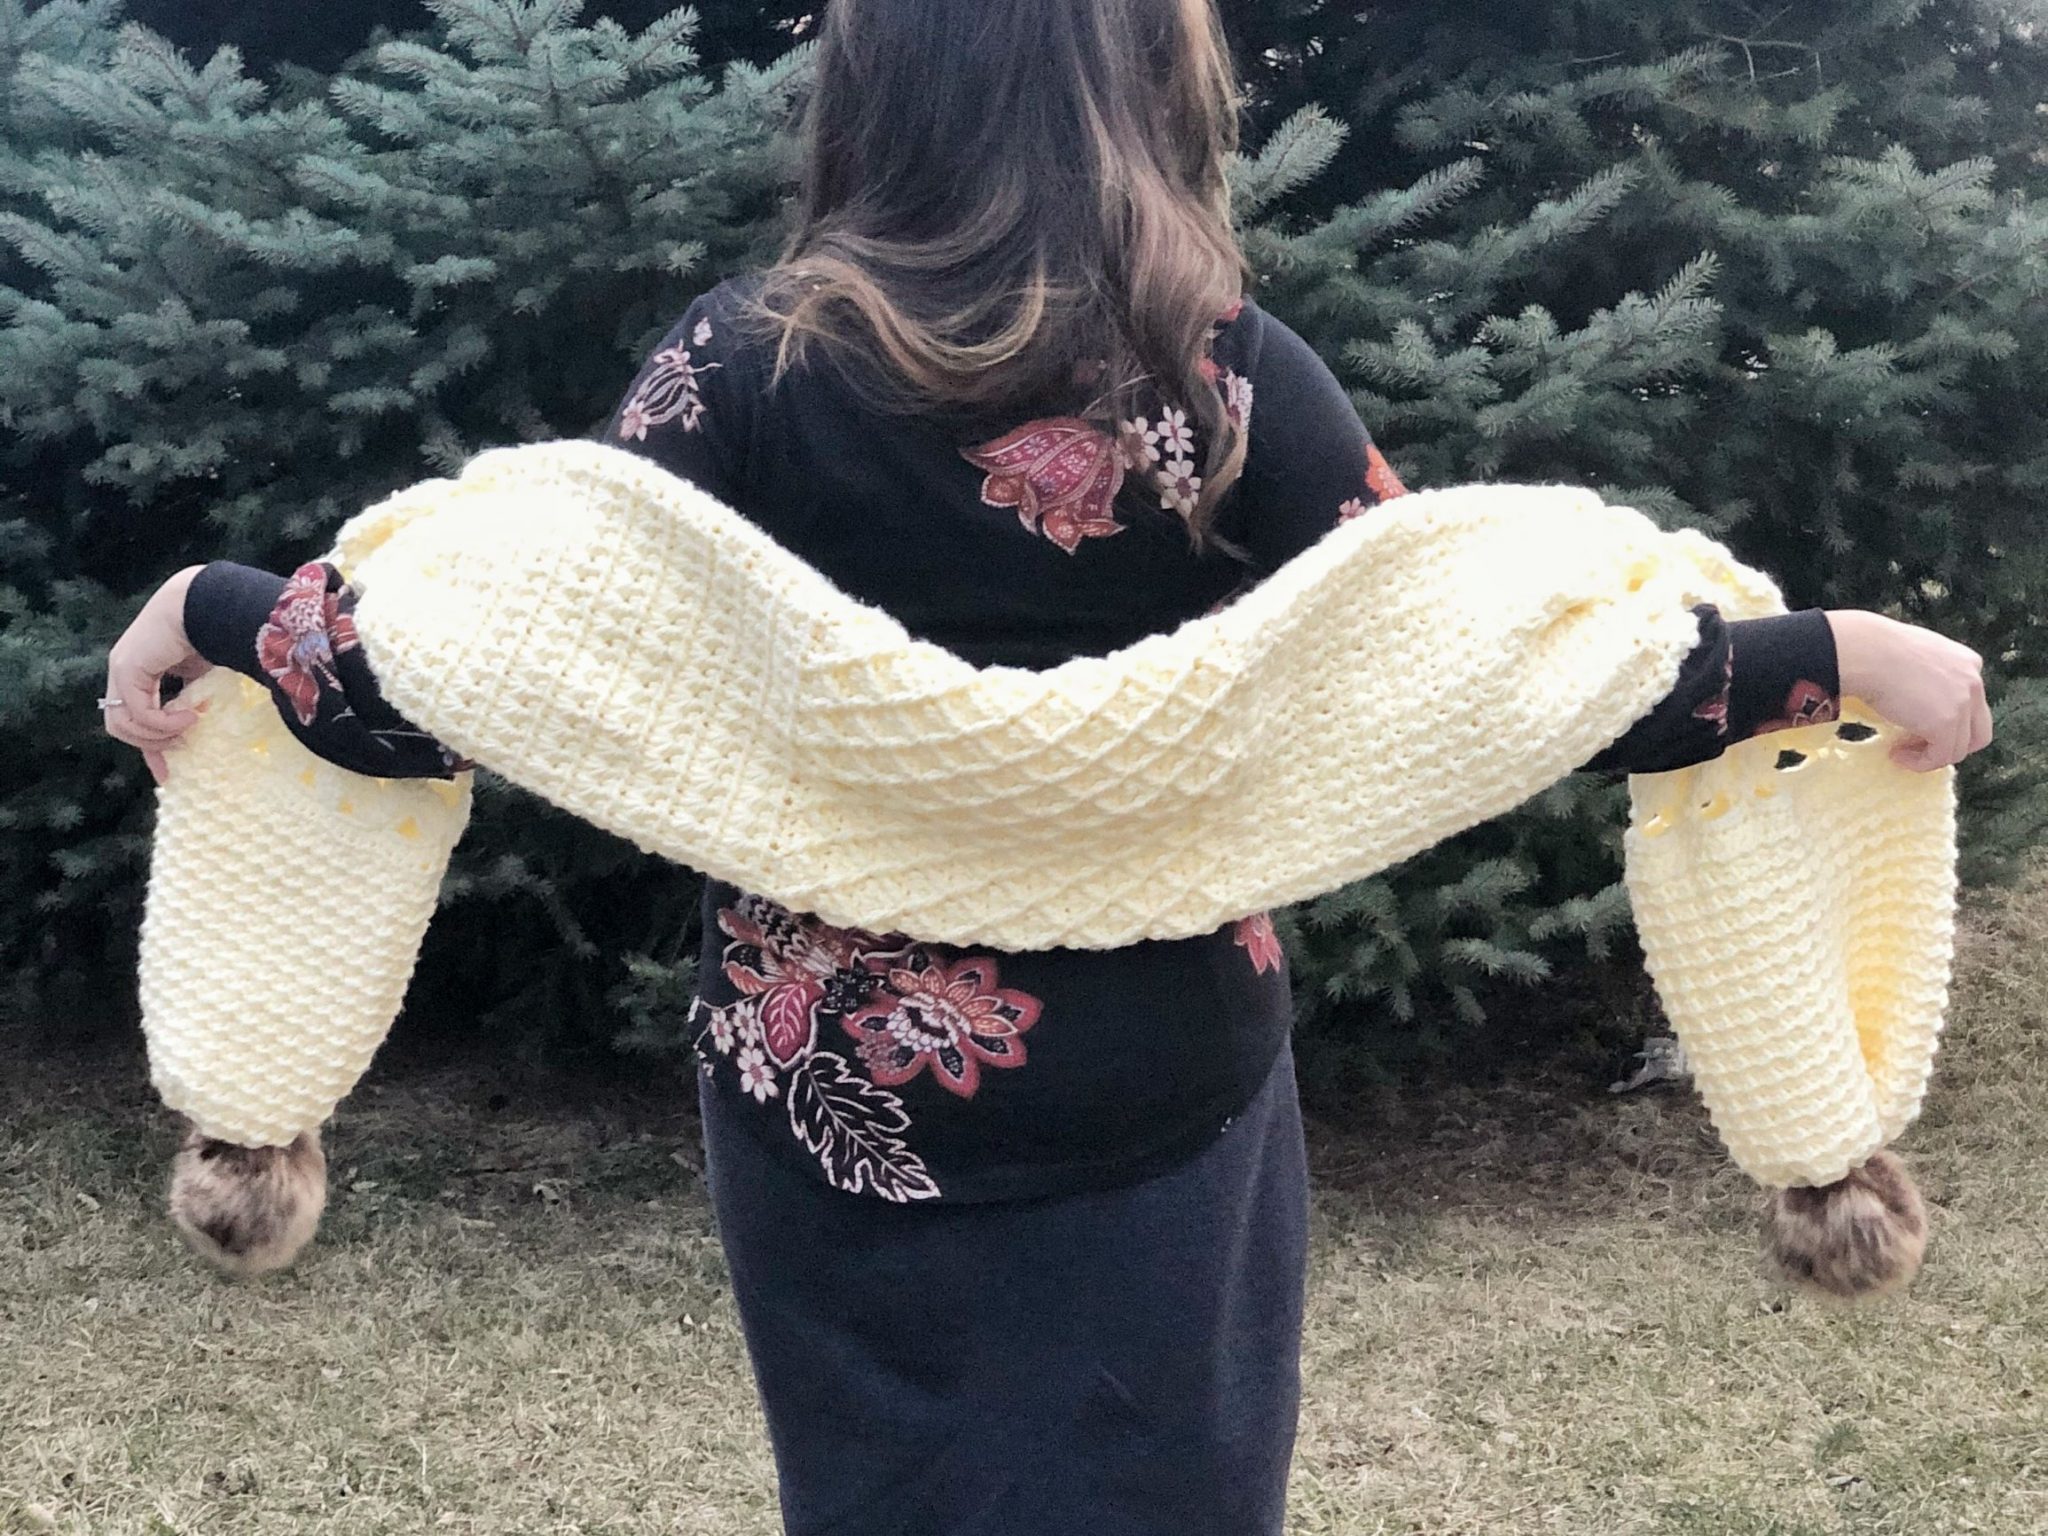
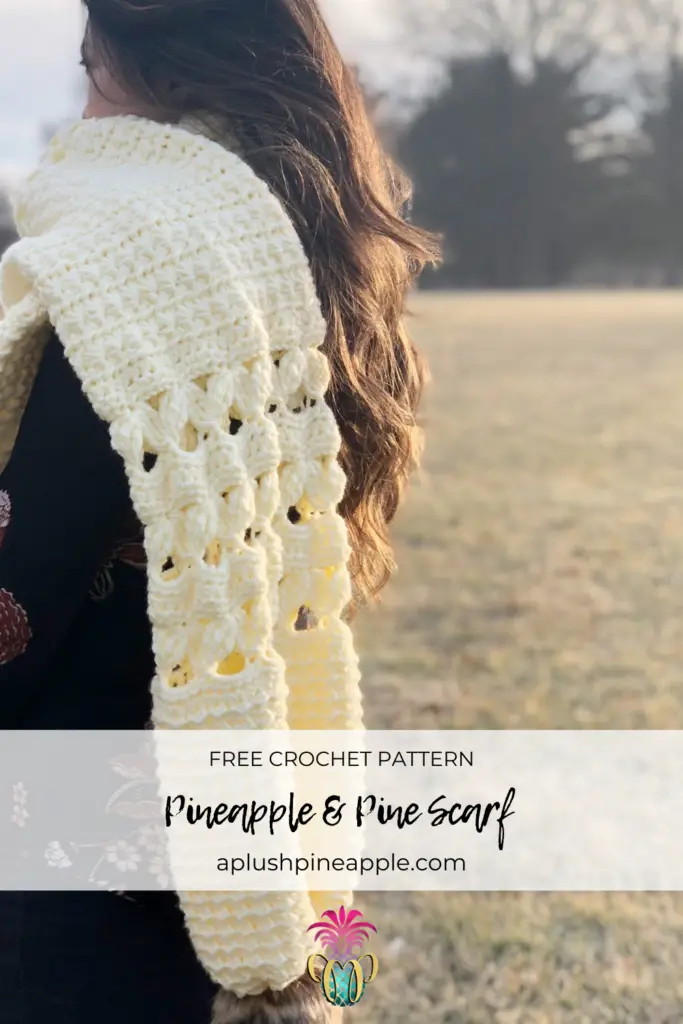
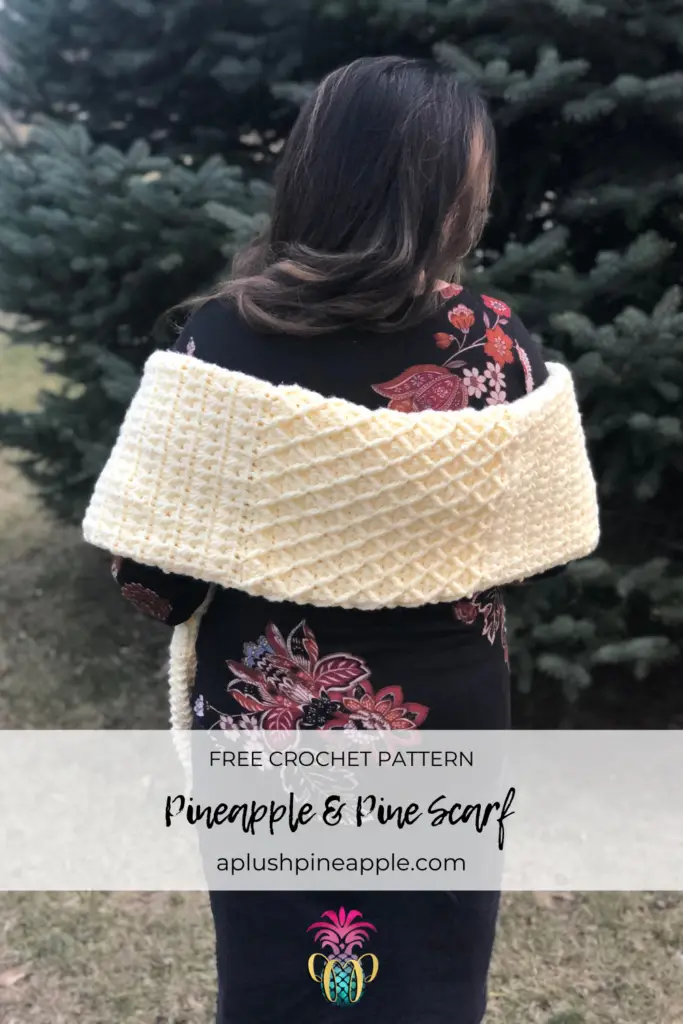
Crochet a fabulous scarf as a fall and winter accessory that features amazing texture details in varying stitches with this free crochet scarf pattern.
“I love not man the less, but nature more.”
-Lord Byron
We wanted our first design to be a reflection of our brands and aesthetics.
Nature is such a thing of beauty and inspiration. I would have to say that much if not all of my creative inspo for my designs comes from nature. I love being outdoors. Even though I am a self-proclaimed summer-loving girl of all things ocean, I do love a good walk in the woods too!
When Kelsie of Crafting for Weeks and I began our maker community called Pineapple and Pine, we wanted our first collaborative design to be a reflection of our love of nature. We chose each stitch pattern with thought and care as a representation of something in nature that we each felt connected to.
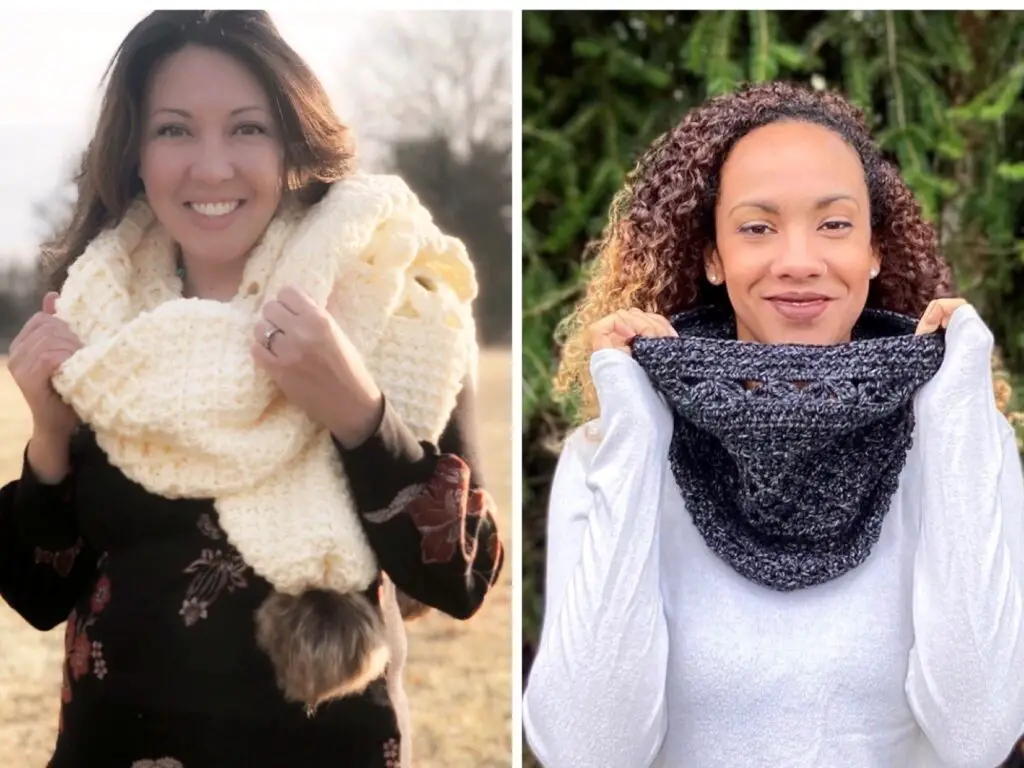
We also chose to design two patterns in one, a scarf version and a cowl version. While these designs were the projects for our first CAL together, we have now decided to make them available individually on each of our blogs for ease of following. You can find the free crochet scarf pattern here in this post, or you can tap the link below for the cowl version.
So get ready for an experience that is more that just making a scarf. Whether it’s the sound of the waves or a breath-taking mountain view, we wanted this free crochet scarf pattern to…
…take you on a journey!
Skill Level – Intermediate
Disclaimer: This post contains affiliate links to the products used in this project. If you make a purchase through any of these links, we will get a small commission at no additional cost to you.
Materials
- 4 balls of Lion Brand Color Made Easy yarn
- Size K10.5/6.5mm crochet hook
- Stitch markers
- Tapestry needle
- Scissors
- 2 x-large faux fur pom-poms (optional)

Notes
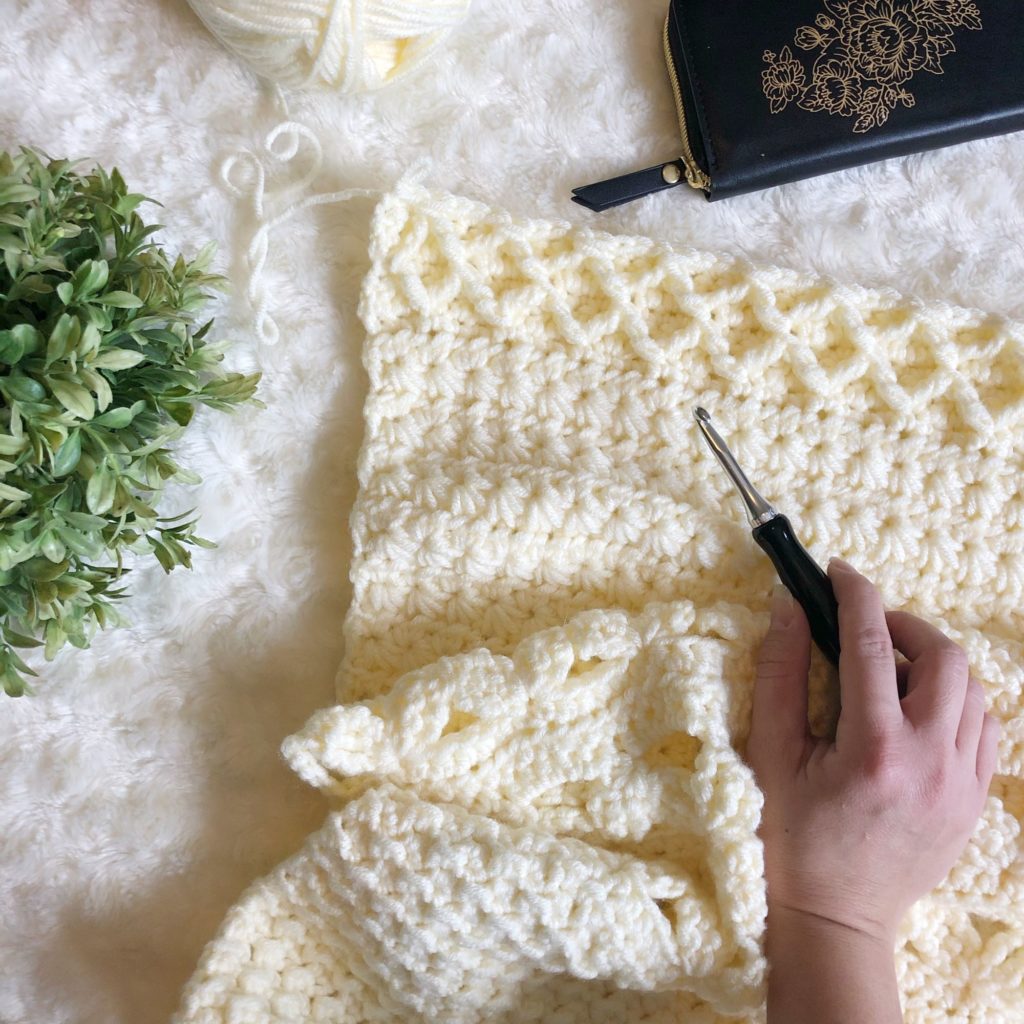
- This free crochet scarf pattern is worked flat (back and forth in rows) and then seamed up the length of the scarf to form a tube.
- There are two optional finishing methods included in this pattern. One method is to add a decorative fringe and one method is to cinch the ends and add decorative pom-poms.
- There are two size options for the scarf: regular and wide. The stitch counts for each size will appear in parenthesis for each line respectively.
- This pattern is written for a super scarf. If you wish to have a standard size scarf, simply use worsted weight yarn instead of bulky.
- The finished scarf measures approximately 70” long by 10” wide (before finishing).
Gauge
Due to varying stitch patterns, the gauge for each stitch is listed under the corresponding section.
Abbreviations
- CH – Chain
- DC – Double crochet
- DTR – Double treble crochet
- DTR Group – Double treble group
- DTR2tog — Double treble group two together into designated stitches.
- FHDC — foundation half double crochet (optional)
- FPTR – Front post treble crochet
- FO – Finish off
- HDC – Half double crochet
- SC – Single crochet
- SL ST – Slip stitch
- TR2tog – Treble crochet two together
- YO – Yarn over
Special Stitches
- Double Treble (DTR)
- YO 3x, insert hook into desired stitch and pull up a loop (5 loops on hook).
- YO, pull through two loops (4 loops on hook).
- YO, pull through two loops (3 loops on hook).
- YO, pull through two loops (2 loops on hook).
- YO, pull through last two loops.
- Double Treble Group (DTR Group)
- YO 3x, insert hook into desired stitch and pull up a loop (5 loops on hook).
- YO, pull through two loops (4 loops on hook).
- YO, pull through two loops (3 loops on hook).
- YO, pull through two loops (2 loops on hook).
- YO 3x, insert hook back into the same stitch and pull up a loop (6 loops on hook).
- YO, pull through two loops (5 loops on hook).
- YO, pull through two loops (4 loops on hook).
- YO, pull through two loops (3 loops on hook).
- YO 3x, insert hook back into the same stitch and pull up a loop (7 loops on hook).
- YO, pull through two loops (6 loops on hook).
- YO, pull through two loops (5 loops on hook).
- YO, pull through two loops (4 loops on hook).
- YO, pull through all four loops.
- Double Treble Group Two Together (DTRGroup2tog)
- Create a DTR Group in desired stitch but do not pull through the last 4 loops.
- SK 5, create a DTR Group in next stitch.
- YO, pull through all eight loops.
- Star Stitch
- To begin a row of star stitch, CH 3, pull up a loop in the 2nd and 3rd CH from the hook as well as the first three stitches of the row (6 loops on hook).
- YO, pull through all six loops, CH 1 to close the star.
- Each star after the first one is completed as follows: Pull up a loop in the CH 1 space, the last leg of the last star, the same stitch as the last leg of the last star, and in the next two stitches (6 loops on hook).
- YO, pull through all six loops, CH 1 to close the star.
- Diamond Trellis Stitch
- Set up for the Diamond Trellis Stitch by completing a row of SC and then a row of DC.
- To begin the first row of cables for the Diamond Trellis, CH 1, FPTR around the 2nd SC post from the SC row.
- On main row, SK 1 (FPTR counts as that stitch), SC 3, FPTR two together by working a FPTR back around the last SC post worked from the SC row, DO NOT pull through the last two loops, SK 3 SC from the SC row, FPTR around next SC post from SC row, complete the stitch.
- Repeat the previous bullet until 5 stitches remain.
- SK 1, SC 3, FPTR back around the last SC post worked from the SC row, SC in last stitch on main row.
- Work another setup row of DC.
- CH 1, turn, SC 2.
- FPTR two together by working a FPTR around the last TR from the last cable row, DO NOT pull through the last two loops, FPTR around next TR from the last cable row.
- On main row, SK 1, SC 3.
- Repeat the last two bullets until 3 stitches remain on main row, SK 1, SC 2.
Pattern
Section One – Ocean Ripples
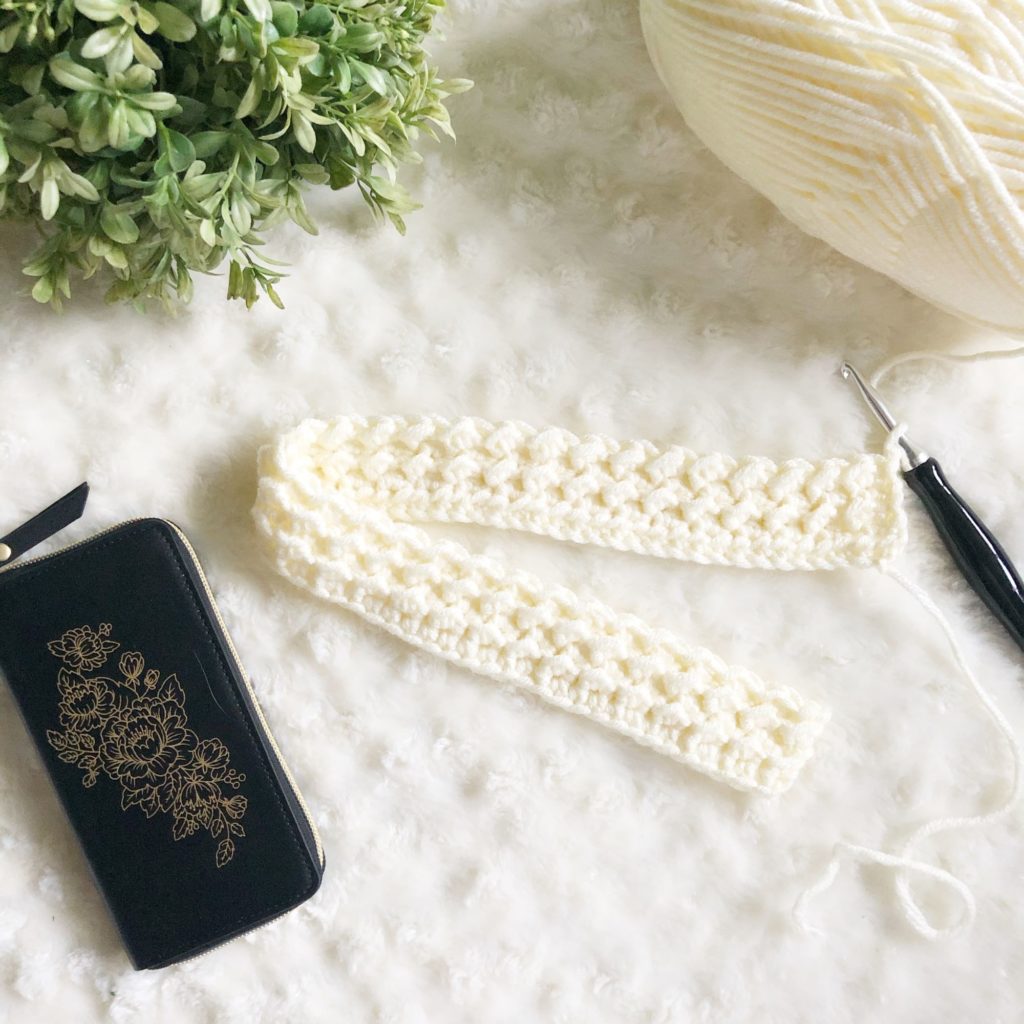
Is there any better sound than the sound of the ocean? One of my all-time favorite past times is sitting on the beach in the still of the early morning or late afternoon hours when there are no swimmers, no sunbathers, no surfers, just me, the sand, and the waves…and maybe the occasional sand crab or seagull. Sometimes, if I’m still enough, the sand crabs come out of their little holes and start moving sand around digging their little tunnels. I love seeing how many will come out before I make one tiny movement that sends them all scurrying back down into the sand.
As we decided on which stitches to use in our first CAL design for this free crochet scarf pattern, I settled on this ripple stitch. To me, it looks exactly like the sand after a wave has washed over it and receded back out into the ocean. If I can’t be at the ocean, I might as well create something that reminds me of it.
Ocean Ripples Section
Gauge: 12 stitches x 14 rows = 4″ x 4″
Row 1: Leaving a long tail, CH 50 (62), HDC in 2nd CH from hook and in each CH across. (49, 61)
Row 2: CH 1, turn, *HDC, SL ST*, repeat from * to * across row, HDC in the last stitch. (49, 61)
Row 3: CH 1, turn, *SL ST, HDC*, repeat from * to * across row, SL ST in the last stitch. (49, 61)
Row 4-35: Repeat Row 2-3 16x.
*Keep in mind that you should always be placing a HDC into a SL ST from the previous row and vice versa. If this pattern is not manifesting in your stitches, your stitch count is off.*
Section Two – Mountain Ranges
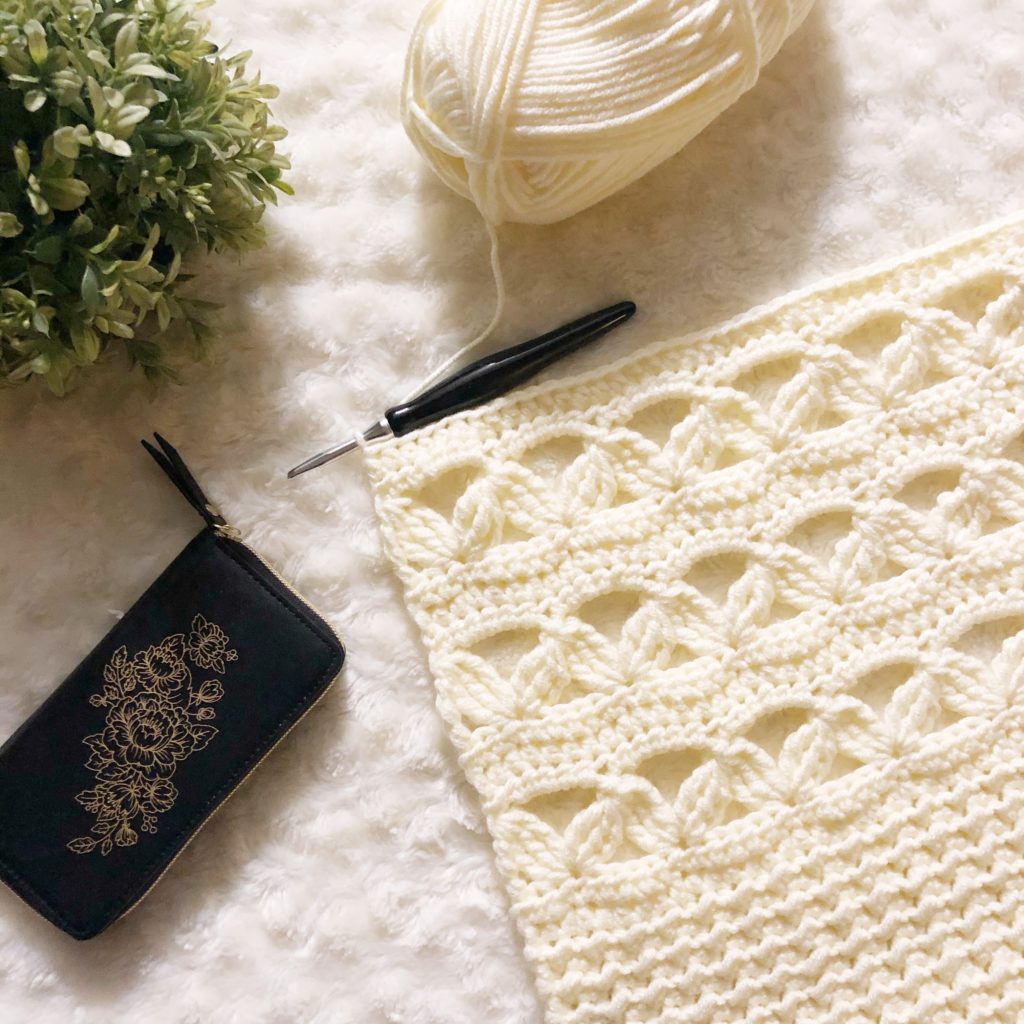
Ahhh…the mountains. They are so majestic and awe-inspiring. I love listening to beautiful music while driving through the mountains, and I can’t help but gaze in wonder at all the nature to be found whenever I get the opportunity to take a hike in the mountains. Not only are they picturesque as a backdrop, but also are usually teeming with amazing wildlife! On a recent hike that our family enjoyed in Tennessee, we saw deer, turkeys, and a bear!
This stitch was a result of Kelsie’s inspiration since she is from the PNW. You can read more about her love of the mountains in her cowl pattern post as well as a video tutorial on how to complete this stitch. It is a stitch that adds so much visual interest to this project with the zig zag effect created by three-stranded double treble stitches.
As you work up the next part of this free crochet scarf pattern, I hope you can feel the cool, crisp air, hear the sounds of a turkey gobbling nearby, and imagine the beauty of a breathtaking mountain scene.
Mountain Ranges Section
Gauge: 4 DTR Group clusters, or 12 HDC x 1 repeat of Rows 36-40 = 4″ x 4″
Row 36: CH 1, turn, HDC in each stitch across. (49, 61)
Row 37: Repeat Row 36.
Row 38: CH 5 (counts as a DTR), turn, SK 3, DTR Group in next stitch, *CH 5, DTRGroup2tog*, repeat from * to * until 3 stitches remain, DTR Group in same stitch as last, SK 2, DTR in last stitch. (1 DTR, (16, 20) DTR Group clusters, 1 DTR)
Row 39: CH 1, turn, HDC in the top of each DTR Group and 5 HDC in each CH 5 space. (49, 61)
Row 40: Repeat Row 36.
Row 41-48: Repeat Row 37-40 2x.
Section Three – Under the Stars
Stargazing is one of my favorite things to do. Just to imagine that the light from a star actually left the star years and years ago, and I am just now gazing upon it is mind blowing. I also love to look for constellations. There are some I can spot easily such as Orion and the Big Dipper, but sometimes, I like to get my app out and try to find new ones. It’s also so fun to read about all of the folklore tied into the constellations by their discoverers!
The star stich is also a contribution by Kelsie inspired by her love of the PNW. Her inspiration behind the stitch can be found in her cowl pattern post as well as a video tutorial on how to work the star stitch should you need it.
Wouldn’t it be amazing to be camping out under the stars while you work on the star section of this free crochet scarf pattern to fully be able to appreciate the inspiration behind it?
Under the Stars Section
Gauge: 6 star clusters x 7 rows = 4″ x 4″
Row 49: CH 3, turn, pull up a loop in 2nd and 3rd CH from hook and in the 1st three stitches (6 loops on hook), YO, pull through all six loops, *CH 1, pull up a loop in the CH 1 sp, the last leg of the previous star, the same stitch as the last leg of the previous star, and in the next two stitches (6 loops on hook), YO, pull through all six loops*, repeat from * to *, CH 1, HDC in last stitch (same stitch as last leg of last star). (24, 30 star clusters, 1 HDC)
Row 50: CH 1, turn, 2 HDC in the CH 1 sp of each star cluster, HDC in top of the first leg of the last star cluster. (49, 61)
Row 51-66: Repeat Row 49-50 8x.
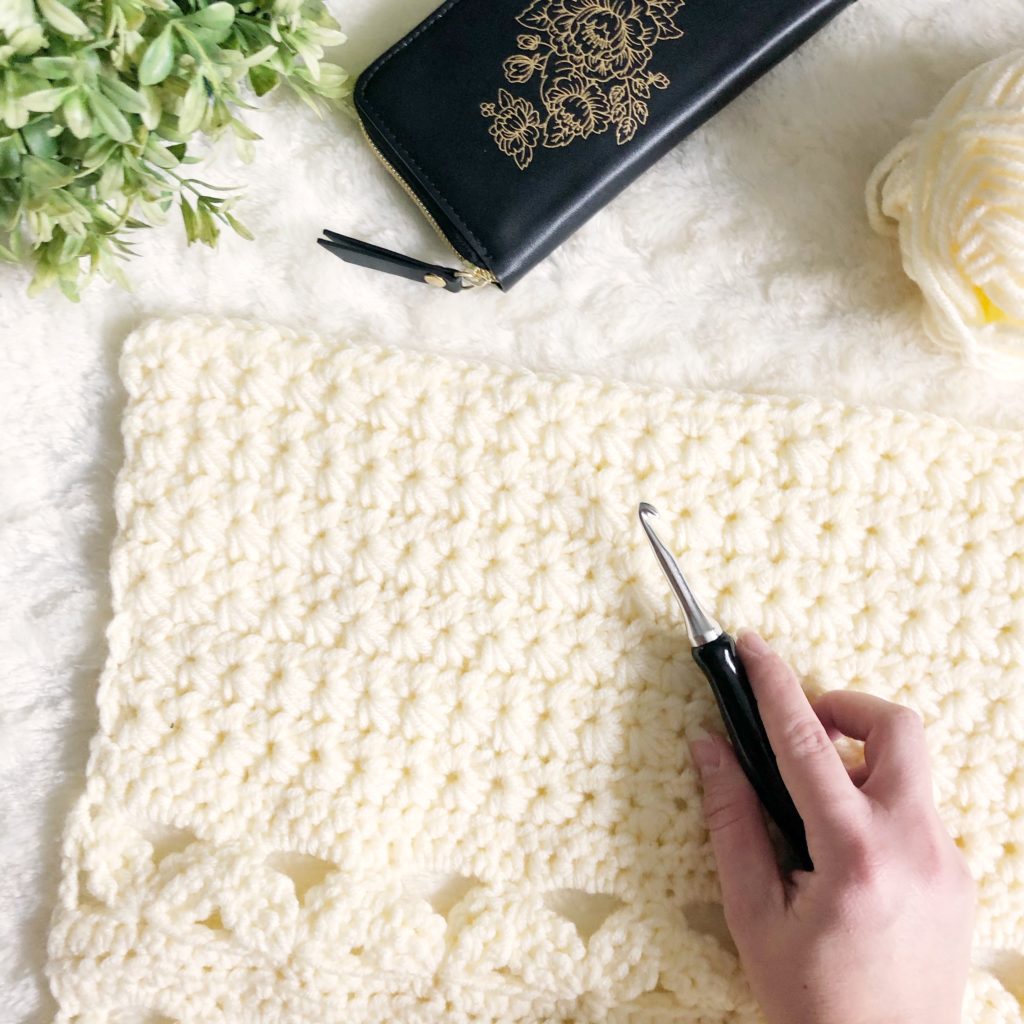
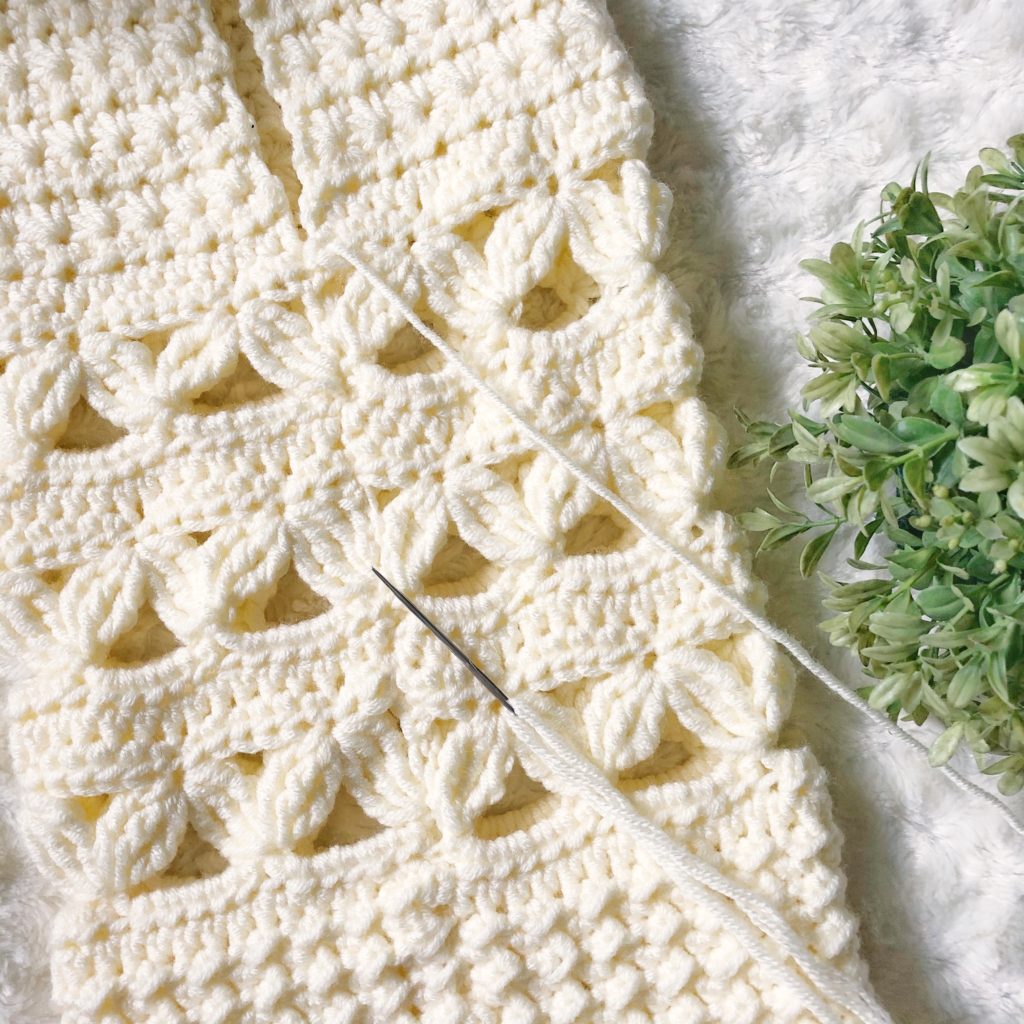
Section Four – Be a Pineapple
Pineapples. The princess of fruits. The symbol of warmth, hospitality, and friendship. For the last section of this free crochet scarf pattern, I chose a stitch that resembles the texture of a pineapple fruit! I have been asked many times why I chose a pineapple to represent my brand. I chose it for the very things that it represents!
Warmth
I am a summer kind of girl. I love everything about summer! Sunshine, baseball, ice cream, sunshine, swimming, fireworks, sunshine, vacations, … oh, and did I mention SUNSHINE! One of my favorite things to do is to sit outside on a warm summer day, so naturally, I would choose something that represents one of my favorite pasttimes!
Hospitality
As a brand in the maker community, I want everyone to feel welcome! I like building relationships with fellow makers because that is the only way to GROW and be successful. I want to have a spirit of celebrating along with my fellow makers in their successes and working together to reach goals!
Friendship
As I have developed relationships in the community, many of those have turned into friendships! We have gone beyond yarn talk and have confided in each other with the daily struggles of life, shared giggles and laughs over the fun moments, and lifted each other up in discouraging times! It’s amazing how your vibe truly DOES attract your tribe and the people that you would be friends with in real life are drawn to you even on a social media platform!
As you work the last and final stitch pattern of this project, I hope that you will consider joining our community and that you will truly experience a warm and hospitable environment with fellow makers and even develop some long-lasting friendships along the way!
Be a Pineapple Section
Gauge: 6 FPTR (3 pairs of FPTR2tog) x 8 rows = 4″ x 4″
Row 67: CH 1, turn, SC in each stitch across. (49, 61)
Row 68: CH 2, turn, DC in each stitch across. (49, 61)
Row 69: CH 1, turn, FPTR around the 2nd SC post from Row 67, *on main row, SK 1, SC 3, FPTR two together by working a FPTR back around the last SC post worked from Row 67, DO NOT pull through the last two loops, SK 3 SC from Row 67, FPTR around next SC post from Row 67 and complete the stitch*, repeat from * to * until 5 stitches remain on main row, SK 1, SC 3, FPTR back around the last SC post worked from Row 67, DO NOT pull through last two loops, SC in last stitch on main row, pull through all three loops. (27 FPTR, 37 SC; 30 FPTR, 46 SC)
Row 70: CH 2, turn, DC in each stitch across. (49, 61)
Row 71: CH 1, turn, SC 2, *FPTR two together by working a FPTR around the last TR post from Row 69, DO NOT pull through the last two loops, FPTR around next TR post from Row 69 and complete the stitch, on main row, SK 1, SC 3*, repeat from * to * until 3 stitches remain on main row, SK 1, SC 2. (27 FPTR, 37 SC; 30 FPTR, 46 SC)
Row 72-83: Repeat Row 68-71 3x.
Video Tutorial
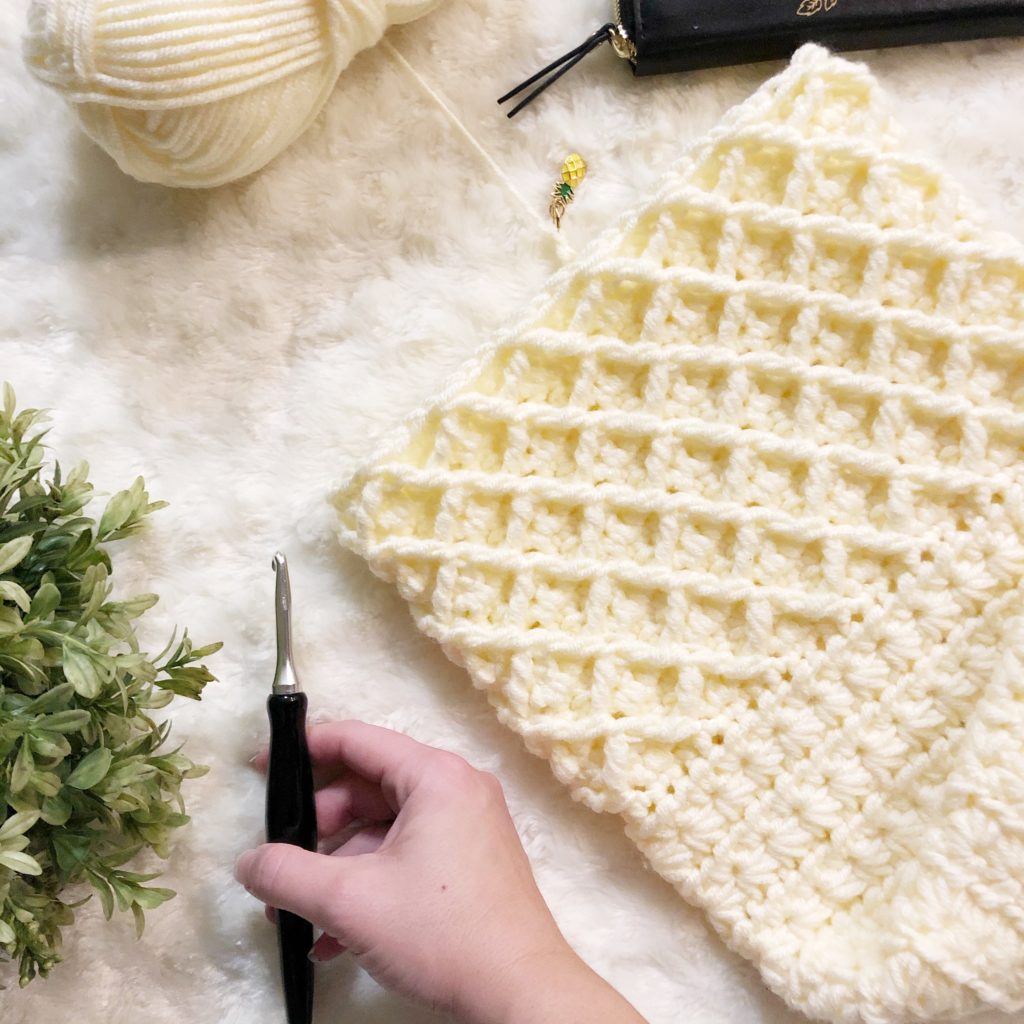
Now that we have covered all the sections, repeat the sections below to finish up your scarf!
Work a row of SC in each stitch and then repeat Under the Stars section.
Work a row of HDC in each stitch and then repeat Mountain Ranges section.
Work a row of HDC in each stitch and then repeat Ocean Ripples section.
Leave a long tail (approximately 4 yards), cut yarn, FO.
Finishing
Seaming
Insert the long tail into your darning needle. Using the mattress stitch (shown below), seam the two long sides together to form a tube.
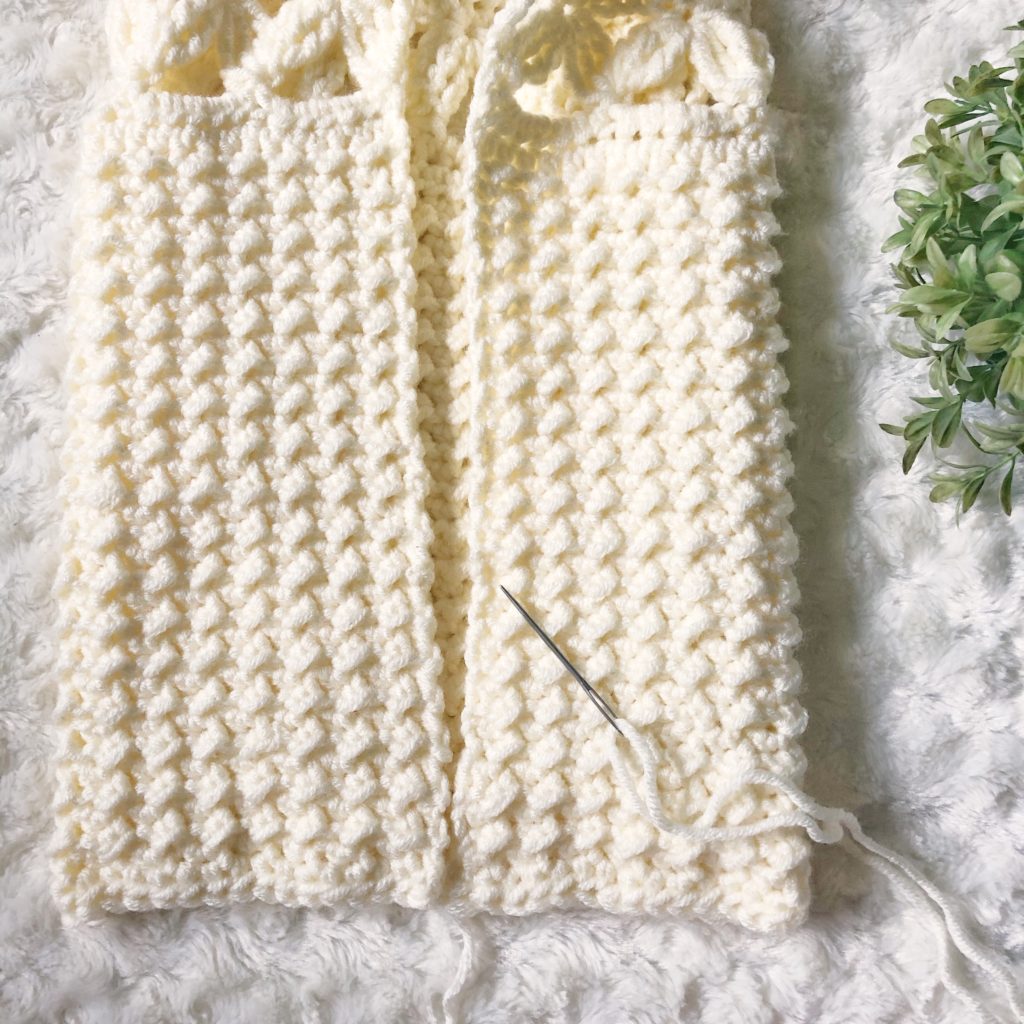
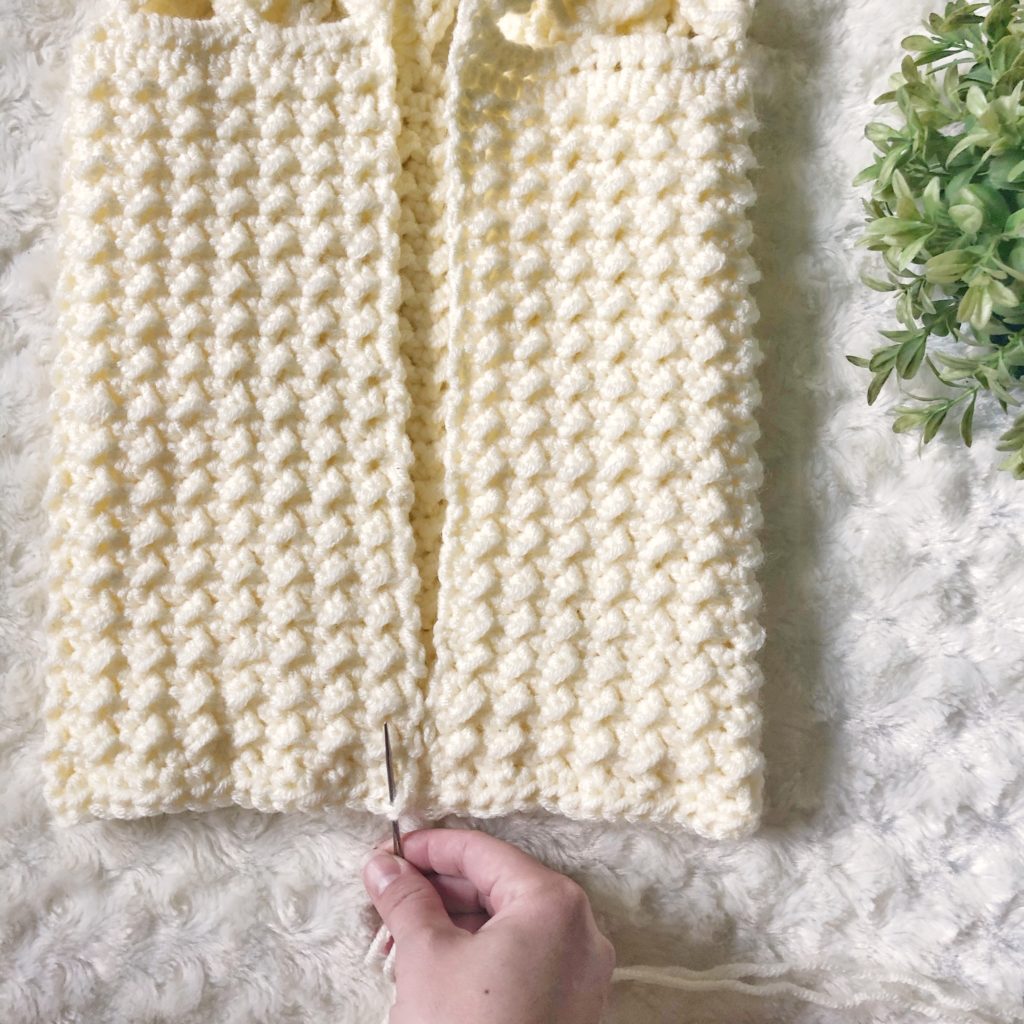
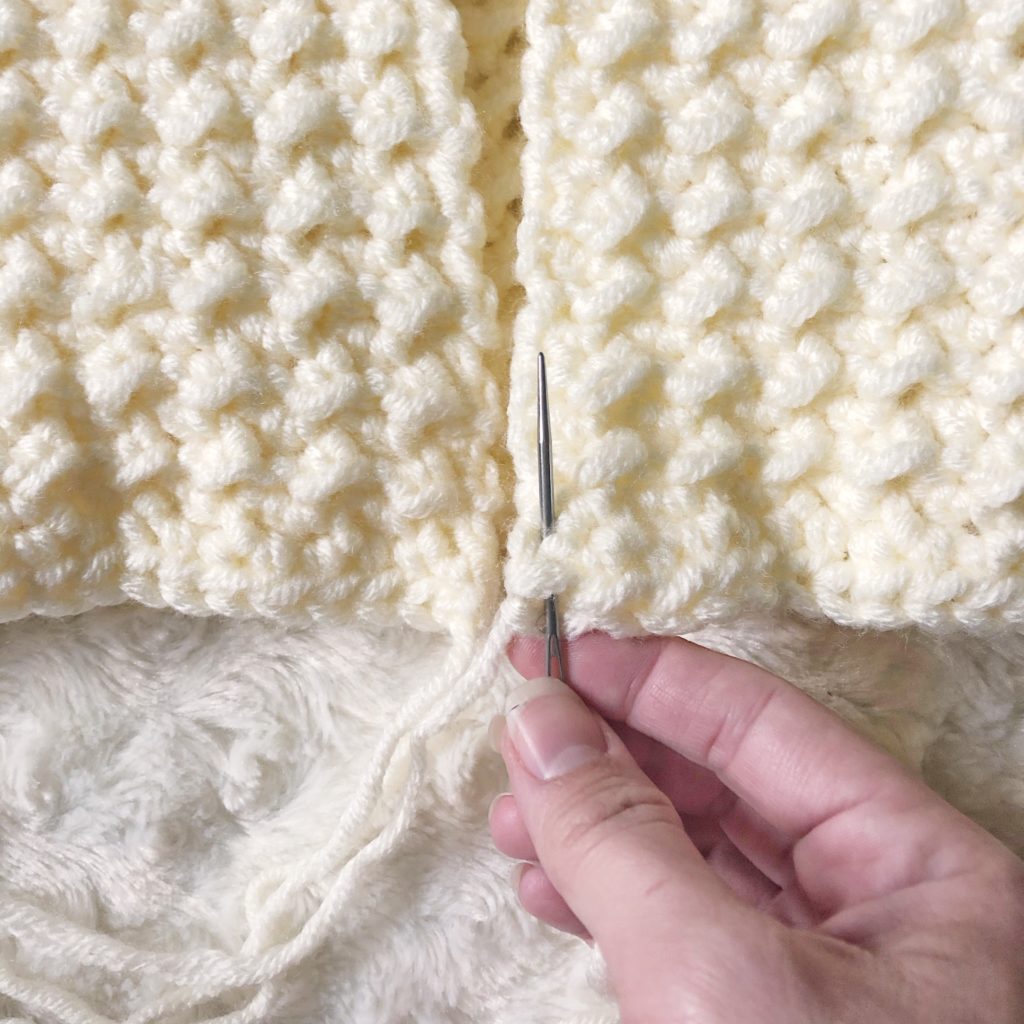
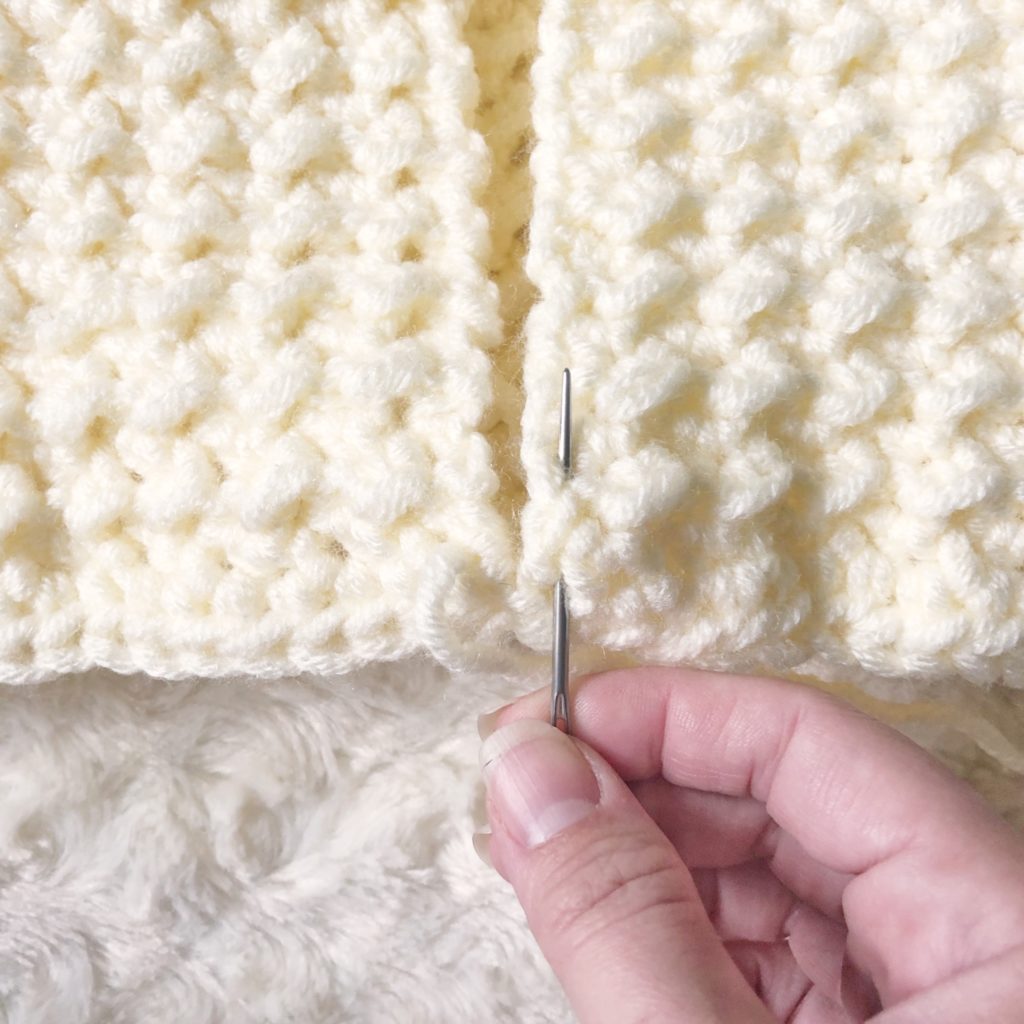
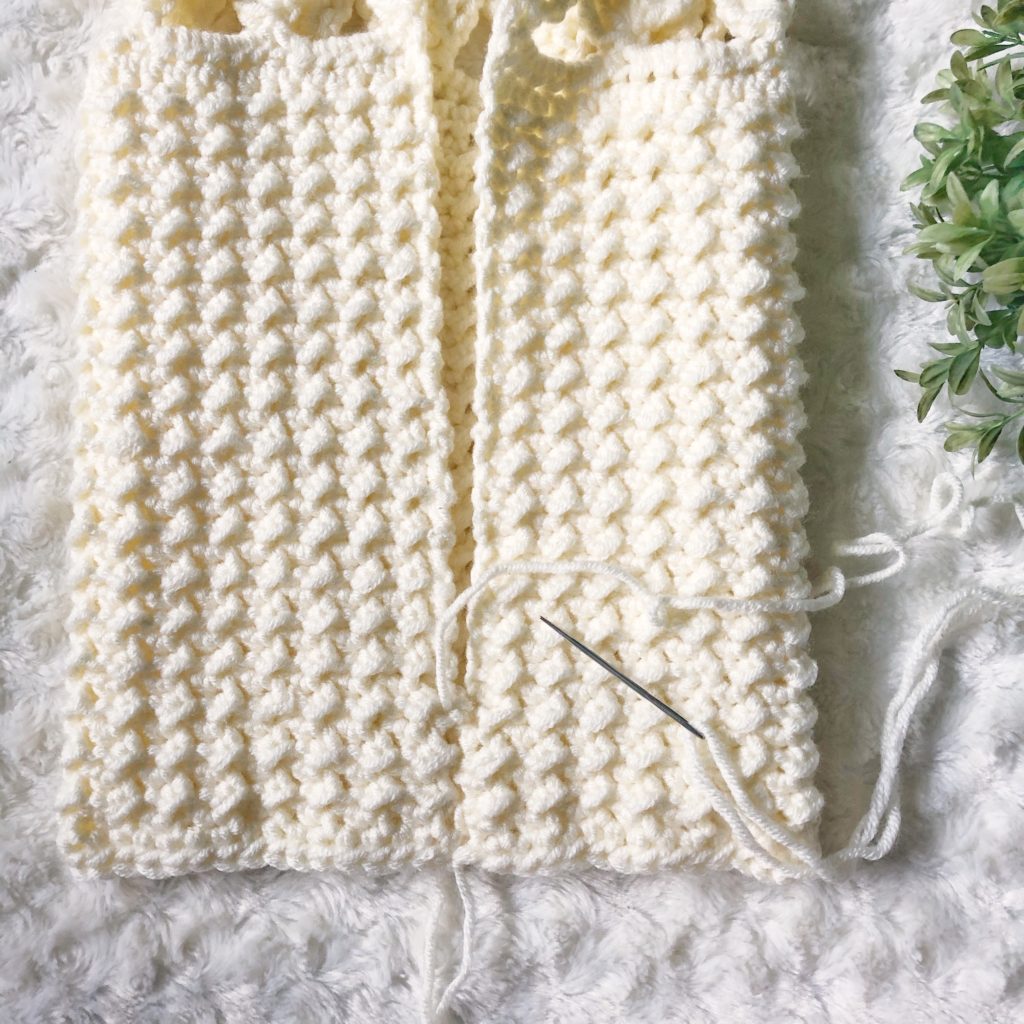
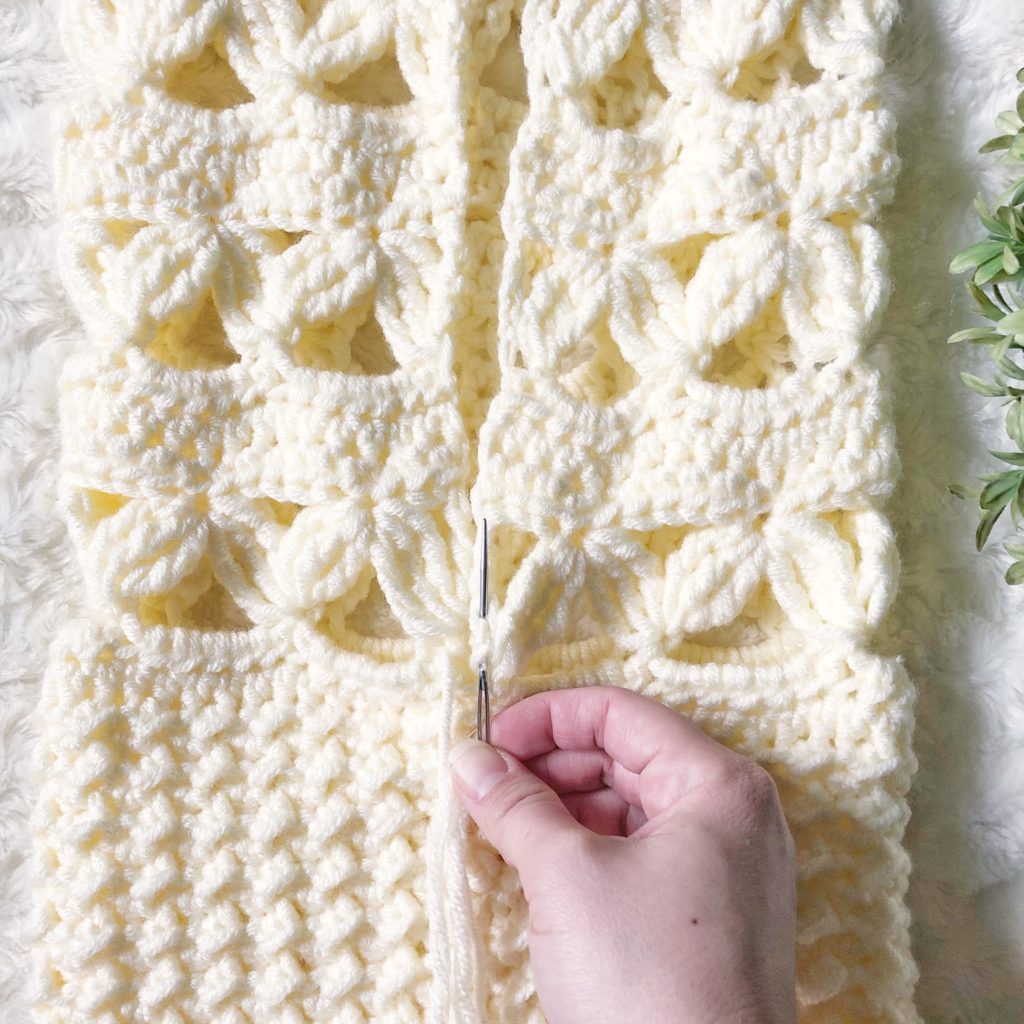
Continue this method all the way up the length of the scarf until the entire scarf has been seamed.
Fringe
Step 1: Cut 98, 122 pieces of yarn approximately 12 inches long each. I accomplish this by wrapping the yarn around a piece of cardboard that is 12 inches wide 49, 61 times. I then cut the yarn on both sides of the cardboard.
Step 2: Using your crochet hook, insert the hook into the first stitch. (Since there are two layers of scarf, be sure to insert the hook into both layers.)
Step 3: Fold two strands of yarn in half and place them on the hook. Pull the yarn through the stitches.
Step 4: Use the crochet hook to grab the tails of the yarn and pull them through the loop. Tighten the knot to secure.
Step 5: Continue adding fringe tails across the edge until the fringe is complete.
Step 6: Repeat this process from Step 2 on the other end.
Pom-poms
Step 1: Thread a length of yarn onto a tapestry needle. Weave the needle through every other stitch of one end all the way around the circumference (basting stitch) and pull to cinch it closed.
Step 2: Weave the needle through opposite ends of the hole several times to secure.
Step 3: Using the remaining tail, attach a pompom to the end of the scarf.
Step 4: Repeat this process on the other end.
Weave in all tails and cut yarn.
We hope that you have enjoyed this pattern! Be sure to join our Pineapple and Pine Facebook Group and Follow us on Instagram! You can also check out some of my other cozy patterns including The Kelsi Headband or The Heather Beanie!

If you make this project, please share it! I would love to see your work! You can tag me on Instagram and Facebook @aplushpineapple. Use the tag #aplushpineapple and #pineappleandpinecal.

The photographs and pattern contained in this document are the property of A Plush Pineapple. Unauthorized reproduction, in whole or in part, or distribution of this pattern or content is prohibited. ALL FINISHED PRODUCTS created using this pattern may be sold locally or online. If selling finished products online, please give my blog credit for the pattern by posting a link to my website.


[…] Week 1: February 3 – February 9 at The Plush Pineapple […]
[…] Check out the Scarf Pattern! […]
[…] I decided that since my Pineapple & Pine Cowl is done in worsted weight, and Sarah’s Pineapple & Pine Scarf is done in bulky, the beanie needed […]
[…] can find all of the inspo behind the stitches that we chose in the original patterns The Pineapple & Pine Scarf or The Pineapple & Pine Cowl. I hope that in making this new version as a free crochet headband […]