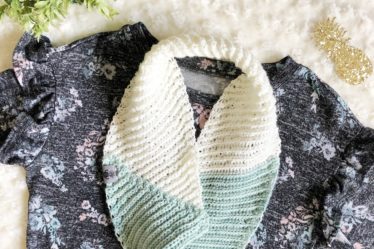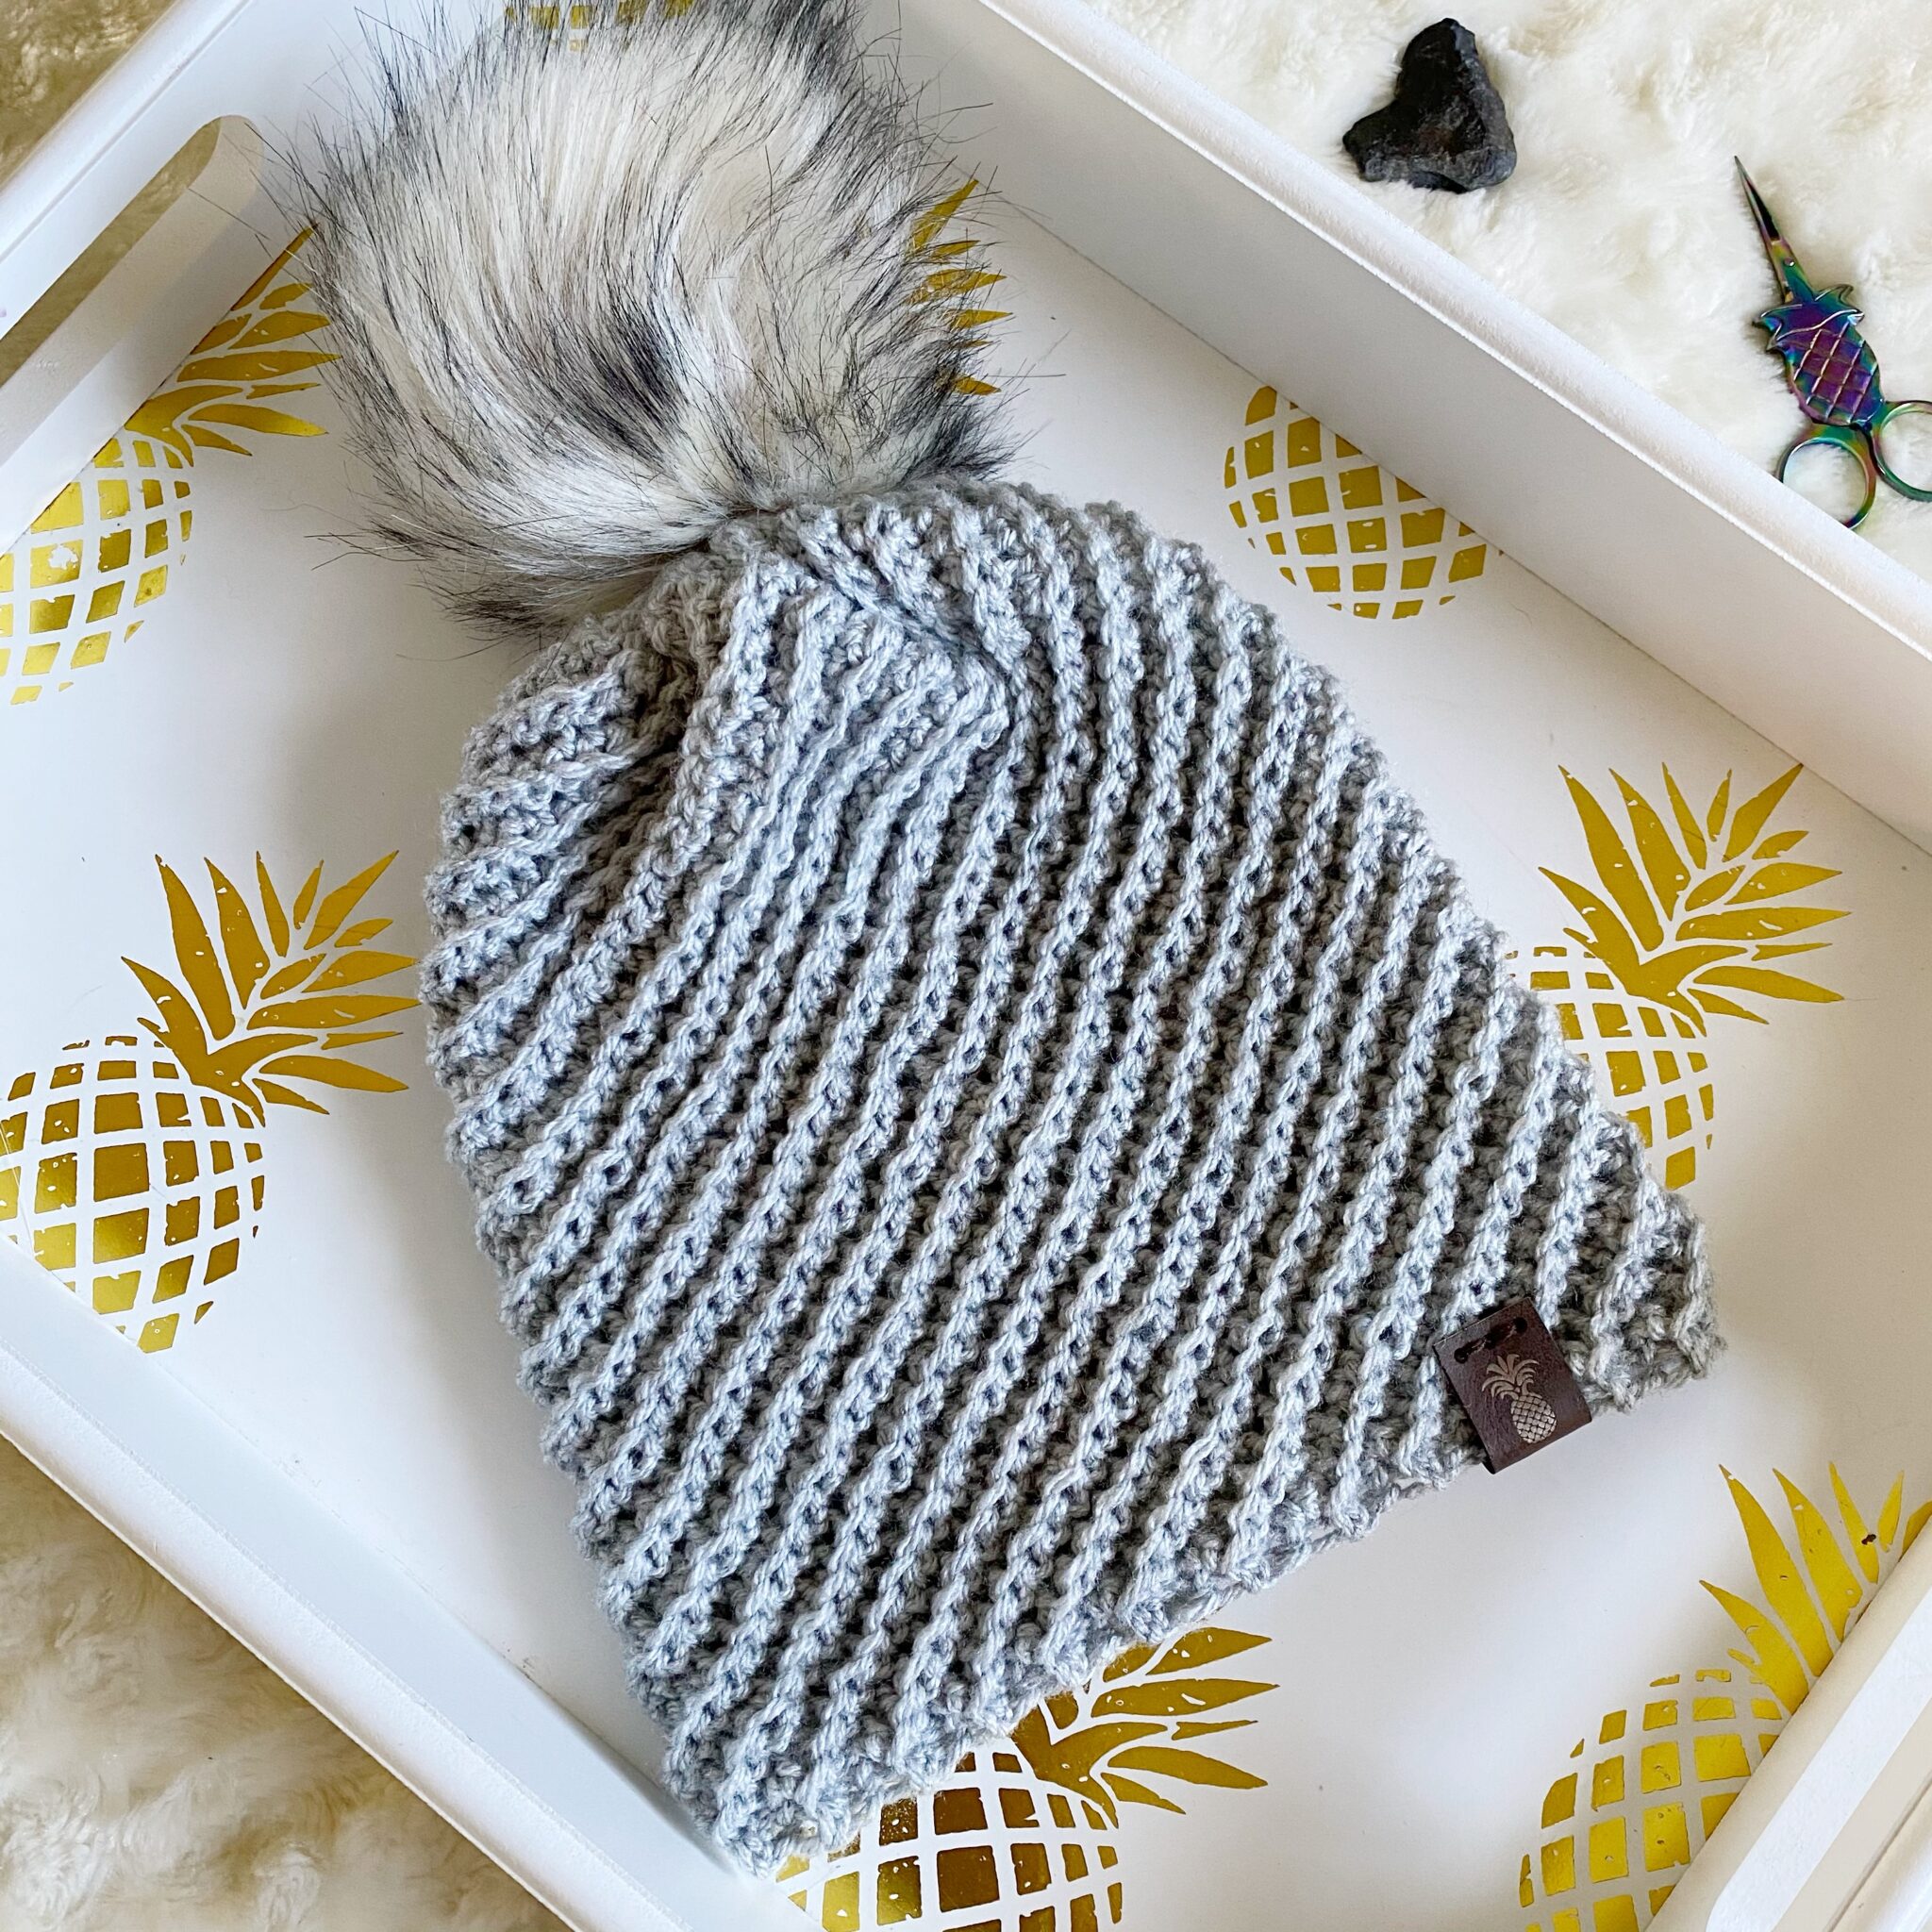
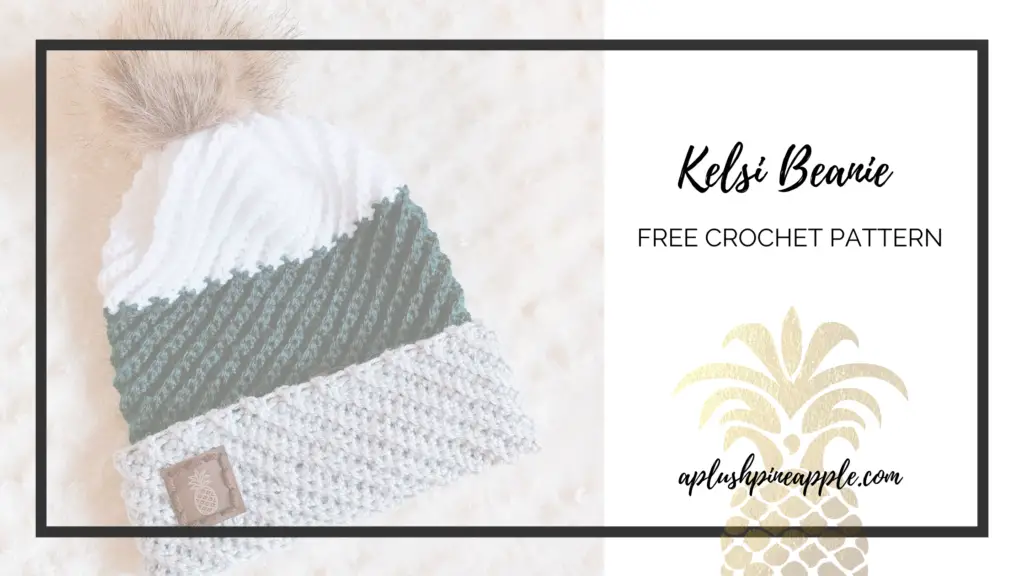
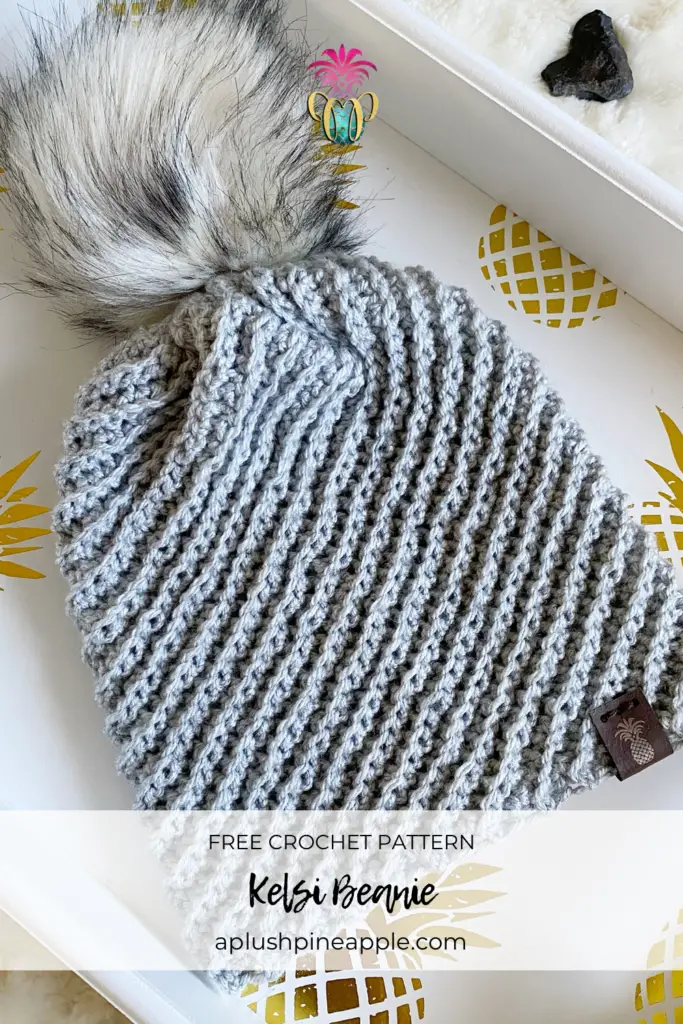
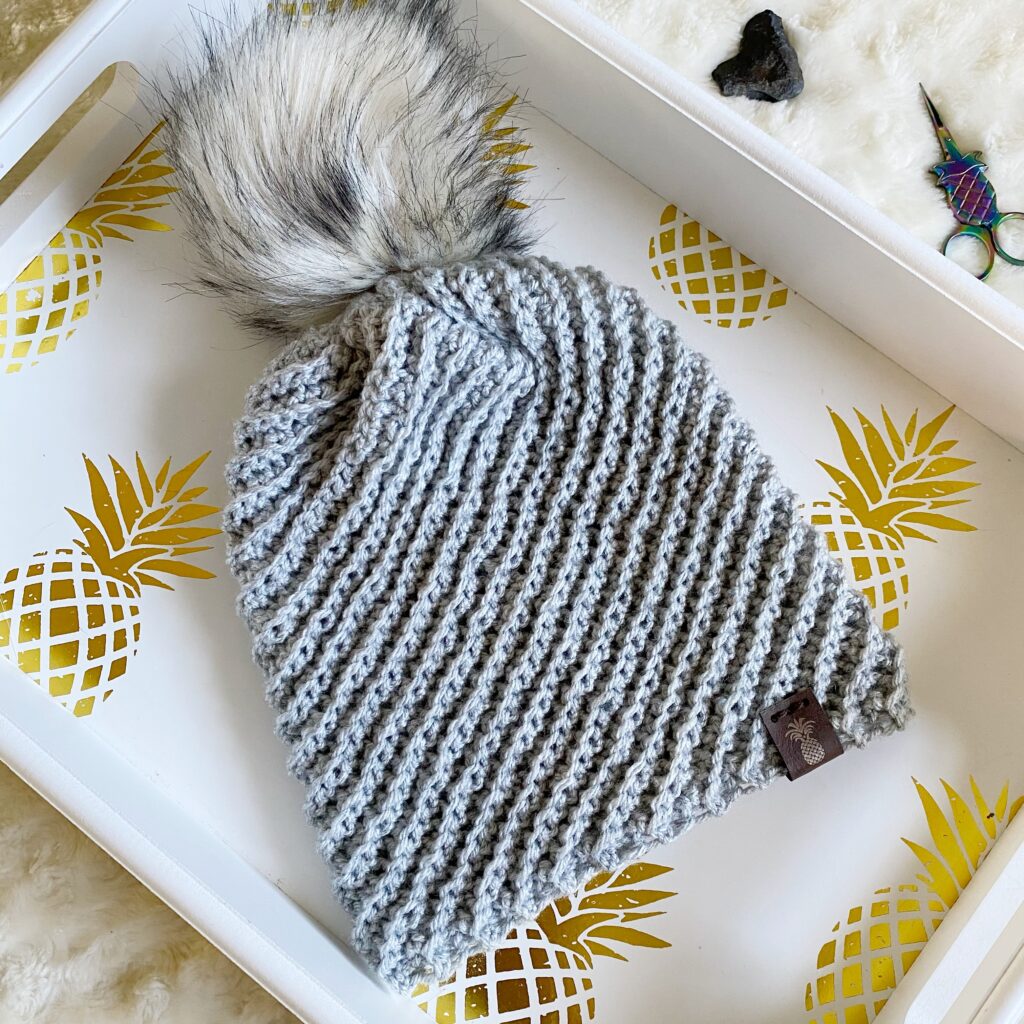
Crochet a beanie that features diagonal ribbing texture with this free crochet beanie pattern that includes modifications for brimmed, brimless, solid-color, or color-blocked.
We all have our sad tales, but don’t you want to finish the story…let it all go and have a life that isn’t dictated by the past?
Saving Mr. Banks
What’s the biggest project that you’ve ever had to frog?
Do you ever get stuck on a mistake that you find in your work, and no matter how much you try to ignore it and keep crocheting, it glares at you until you finally give in and frog it? If you’re thinking, “OMG! Yes!” then you are not alone. I know that I’ve been there, and I’m sure most of us have.
As I was designing this crochet beanie pattern, I made a mistake in the number of stitches I had, and for the life of me, I couldn’t find where it was. I was tempted to frog back row by row until I found the mistake. Mind you, I had already completed the hat, so this decision would mean undoing the seaming and the bind off in order to frog back who knows how many rows!
This is so much like life isn’t it? You make a mistake…a BIG one. And no matter how much you try to move forward, that mistake is always there whispering in your ear. Only, we can’t frog life, can we? Wouldn’t that be nice if we could. So the only other option is to let it go and not allow your life to be dictated by the past. Don’t let that one mistake haunt you indefinitely.
In crochet, there is an old wives tale that says part of your soul is stitched into every project you make. It goes on to say that you ought to leave a mistake in every thing you crochet so that your soul can escape. That may sound silly, but the point is that your mistakes (however ugly they may be) make up your life and the story of it. Allow yourself the freedom to escape the guilt and live the remainder of your life to fullest. You can’t go back and change the beginning, but you can…
…look forward and change the ending!
If you like this crochet beanie pattern, you may also want to check out some of the other items in the Kelsi Collection including my best seller, the Kelsi Headband, or the Kelsi Scarf!
Winter Fashion Blog Hop – January 2022
If you are here for the Winter Fashion Blog Hop hosted by E’Claire Makery, then you have come to the right place! I am sharing this pattern absolutely FREE for one day only as part of her blog hop. We Crochet graciously provided the yarn for this project, and you can find all the links to purchase the yarn that I used below in the materials list!
First, you will need to hop over to her blog to snag the coupon code. Then follow her link to come back here and get your pattern!


Winter Fashion Crochet Bundle
If you missed any of the patterns in this blog hop OR you just want a bundle of amazing crochet patterns, you can purchase the ENTIRE BUNDLE at a discounted price at the link below!

Skill Level – Intermediate or Adventurous Beginner
Materials
Disclaimer: This post contains affiliate links to the products used in this project. If you make a purchase through any of these links, we will get a small commission at no additional cost to you.
- Worsted (4) weight yarn
- Yarn pictured is We Crochet Brava in White, Hunter, and Dove Heather
- See chart below for yardage
- US I9/5.50mm crochet hook (or hook necessary to meet gauge)
- Tapestry needle
- Scissors (This is a link to the pineapple ones that I use.)
- Measuring tape
- Pompom (optional)
| Size/Style | Brimless | Brimmed |
| Newborn | 60 yards | 90 yards |
| Baby | 105 yards | 140 yards |
| Child | 160 yards | 200 yards |
| Teen/Adult | 180 yards | 225 yards |
Abbreviations
- BLO – Back loop only
- CH – Chain
- SC – Single crochet
- SC INC – Single crochet increase
- SC DEC – Single crochet decrease
- FO – Finish off
Gauge
15 SC BLO x 16 rows = 4” x 4”
Measurements
| Height (w/o brim) | Brim Height | Circumference | |
| Newborn | 6” | 2 ½” | 10 ½” |
| Baby | 8 ¼” | 3 ¼” | 14 ½” |
| Child | 9 ½” | 3 ¾” | 17 ½” |
| Teen/Adult | 10” | 4” | 18 ½” |
Notes
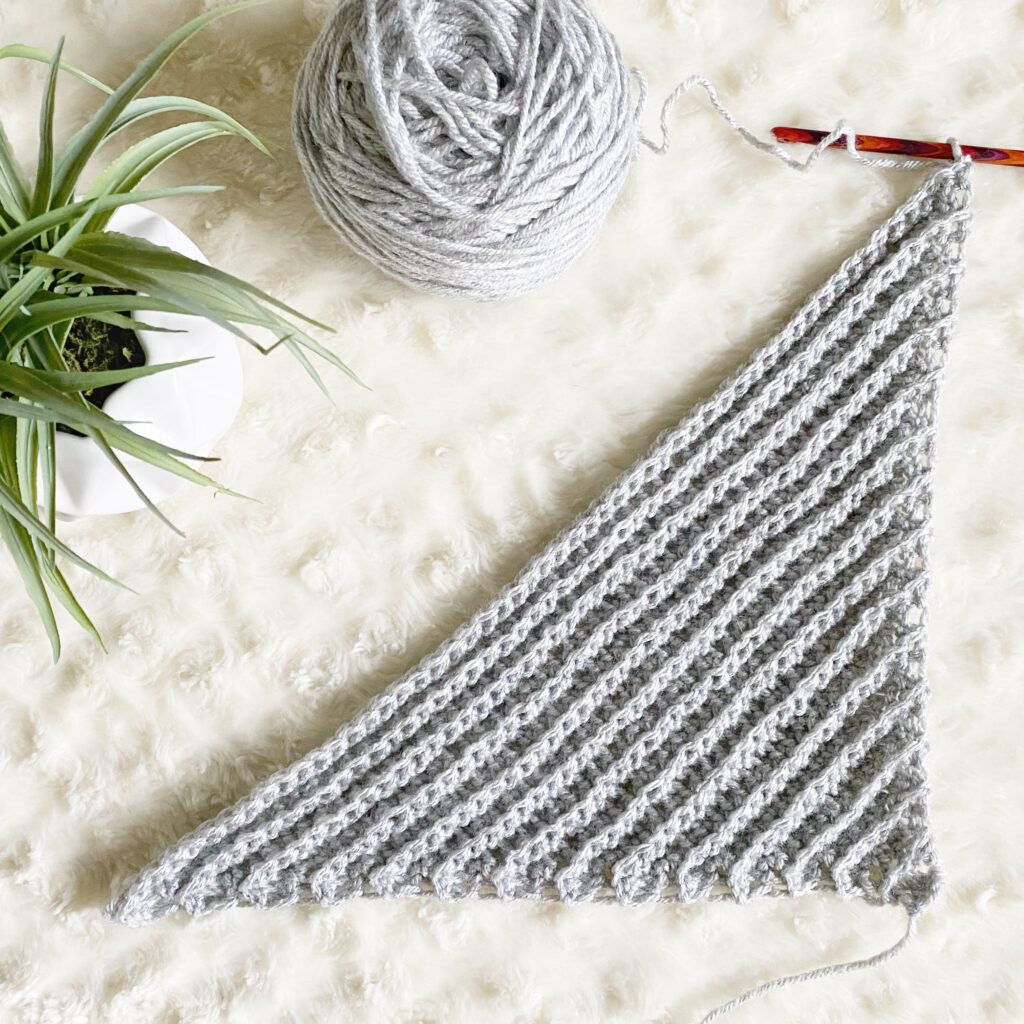
- This crochet beanie pattern is worked flat (back and forth in rows) as a rectangle from corner to corner. It is then stitched around the length and cinched to form the top of the hat and then seamed up the width of the work to form a hat.
- Beginning CHs do not count as stitches.
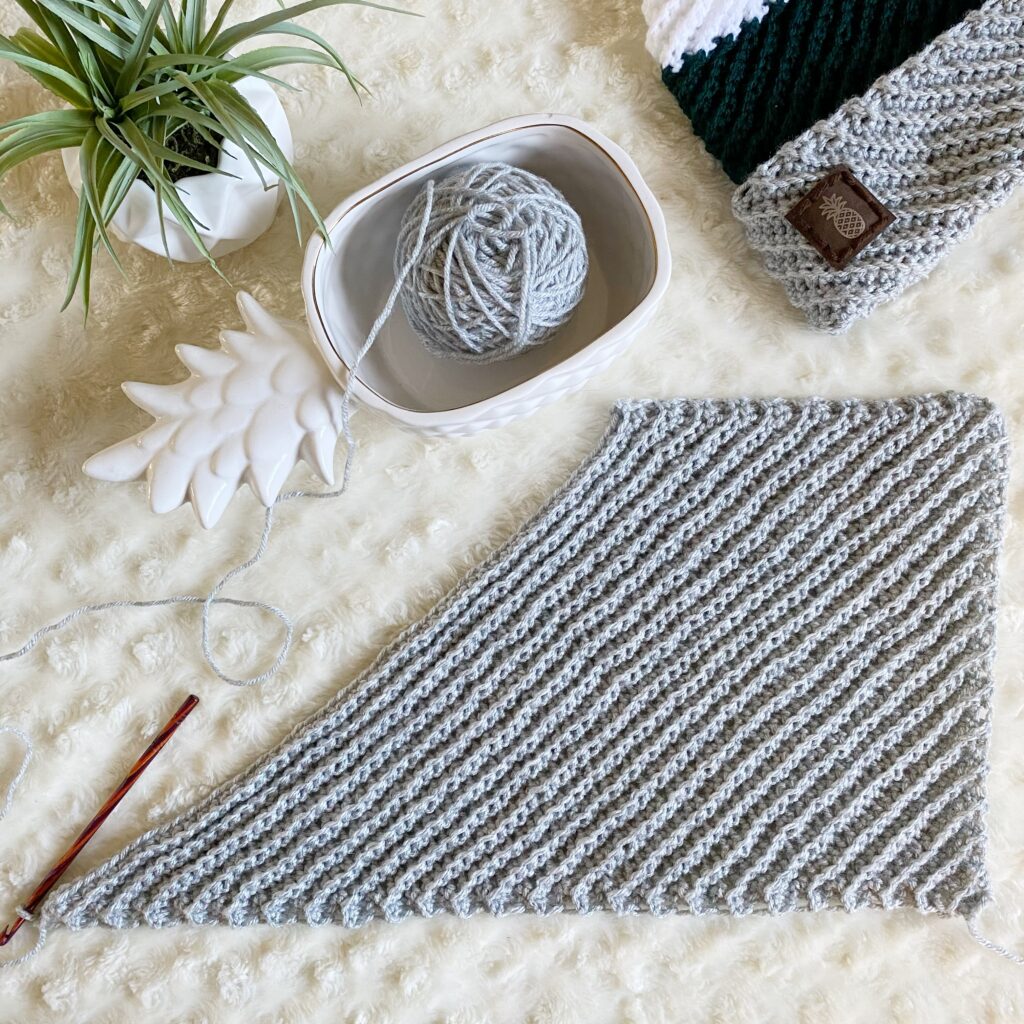
- Increase rows will have an increase stitch near the beginning and end of the row to build the height of the work. This section will take the shape of a triangle. Repeat rows will have an increase stitch near one end and a decrease stitch near the other end to build length while maintaining a diagonal edge. Decrease rows will have a decrease stitch near the beginning and end of the row. This section will fill in the remaining triangle portion of the work to form a finished rectangle.
- The finished rectangle will seem like more of a parallelogram when finished. This shape is due to the nature of the stitch. Working in BLO creates an elastic ribbing so this elasticity pulls on the fabric. Stretching the rectangle or blocking before seaming will remedy this problem.
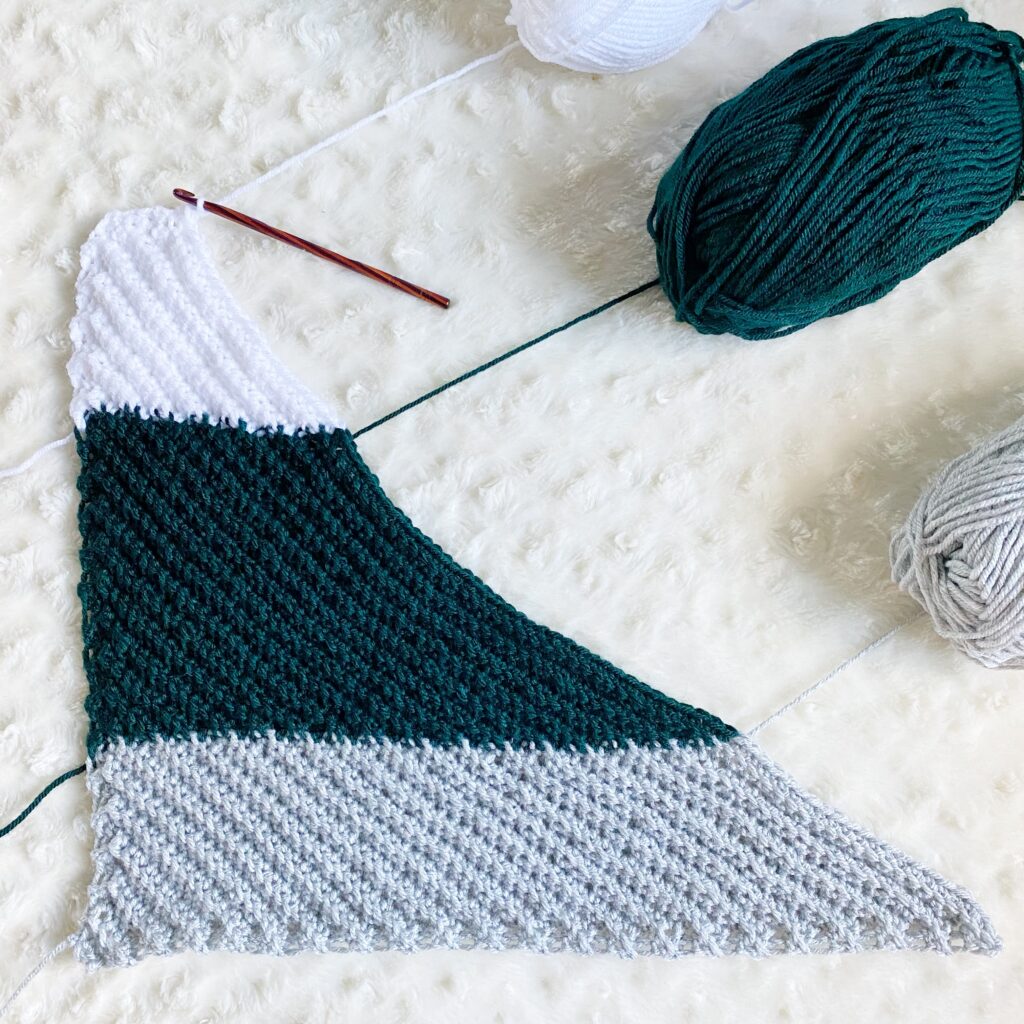
- This crochet beanie pattern includes directions for making a brimmed or brimless version as well as a solid color or color-blocked version.
- Sizes are indicated by parenthesis ( ) respectively Newborn, Baby, Child, Teen/Adult with the brimmed option in brackets [ ].
- When working the color-blocked version, pull the new color through as you complete the stitch prior to the color change. Keep all tails on one side of the work.
- If you have any difficulty completing this project and would like support, please email me at aplushpineapple@gmail.com.
Special Stitches
SC INC
This stitch is worked by placing two SC into one stitch.
SC DEC
This stitch is worked by inserting the hook into the next stitch and pulling up a loop (2 loops on hook), then inserting the hook into the next stitch and pulling up a third loop, then completing the stitch with a yarn over and pull through all three loops.
SC BLO
This stitch is worked as a regular SC by inserting the hook into only the back loop of each stitch. It creates a ribbed edge within the work.
Crochet Beanie Pattern – Solid Color
Row 1: CH 4, SC in 2nd CH from hook and in each CH across. (3)
*Work in the BLO for the remainder of the pattern.*
Increase Section
Row 2: CH 1, turn, SC INC, SC, SC INC. (5)
Row 3: CH 1, turn, SC, SC INC, SC across until 2 stitches remain, SC INC, SC. (7)
Row 4-(16 [23], 23 [31], 27 [36], 28 [38]): Repeat Row 3 increasing two stitches per row. Row 16 [23], 23 [31], 27 [36], 28 [38] should have 33 [47], 47 [63], 55 [73], 57 [77] stitches.
Repeat Section
Row 1: CH 1, turn SC, SC DEC, SC across until 2 stitches remain, SC INC, SC. (33 [47], 47 [63], 55 [73], 57 [77])
Row 2: CH 1, turn, SC, SC INC, SC across until 3 stitches remain, SC DEC, SC. (33 [47], 47 [63], 55 [73], 57 [77])
Proceed to correct size.
Newborn
Repeat Rows 1-2 alternately for 11 [4] more rows. You should have a total of 29 rows at this point.
Baby
Repeat Rows 1-2 alternately for 14 [6] more rows. You should have a total of 39 rows at this point.
Child
Repeat Rows 1-2 alternately for 18 [9] more rows. You should have a total of 47 rows at this point.
Teen/Adult
Repeat Rows 1-2 alternately for 19 [9] more rows. You should have a total of 49 rows at this point.
All sizes proceed below.
Decrease Section
Row 1: CH 1, turn, SC, SC DEC, SC across until 3 stitches remain, SC DEC, SC. (31 [45], 45 [61], 53 [71], 55 [75])
Row 2-14 [21] ,21 [29], 25 [34], 26 [36]: Repeat Row 1 decreasing 2 stitches per row. Row 14 [21] ,21 [29], 25 [34], 26 [36] should have 5 stitches.
Row 15 [22], 22 [30], 26 [35], 27 [37]: CH 1, turn, SC DEC, SC, SC DEC. (3)
Leave a long tail (approximately 18”). FO. Proceed to Finishing section.
Crochet Beanie Pattern – Color Blocked
Increase Section
Brim – Color A
Row 1: CH 4, SC in 2nd CH from hook and in each CH across. (3)
*Work in the BLO for the remainder of the pattern.*
Row 2: CH 1, turn, SC INC, SC, SC INC. (5)
Row 3: CH 1, turn, SC, SC INC, SC across until 2 stitches remain, SC INC, SC. (7)
Row 4-(6, 8, 9, 10): Repeat Row 3 increasing two stitches per row. Row 6, 8, 9, 10 should have 13, 17, 19, 21 stitches.
Brim & Body – Add Color B
Continue to work a repeat of Row 3 increasing two stitches per row by placing a SC INC in the 2nd stitch and 2nd to last stitch of every row, but use the color counts for the rows as listed below. You may need to change colors in the middle of an INC or DEC.
Row 7, 9, 10, 11: CH 1, turn, (14, 18, 20, 22) A, 1 B. (15, 19, 21, 23)
Row 8, 10, 11, 12: CH 1, turn, 3 B, (14, 18, 20, 22) A. (17, 21, 23, 25)
Row 9, 11, 12, 13: CH 1, turn, (14, 18, 20, 22) A, 5 B. (19, 23, 25, 27)
Row 10, 12, 13, 14: CH 1, turn, 7 B, (14, 18, 20, 22) A. (21, 25, 27, 29)
Row 11, 13, 14, 15: CH 1, turn, (14, 18, 20, 22) A, 9 B. (23, 27, 29, 31)
Row 12, 14, 15, 16: CH 1, turn, 11 B, (14, 18, 20, 22) A. (25, 29, 31, 33)
Row 13, 15, 16, 17: CH 1, turn, (14, 18, 20, 22) A, 13 B. (27, 31, 33, 35)
Row 14, 16, 17, 18: CH 1, turn, 15 B, (14, 18, 20, 22) A. (29, 33, 35, 37)
Row 15, 17, 18, 19: CH 1, turn, (14, 18, 20, 22) A, 17 B. (31, 35, 37, 39)
Row 16, 18, 19, 20: CH 1, turn, 19 B, (14, 18, 20, 22) A. (33, 37, 39, 41)
Proceed to correct size.
Newborn
If making the brimless version, proceed to the Repeat Section here.
Brim & Body – Add Color C
Row 17: CH 1, turn 14 A, 20 B, 1 C. (35)
Row 18: CH 1, turn, 3 C, 20 B, 14 A. (37)
Row 19: CH 1, turn, 14 A, 20 B, 5 C. (39)
Row 20: CH 1, turn, 7 C, 20 B, 14 A. (41)
Row 21: CH 1, turn, 14 A, 20 B, 9 C. (43)
Row 22: CH 1, turn, 11 C, 20 B, 14 A. (45)
Row 23: CH 1, turn, 14 A, 20 B, 13 C. (47)
Newborn size proceed to Repeat Rows Section.
Baby
Row 19: CH 1, turn, 18 A, 21 B. (39)
Row 20: CH 1, turn, 23 B, 18 A. (41)
Row 21: CH 1, turn, 18 A, 25 B. (43)
Row 22: CH 1, turn, 27 B, 18 A. (45)
Row 23: CH 1, turn, 18 A, 29 B. (47)
If making the brimless version, proceed to the Repeat Section here.
Brim & Body – Add Color C
Row 24: CH 1, turn, 1 C, 30 B, 18 A. (49)
Row 25: CH 1, turn, 18 A, 30 B, 3 C. (51)
Row 26: CH 1, turn, 5 C, 30 B, 18 A. (53)
Row 27: CH 1, turn, 18 A, 30 B, 7 C. (55)
Row 28: CH 1, turn, 9 C, 30 B, 18 A. (57)
Row 29: CH 1, turn, 18 A, 30 B, 11 C. (59)
Row 30: CH 1, turn, 13 C, 30 B, 18 A. (61)
Row 31: CH 1, turn, 18 A, 30 B, 15 C. (63)
Baby size proceed to Repeat Rows Section.
Child
Row 20: CH 1, turn 20 A, 21 B. (41)
Row 21: CH 1, turn, 23 B, 20 A. (43)
Row 22: CH 1, turn, 20 A, 25 B. (45)
Row 23: CH 1, turn, 27 B, 20 A. (47)
Row 24: CH 1, turn, 20 A, 29 B. (49)
Row 25: CH 1, turn, 31 B, 20 A. (51)
Row 26: CH 1, turn, 20 A, 33 B. (53)
Row 27: CH 1, turn, 35 B, 20 A. (55)
If making the brimless version, proceed to the Repeat Section here.
Brim & Body – Add Color C
Row 28: CH 1, turn, 20 A, 36 B, 1 C. (57)
Row 29: CH 1, turn, 3 C, 36 B, 20 A. (59)
Row 30: CH 1, turn, 20 A, 36 B, 5 C. (61)
Row 31: CH 1, turn, 7 C, 36 B, 20 A. (63)
Row 32: CH 1, turn, 20 A, 36 B, 9 C. (65)
Row 33: CH 1, turn, 11 C, 36 B, 20 A. (67)
Row 34: CH 1, turn, 20 A, 36 B, 13 C. (69)
Row 35: CH 1, turn, 15 C, 36 B, 20 A. (71)
Row 36: CH 1, turn, 20 A, 36 B, 17 C. (73)
Child size proceed to Repeat Rows Section.
Teen/Adult
Row 21: CH 1, turn 22 A, 21 B. (43)
Row 22: CH 1, turn, 23 B, 22 A. (45)
Row 23: CH 1, turn, 22 A, 25 B. (47)
Row 24: CH 1, turn, 27 B, 22 A. (49)
Row 25: CH 1, turn, 22 A, 29 B. (51)
Row 26: CH 1, turn, 31 B, 22 A. (53)
Row 27: CH 1, turn, 22 A, 33 B. (55)
Row 28: CH 1, turn, 35 B, 22 A. (57)
If making the brimless version, proceed to the Repeat Section here.
Brim & Body – Add Color C
Row 29: CH 1, turn, 22 A, 36 B, 1 C. (59)
Row 30: CH 1, turn, 3 C, 36 B, 22 A. (61)
Row 31: CH 1, turn, 22 A, 36 B, 5 C. (63)
Row 32: CH 1, turn, 7 C, 36 B, 22 A. (65)
Row 33: CH 1, turn, 22 A, 36 B, 9 C. (67)
Row 34: CH 1, turn, 11 C, 36 B, 22 A. (69)
Row 35: CH 1, turn, 22 A, 36 B, 13 C. (71)
Row 36: CH 1, turn, 15 C, 36 B, 22 A. (73)
Row 37: CH 1, turn, 22 A, 36 B, 17 C. (75)
Row 38: CH 1, turn, 19 C, 36 B, 22 A. (77)
All sizes proceed below.
Repeat Section
In this section, maintain the same stitch counts for each color that you ended the previous sections with. A SC DEC or SC INC counts as 1 stitch toward each color total. You should always be placing the last SC of the Color C section into the first stitch of the Color B section and likewise when moving from Color B to Color A.
*Important: If beginning this section with Color C, start on Row 1 and then do Row 2 before proceeding to correct size. If beginning this section with Color A, start on Row 2 and then do Row 1 before proceeding to correct size.*
Row 1: CH 1, turn, SC, SC DEC, SC across to last 2 stitches, SC INC, SC.
Row 2: CH 1, turn, SC, SC INC, SC across to last 3 stitches, SC DEC, SC.
Proceed to correct size.
Newborn
Repeat Rows 1-2 alternately for 11 [4] more rows. You should have a total of 29 rows at this point.
Baby
Repeat Rows 1-2 alternately for 14 [6] more rows. You should have a total of 39 rows at this point.
Child
Repeat Rows 1-2 alternately for 18 [9] more rows. You should have a total of 47 rows at this point.
Teen/Adult
Repeat Rows 1-2 alternately for 19 [9] more rows. You should have a total of 49 rows at this point.
All sizes proceed below.
Decrease Section
In this section, you will begin decreasing on both ends of each row. Continue to place the last SC from the Color C section into the first stitch of the Color B section and likewise when moving from Color B to Color A. The stitch count for Color A will diminish by 2 stitches per row until its section ends. Then Color B will diminish until only Color C is left. When trimming the yarn from the finished sections be sure to leave a long tail (approximately 12”) for each.
Row 1: CH 1, turn, SC, SC DEC, SC across until 3 stitches remain, SC DEC, SC. (31 [45], 45 [61], 53 [71], 55 [75])
Row 2-14 [21] ,21 [29], 25 [34], 26 [36]: Repeat Row 1 decreasing 2 stitches per row. Row 14 [21] ,21 [29], 25 [34], 26 [36] should have 5 stitches.
Row 15 [22], 22 [30], 26 [35], 27 [37]: CH 1, turn, SC DEC, SC, SC DEC. (3)
Leave a long tail (approximately 18”). FO. Proceed to Finishing section.

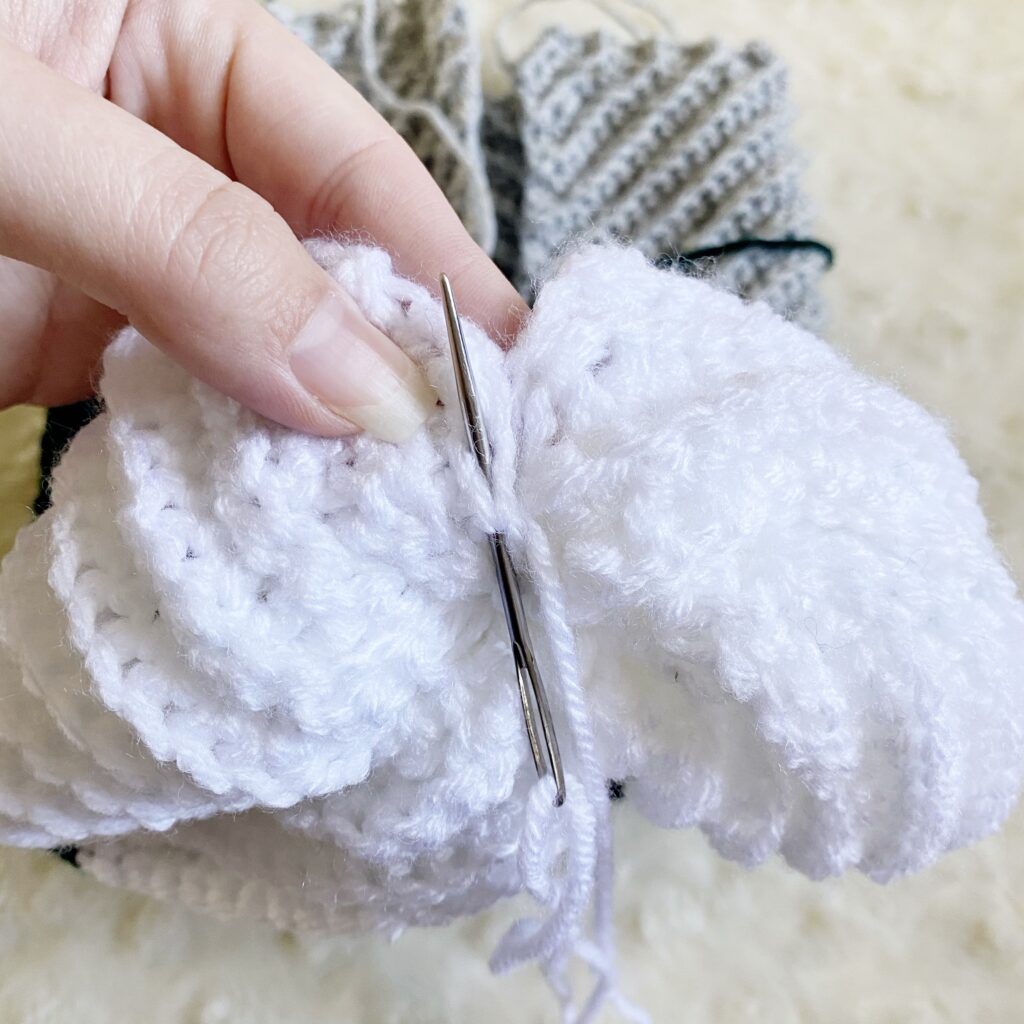
Finishing
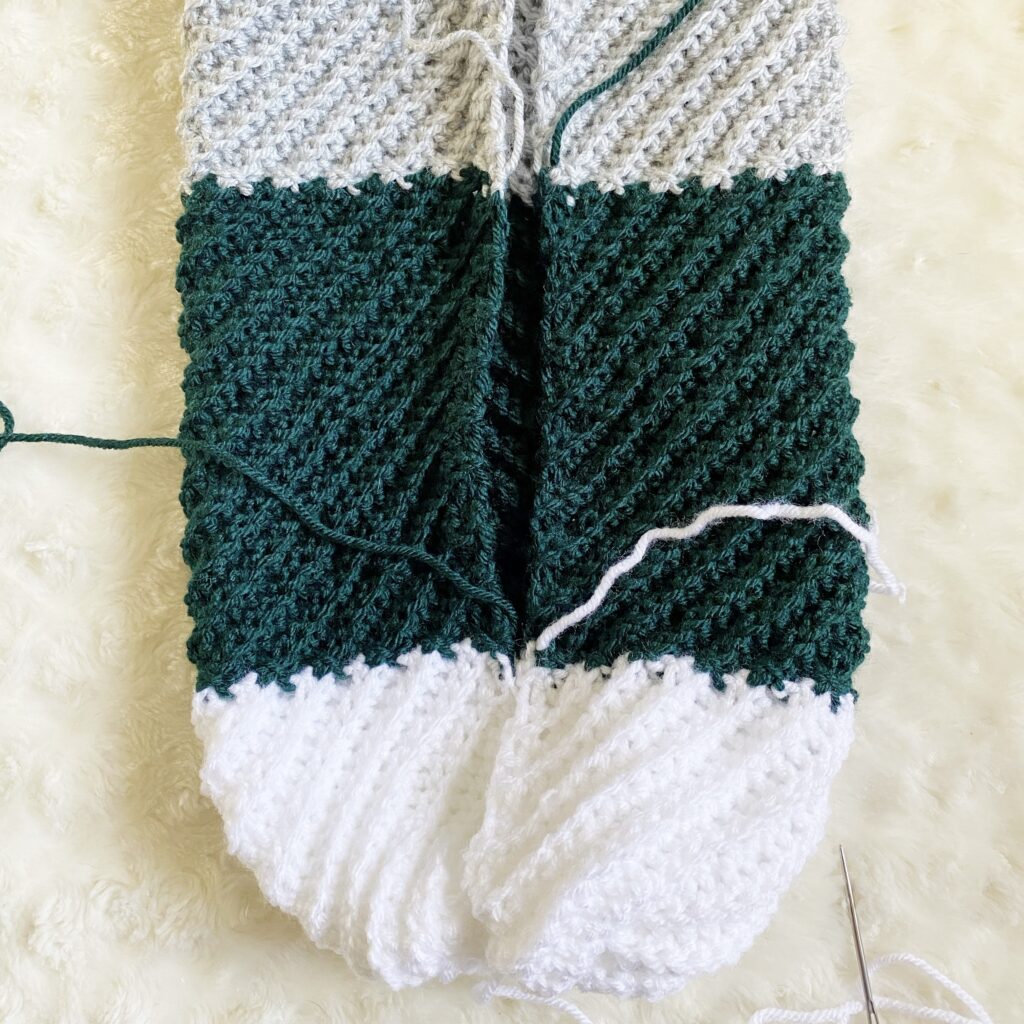
Insert the long tail into your darning needle. Using the basting stitch, weave the yarn through each stitch around the top of the fabric. Pull tight to cinch the top closed. Begin using the mattress stitch to seam down the height of the beanie. The mattress stitch is worked by inserting the needle from the top of the fabric around the end of each row and back up to the top of the fabric alternating sides. Be sure to line up the rows as you go.
If seaming the color-blocked version, use the corresponding colored tails when seaming each section.
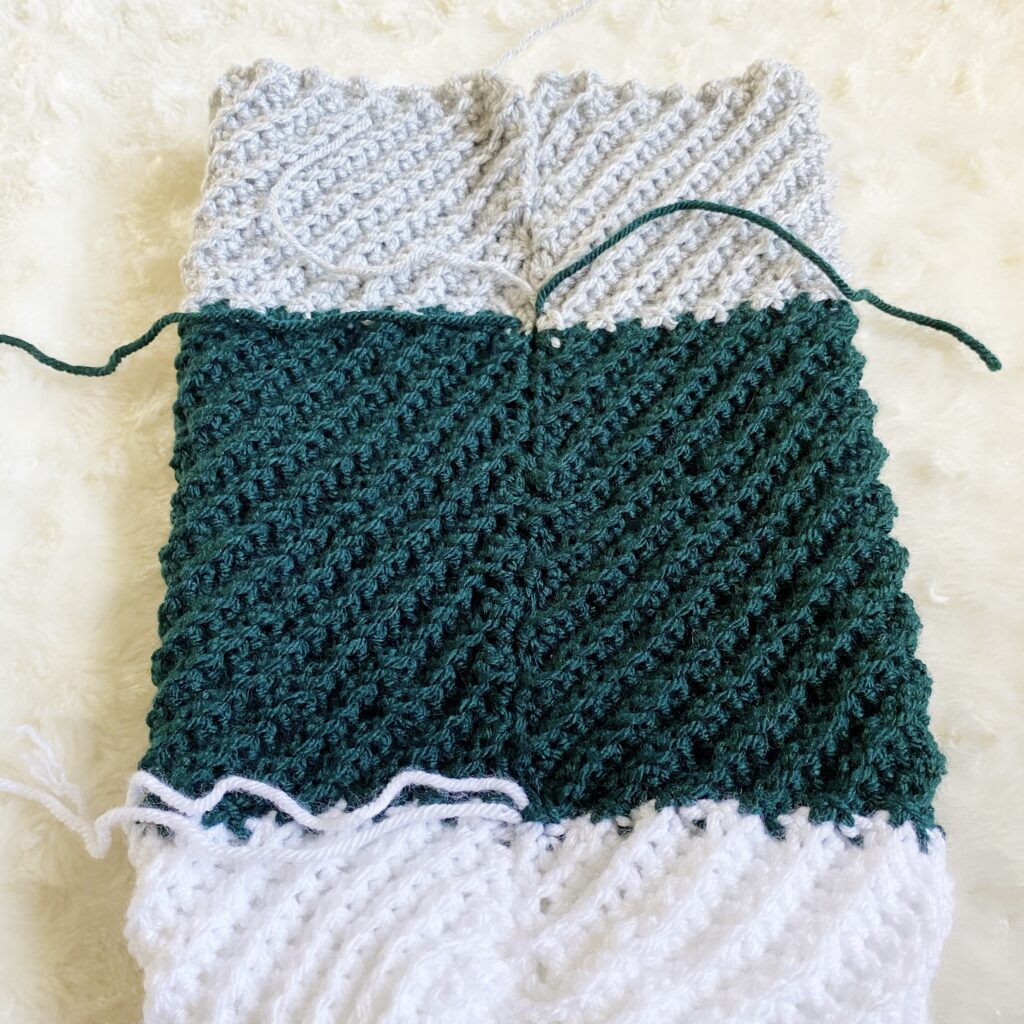
Weave in all remaining ends. I hope you enjoyed this crochet beanie pattern! You may choose to attach a yarn pom or faux fur pom to the top. I also chose to add a patch to my brim.

If you make this crochet beanie pattern, please share it! I would love to see your work! You can tag me on Instagram and Facebook @aplushpineapple. Use the tags #aplushpineapple and #kelsibeanie.

The photographs and pattern contained in this document are the property of A Plush Pineapple. Unauthorized reproduction, in whole or in part, or distribution of this pattern or content is prohibited. ALL FINISHED PRODUCTS created using this pattern may be sold locally or online. If selling finished products online, please give my blog credit for the pattern by posting a link to my website.